
Introduction, Road to Major Rank and Map Overview
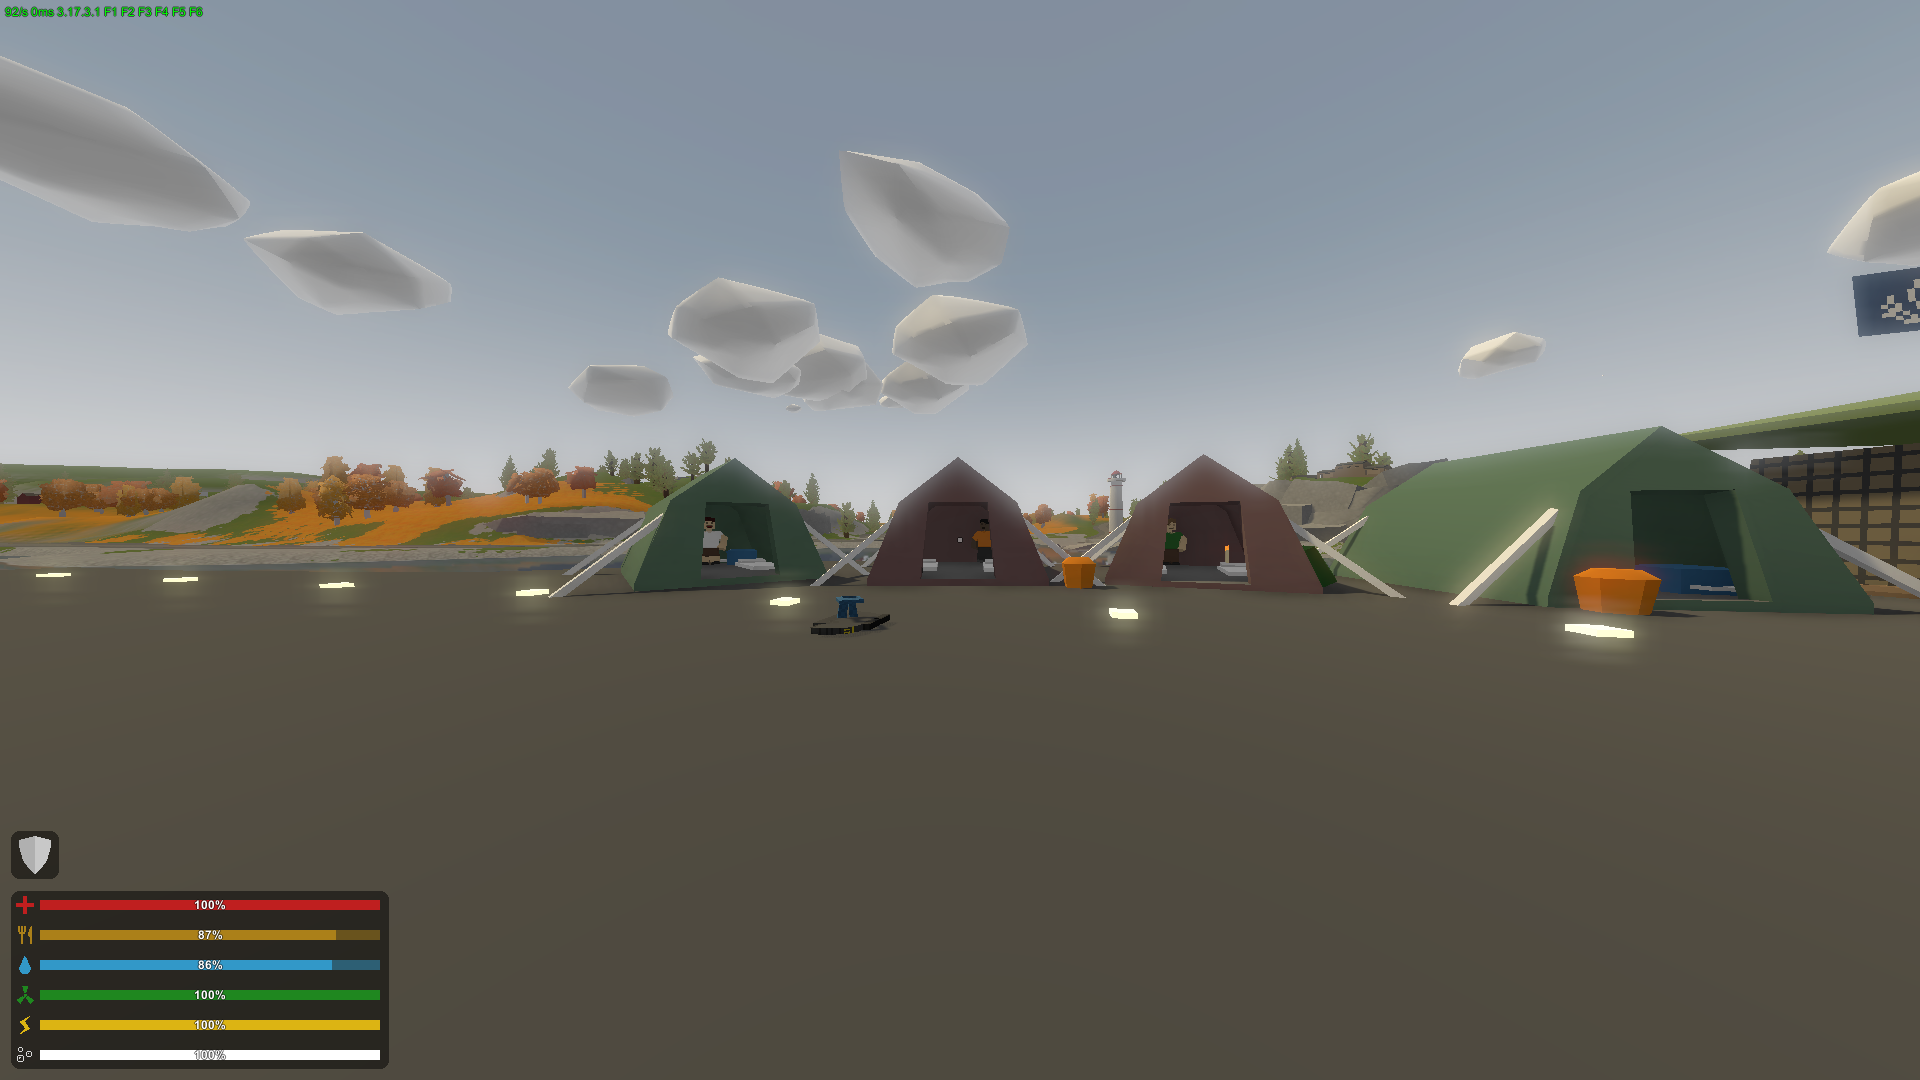
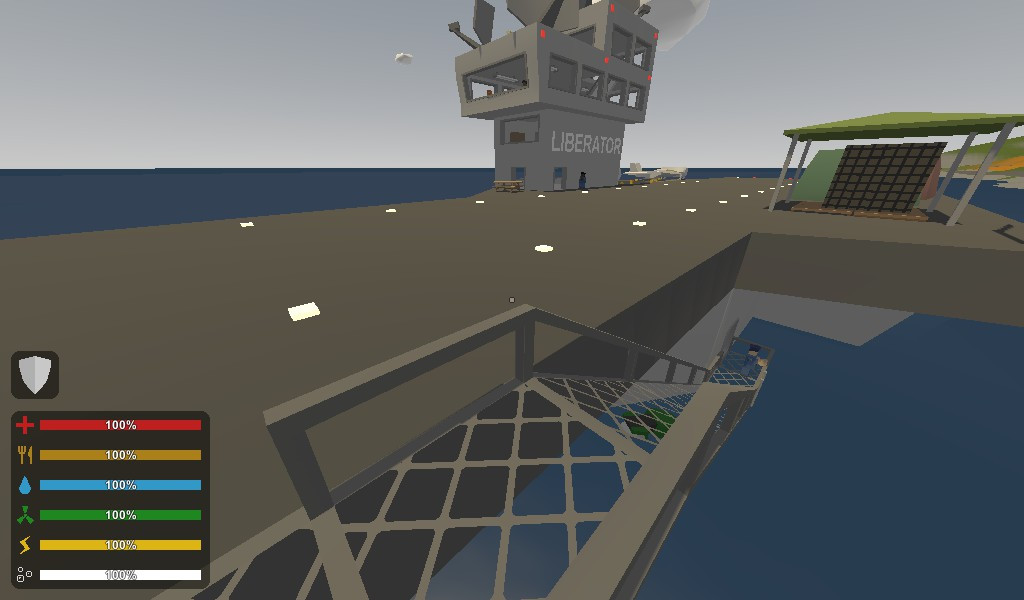
All aboard the Liberator and get ready for a topsy-turvy adventure around Russia.
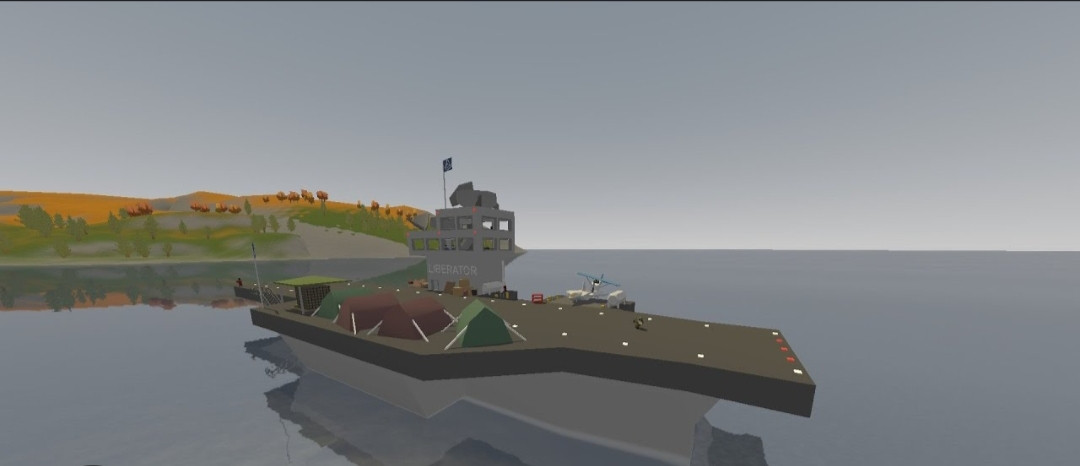
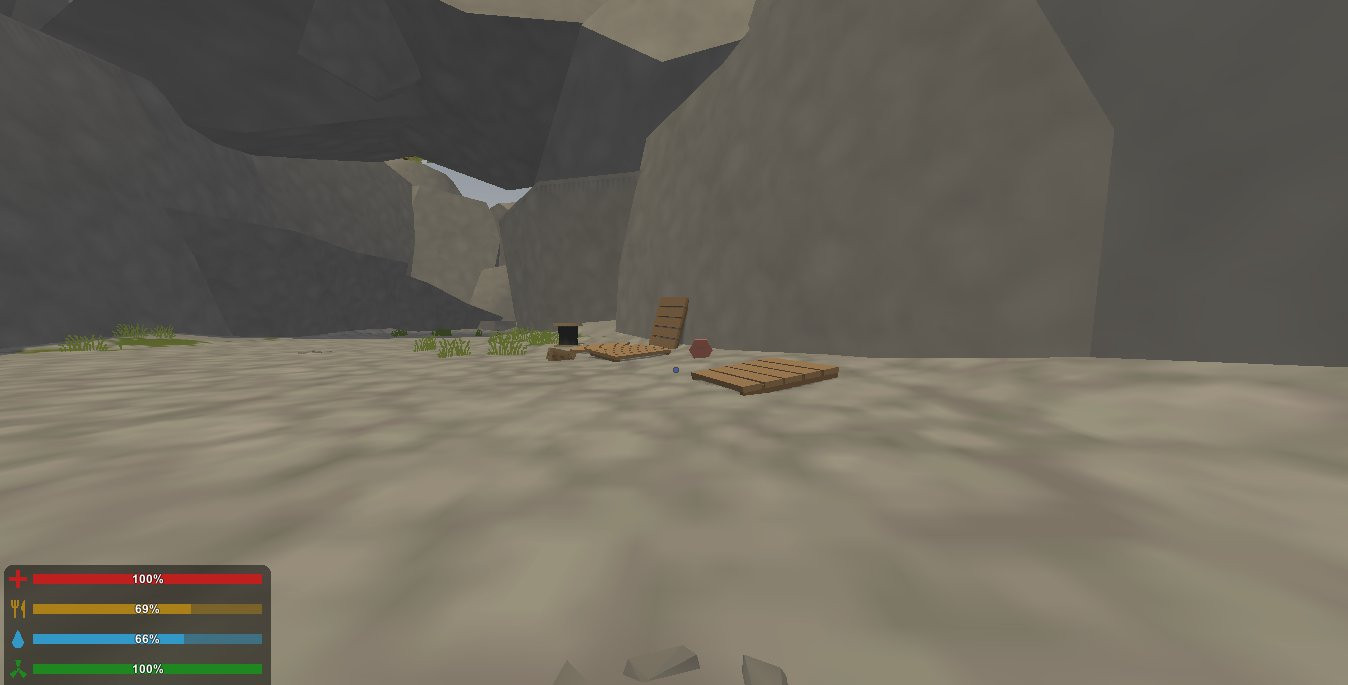
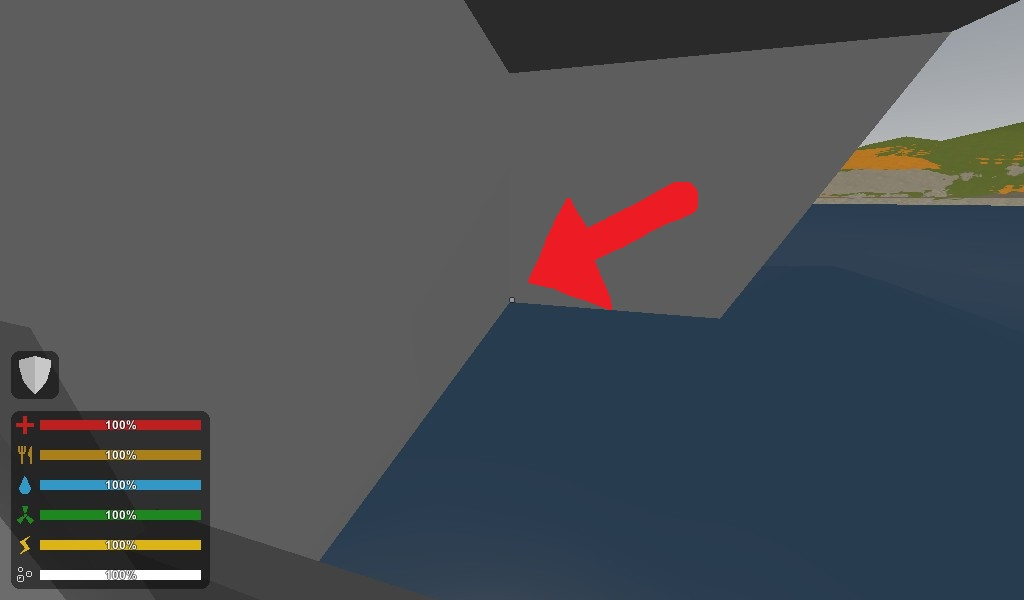
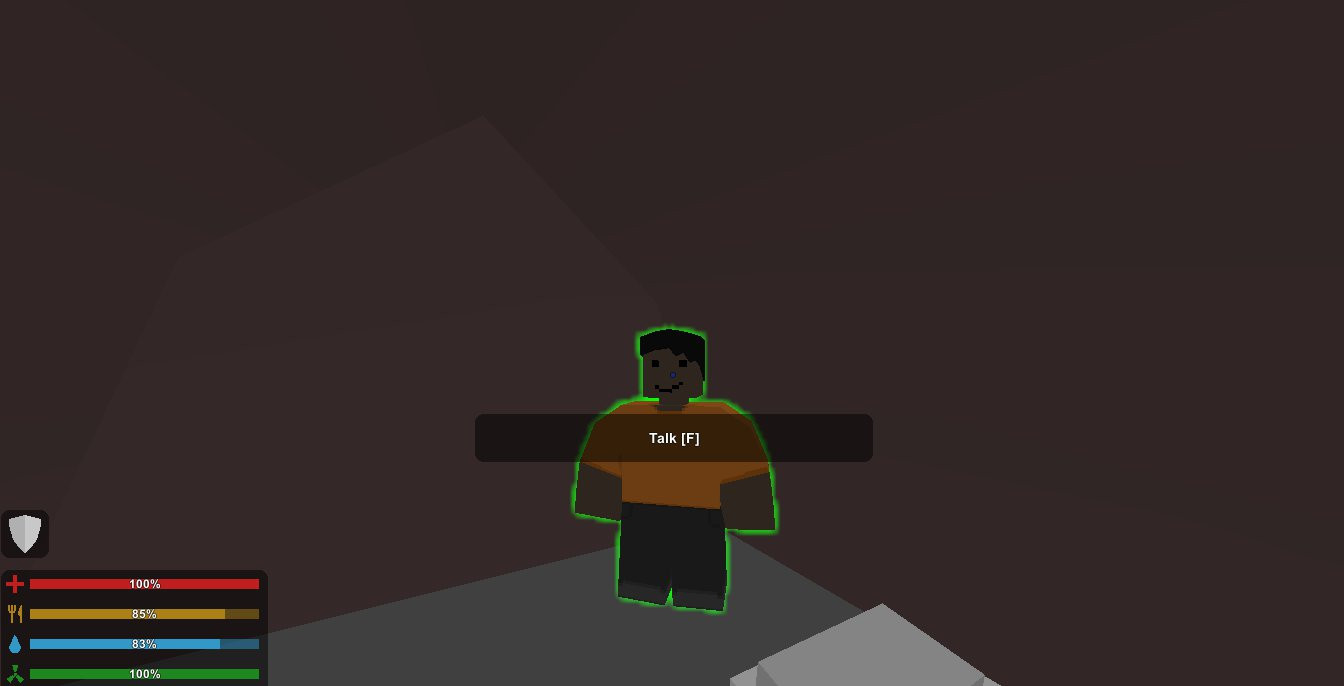
In order to reach Ensign, Lieutenant, and Major Rank, your character will need to accumulate a total of 170 positive reputation by completing side quests that are available in the Russia map only. There are a total of 24 side quests available in the Russia map, where you will want to travel to the south of the map to an area marked as "Liberator" above the ocean, which is a large aircraft carrier where you must interact with certain NPC within the ship to trigger each quest.
You will need to complete almost all of the quests in order to accumulate enough positive reputation to reach Ensign, Lieutenant, and Major Rank. You can, however, choose to skip one quest and still accumulate enough positive reputation to reach Major Rank. Once you have accumulated enough reputation, you can interact with Captain Sydney at the captain's deck to finally arise to Major Rank. Do note that you can also accept multiple quests from each NPC at once and make progress towards each quest while you are exploring the Russia map.
Refer to the Map below for each locations you will need to travel to for every side quests.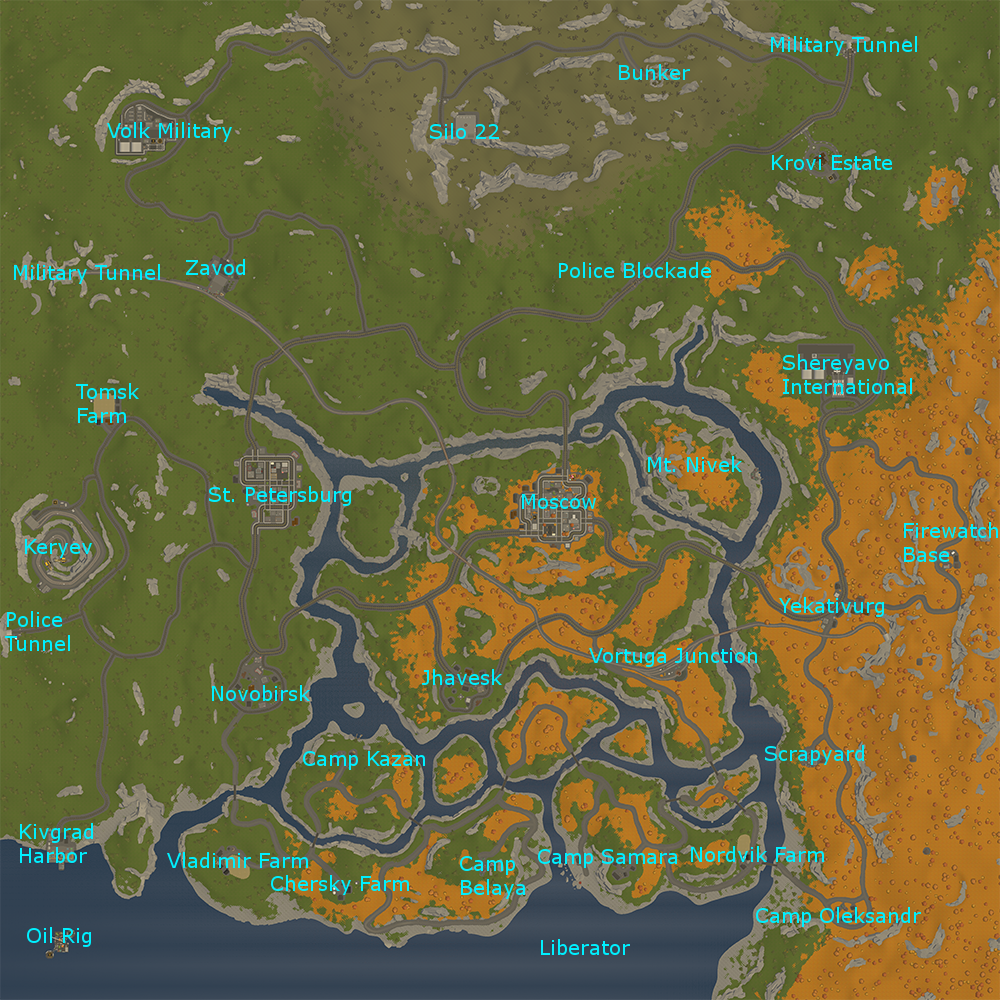
Main Side Quests
Main side quests in order.
On Air
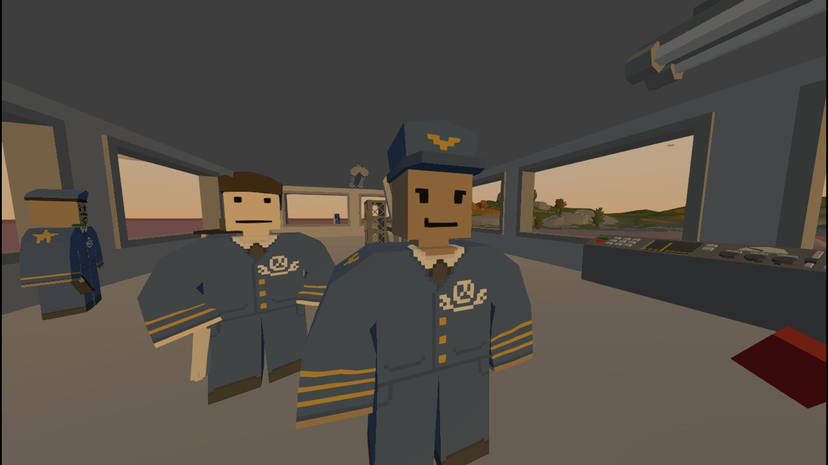
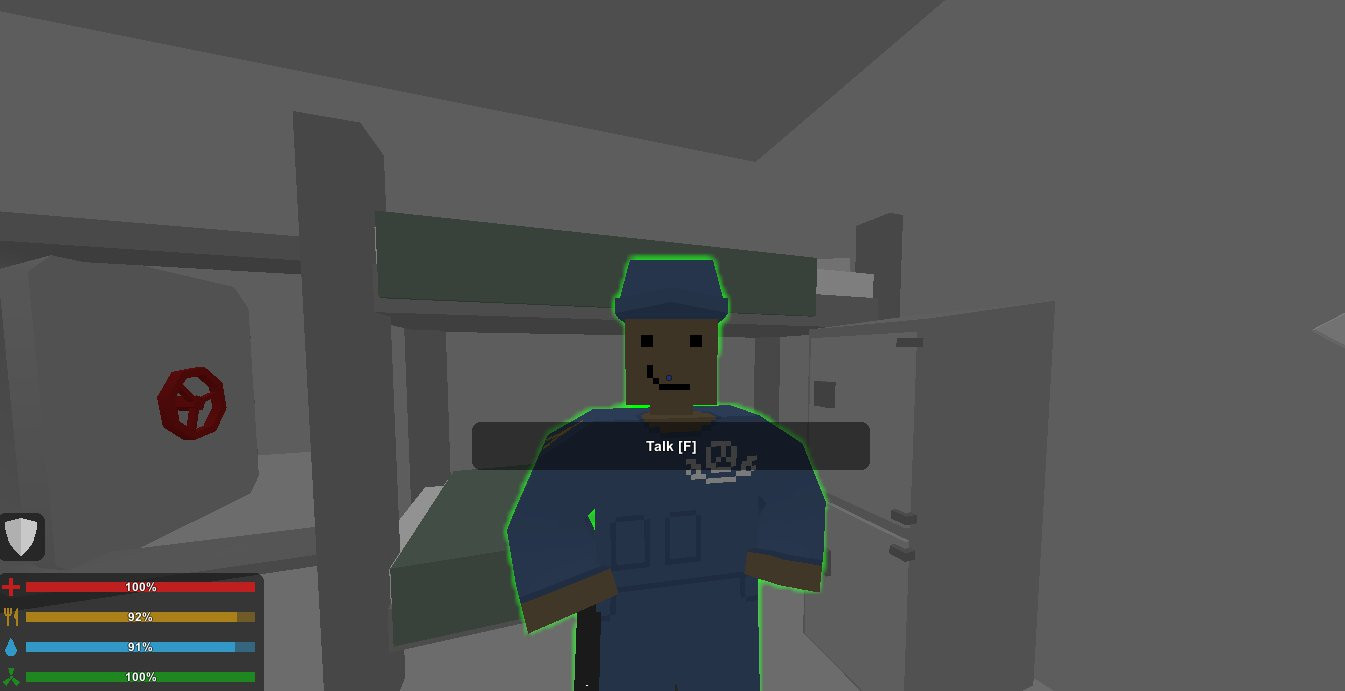
- After boarding the Liberator, you will want to head to the captain's deck and meet with Captain Sydney, where she will ask you to join the Coalition. Agree to join and she will ask you to meet up with Commander Laurence, who is located at the back of the room and near Captain Sydney. Below is a picture of both Captain Sydney and Commander Laurence.
- Start by interacting with Commander Laurence, who will task you with fixing 3 broadcasting towers that are scattered all around the Russia map. He will also ask you to get the repair kit from Natalie the Engineer.
- Head over to the Engine Room and meet up with Natalie the Engineer. She will provide you with the repair kit to fix the towers.

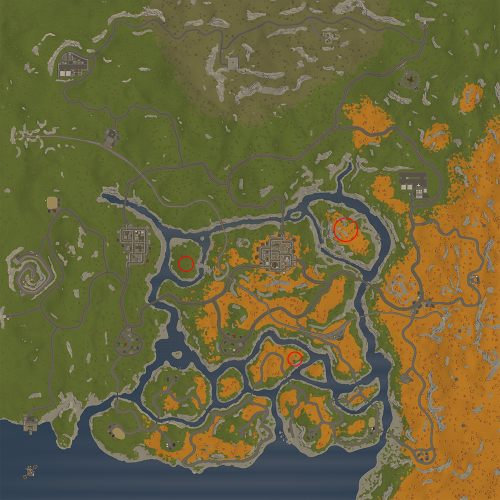
- Below is a map showing the locations of each of the 3 towers. You will receive +5 reputation upon fixing all towers and reporting back to Commander Laurence, who will also assign you the next quest.
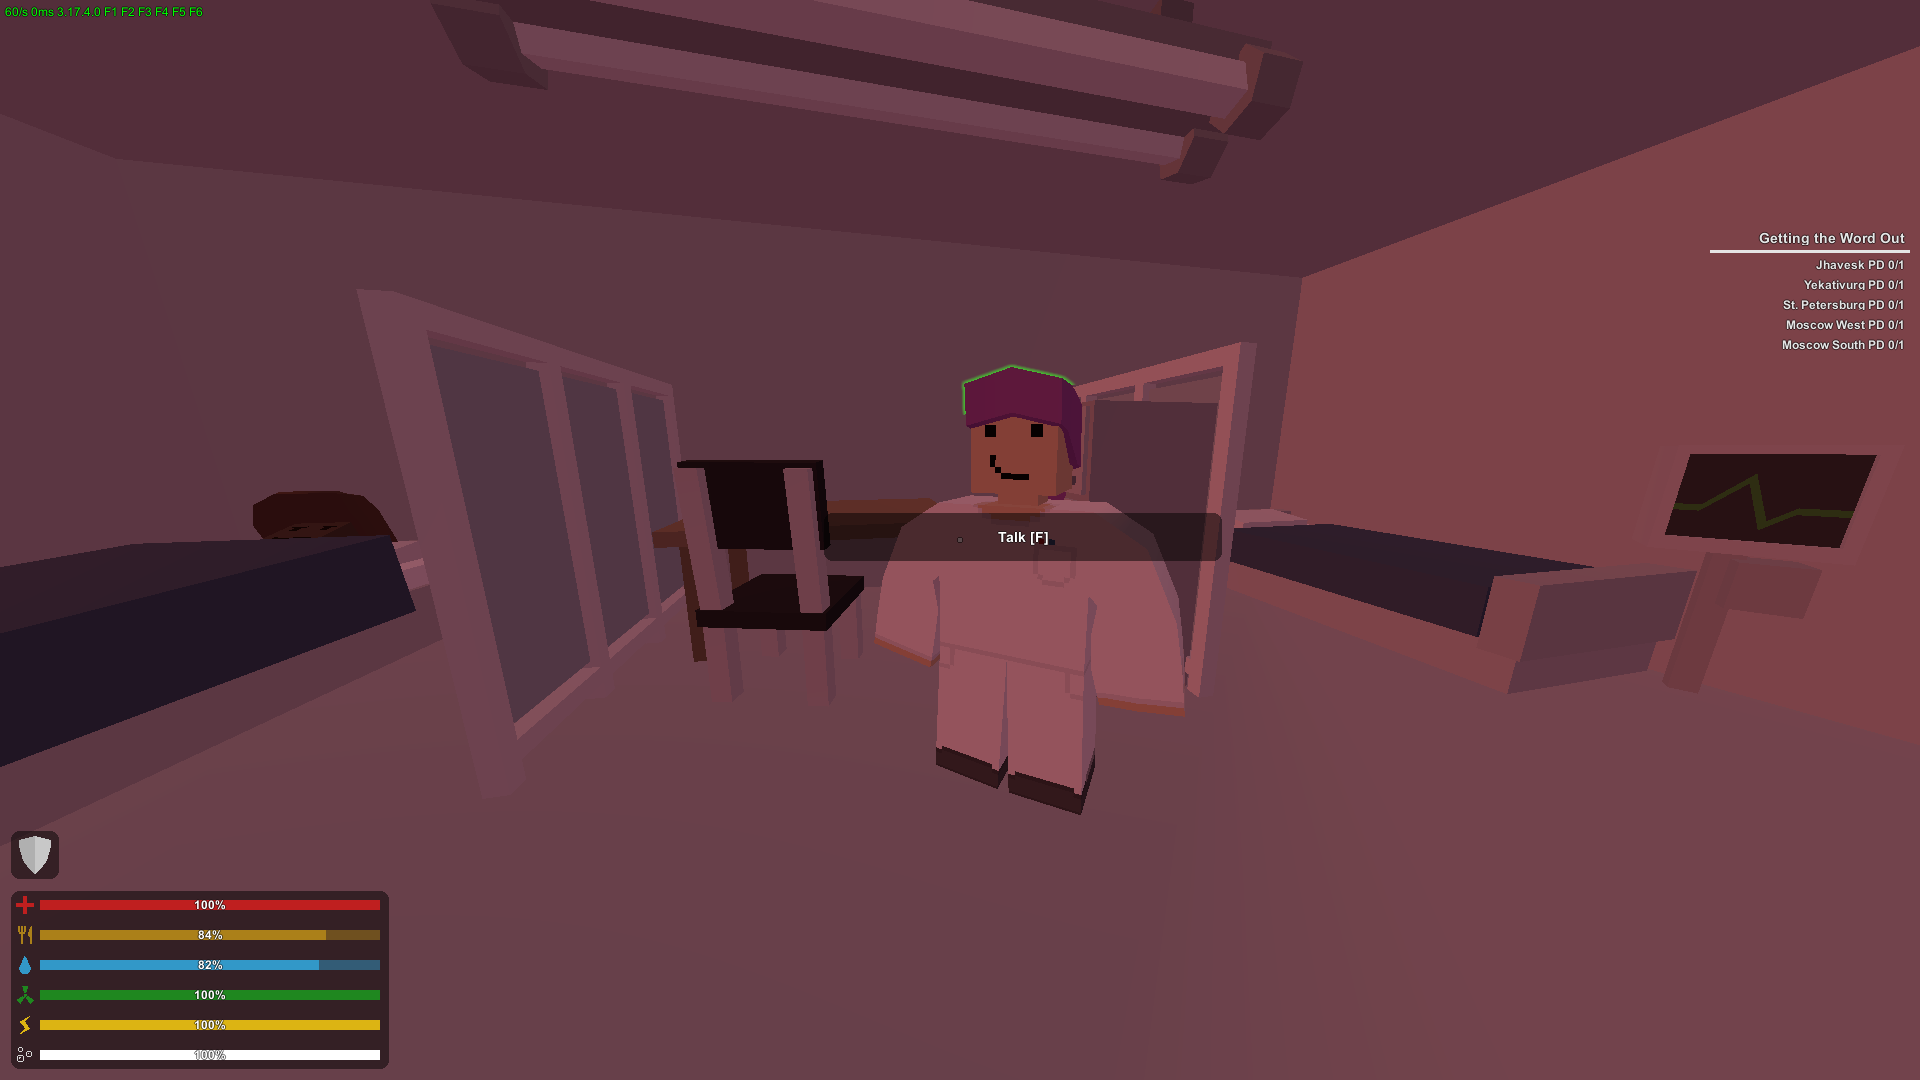
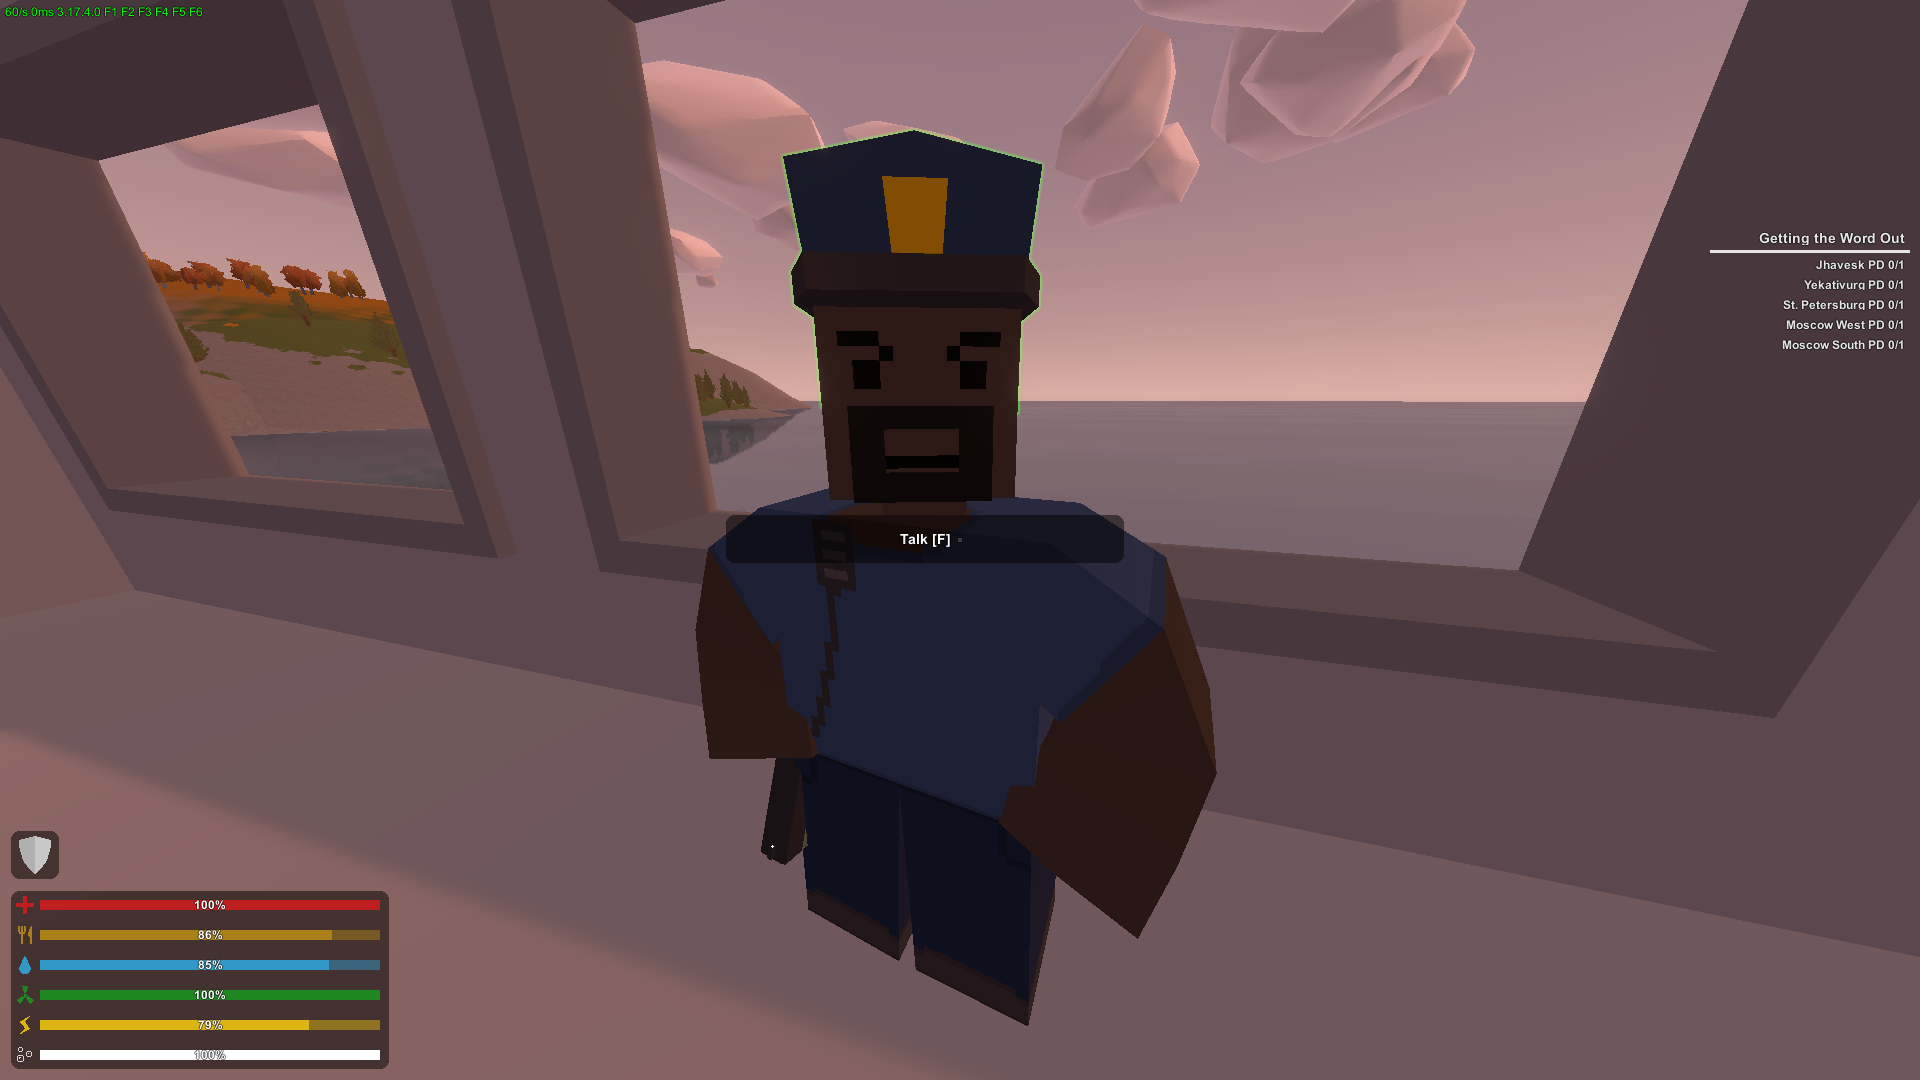
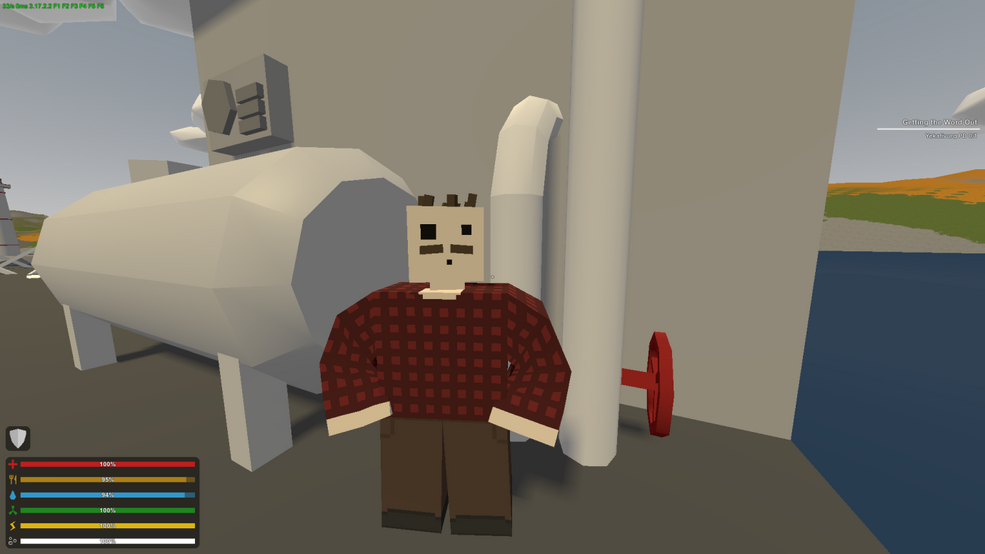
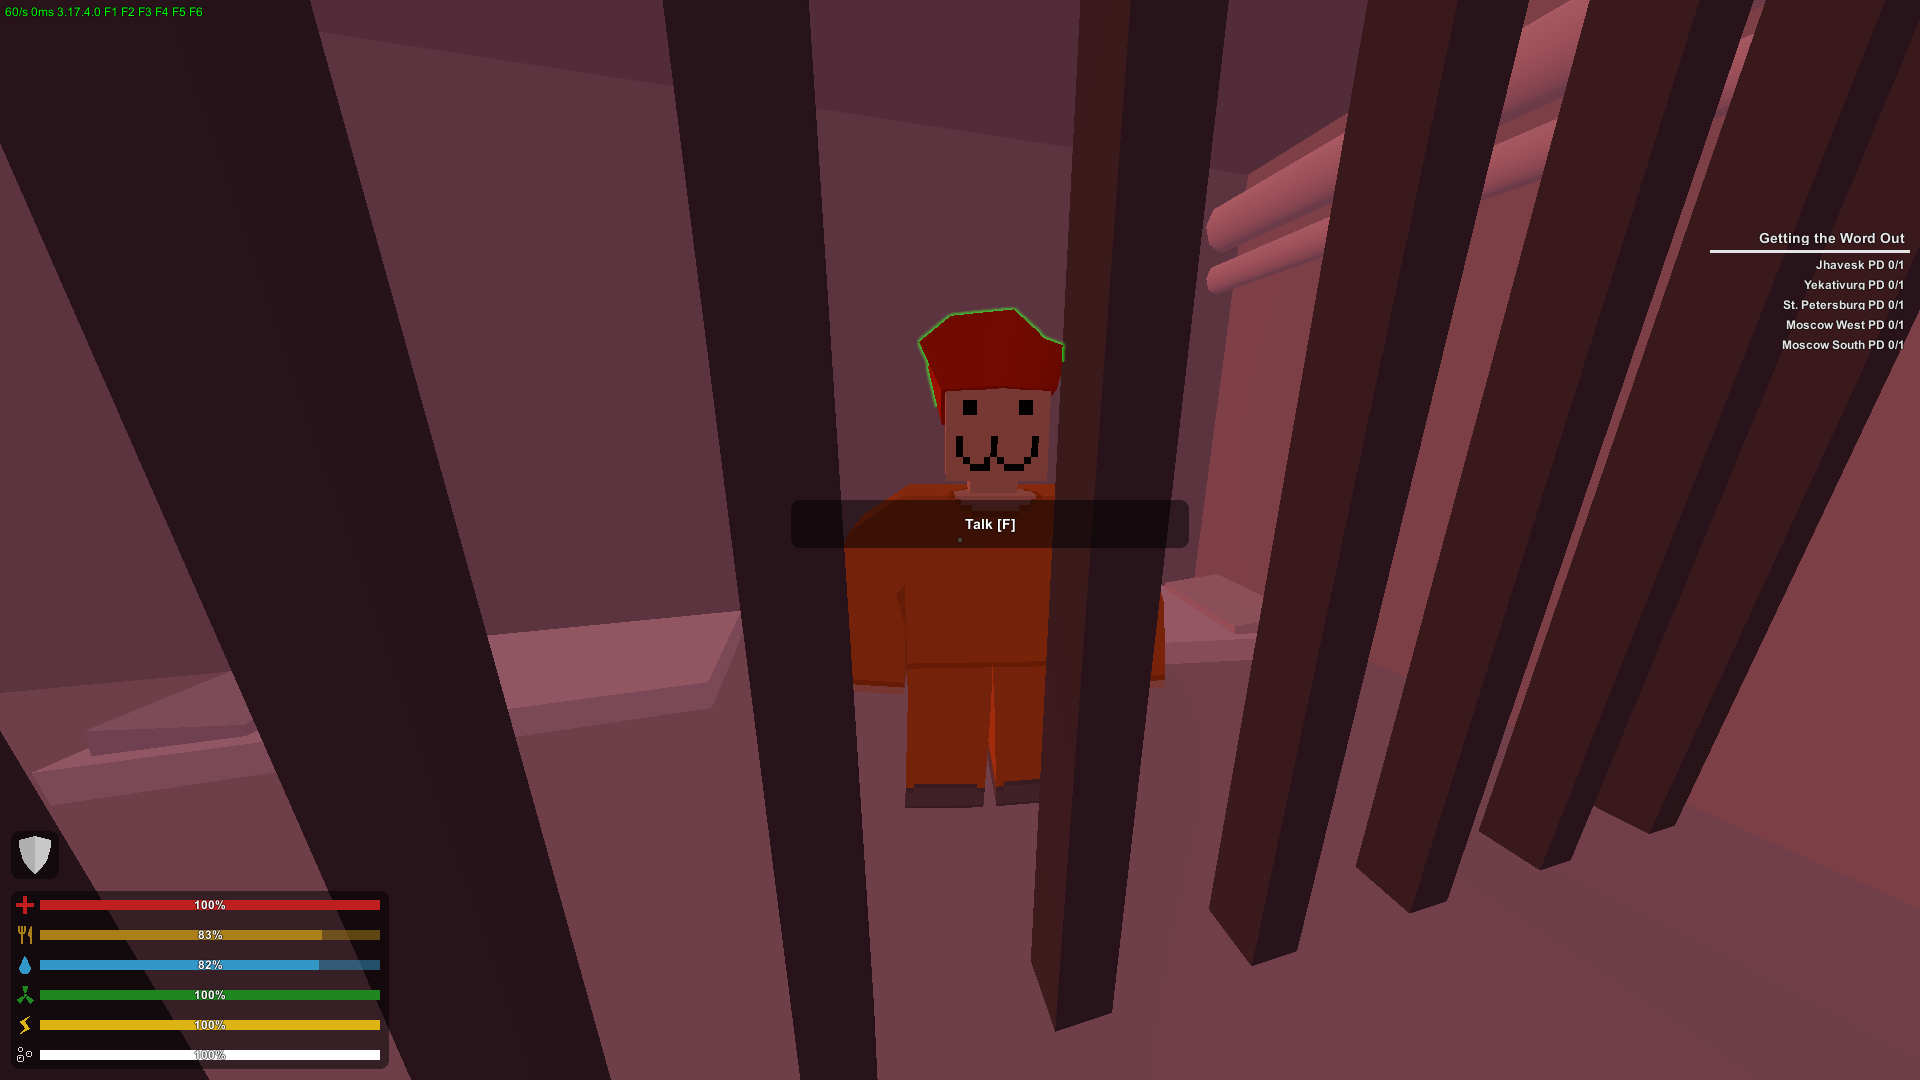
Getting the Word Out
- After the completion of the previous quest, meet up with Commander Laurence, who will task you with another side quest to complete.
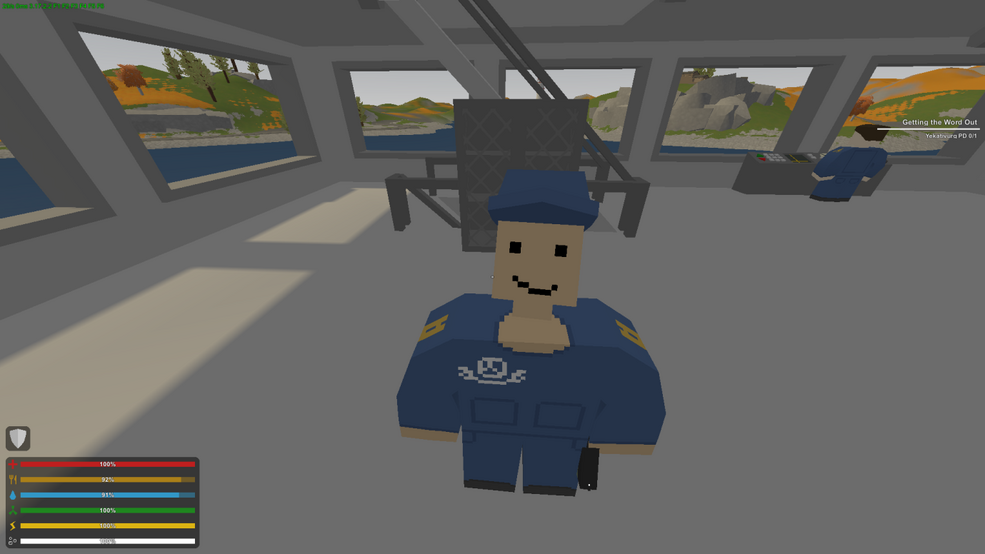
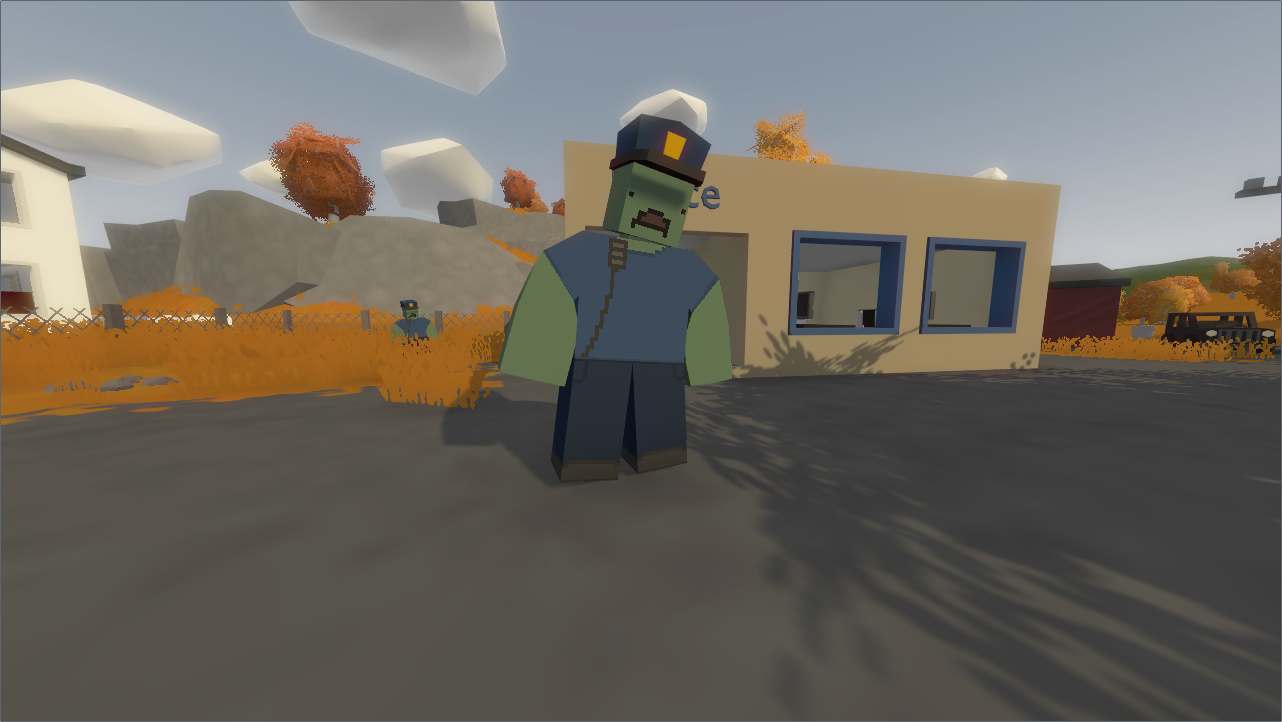
- You are tasked with placing and sticking 5 posters on 5 different police stations that are located in the Russia map, which are in St. Petersburg, Yekativurg, Jhavesk, and Moscow (there are 2 police stations located in the western and southern regions of Moscow).
- When you are near a police station, a green transparent image can be seen on the wall, which indicates you can place and stick the poster there.

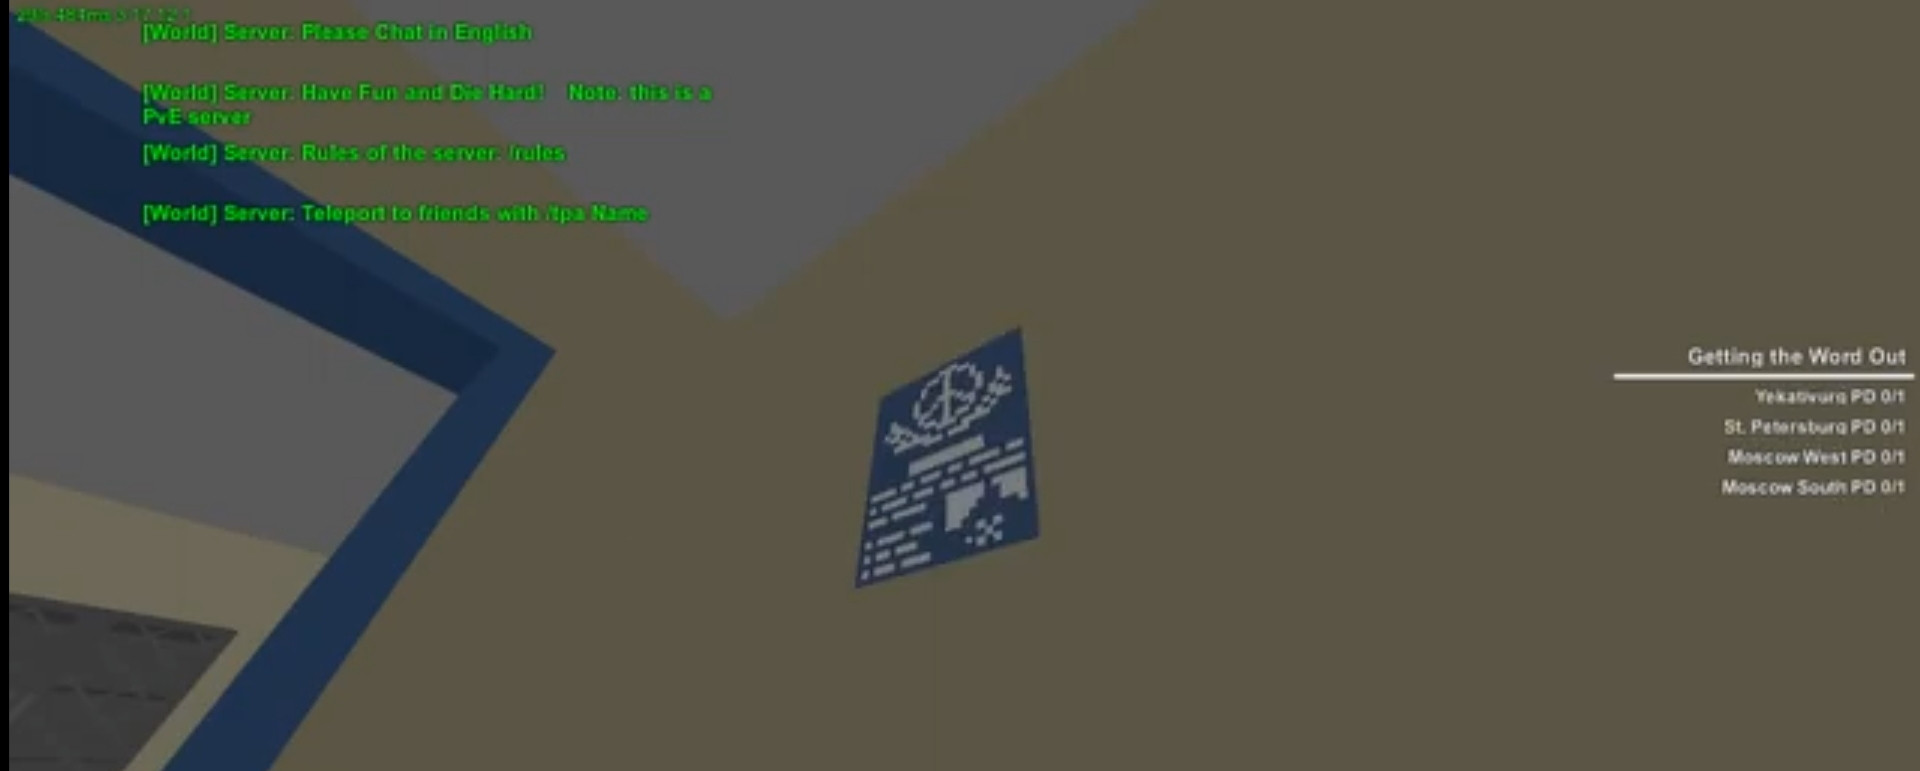
- Once you have placed all 5 of the posters, return to the Liberator and report back to Commander Laurence upon the mission completion, and you will be rewarded with +5 reputation and the next quest.
Mysterious Papertrail
Side NoteTechnically, this quest is not part of the main side quests, but since you will be given access to this quest upon completion of the previous quest above, this quest was listed in the next order. |
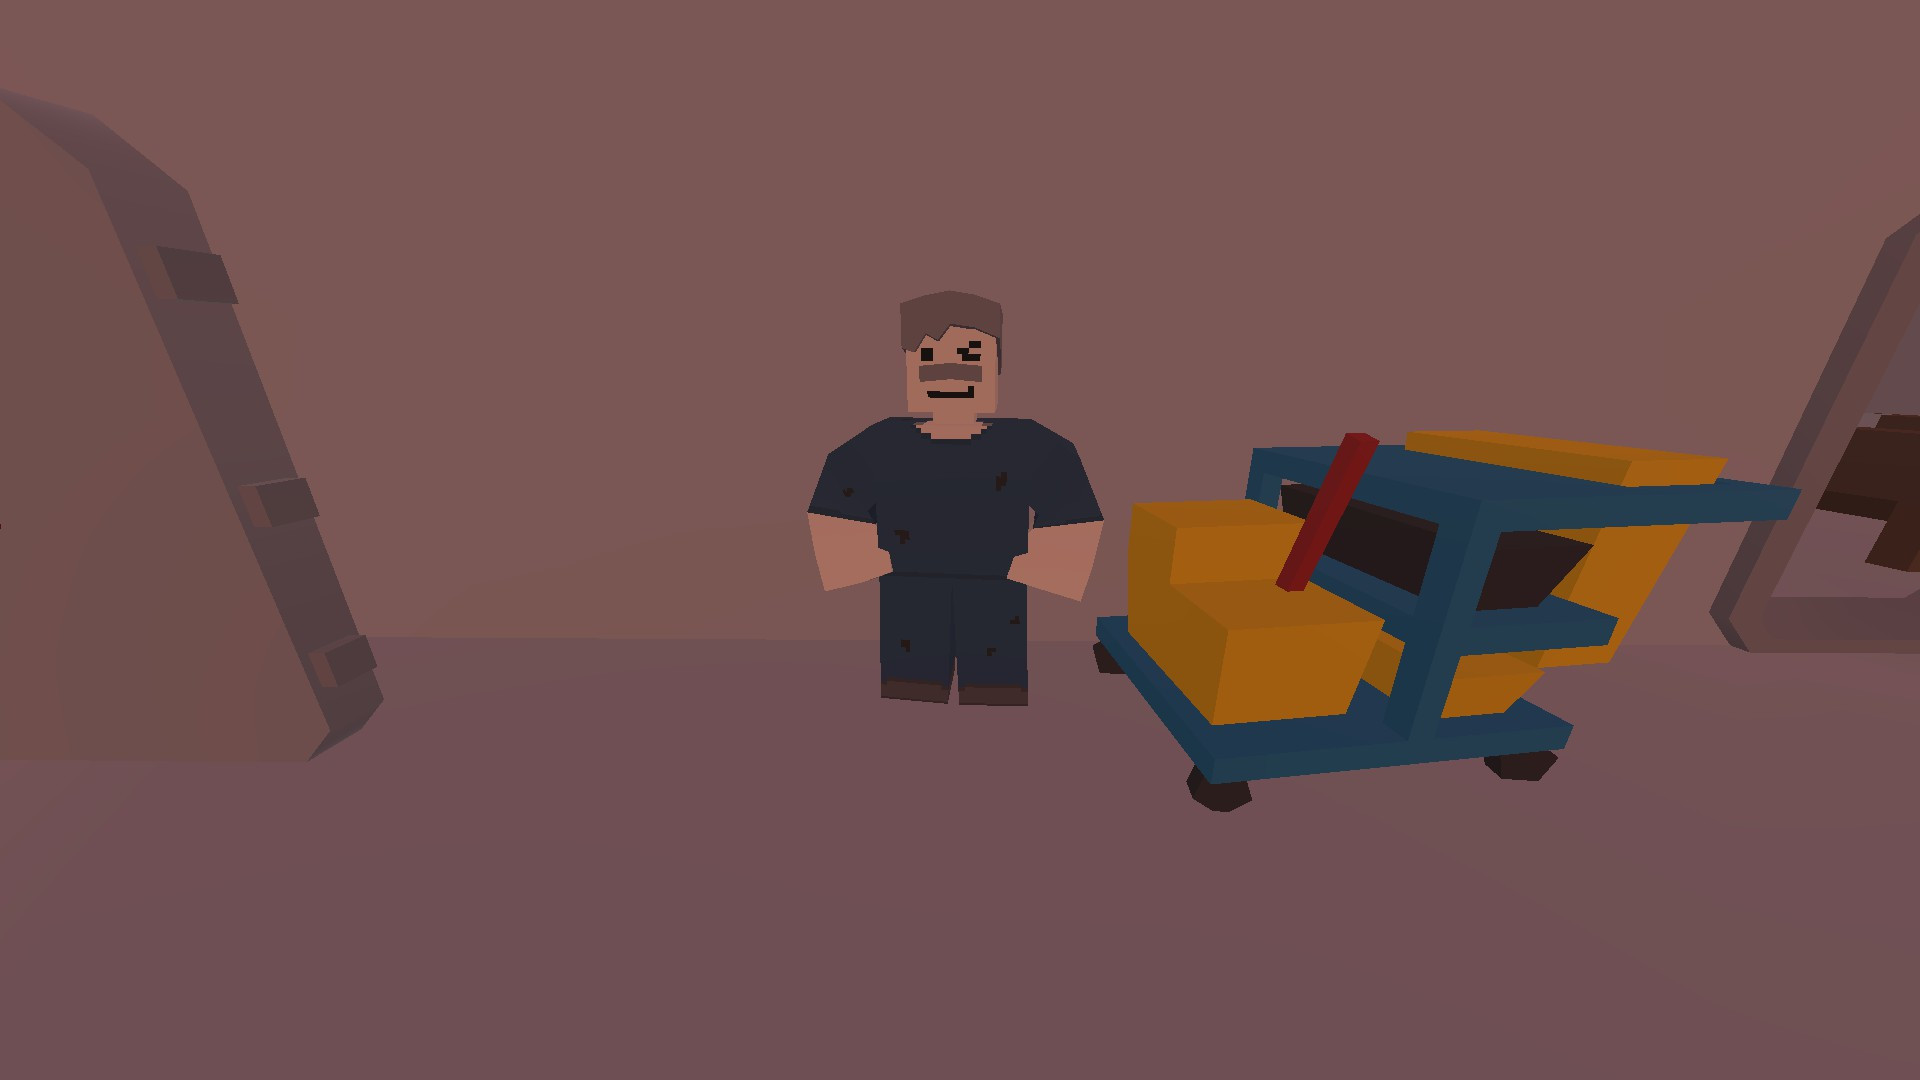
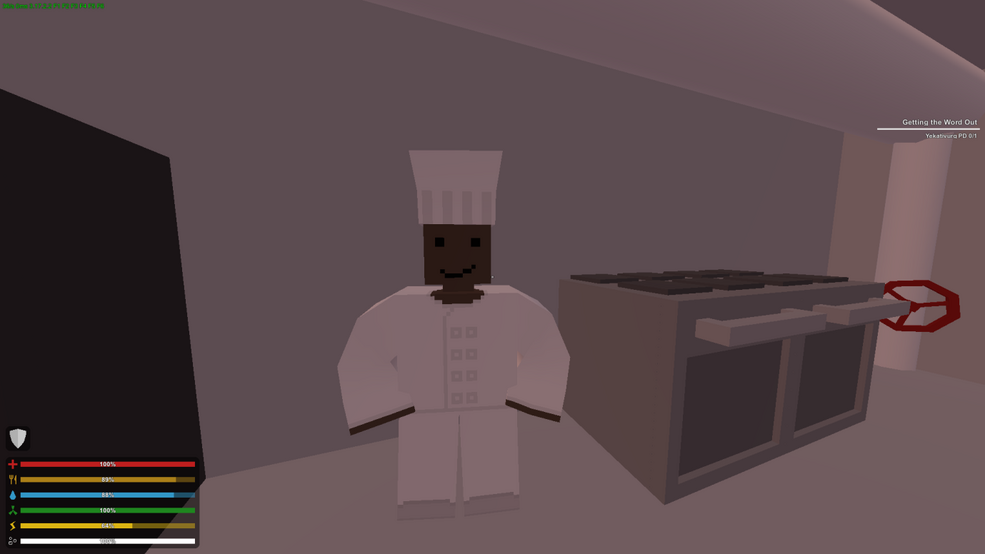
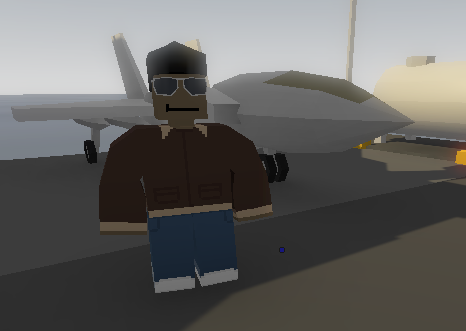
- After the completion of the previous quest above, meet with Commander Laurence once more, where he tasks you with handing out some letters to a few NPCs on the Liberator.
- Start by finding Rusty the Janitor; he is located in the janitor's room.
- Then you will want to find Chef Leonard, who is located in the cafeteria.
- Next, you will want to look for Andy, who is located outside, by the fighting jet.
- The final person you will want to hand the letter to is Captain Sydney. You will receive +5 reputation upon completion.
The Squeaky Motor Gets the Grease
- Meet up with Natalie the Engineer; she is located in the engine room.

- She will task you with finding 3 items, which are 3 Metal Bars, 2 Metal Sheets, and 1 Wire, all of which can be found and spawned in the Cheats menu. (Metal Bar ID 285, Metal Sheet ID 68 and Wire ID 65, respectively)
- Once you have spawned everything from the Cheats menu, interact with her once again and you will receive +5 reputation.
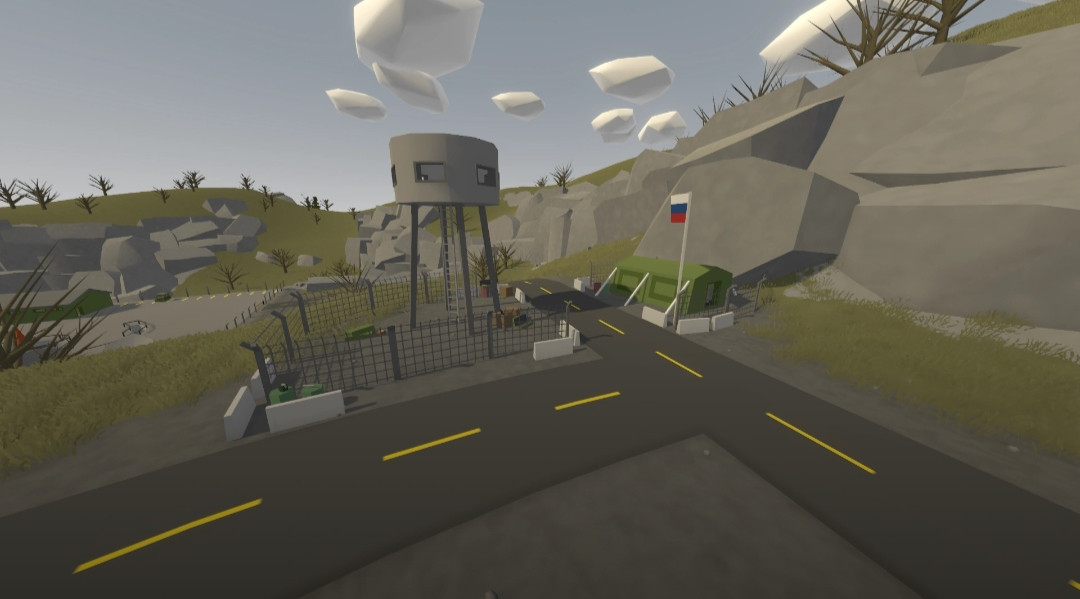
The Hunt for Jet Fuel
- Meet up with Lieutenant Oswald, who is located on the right side at the Captain's Deck.
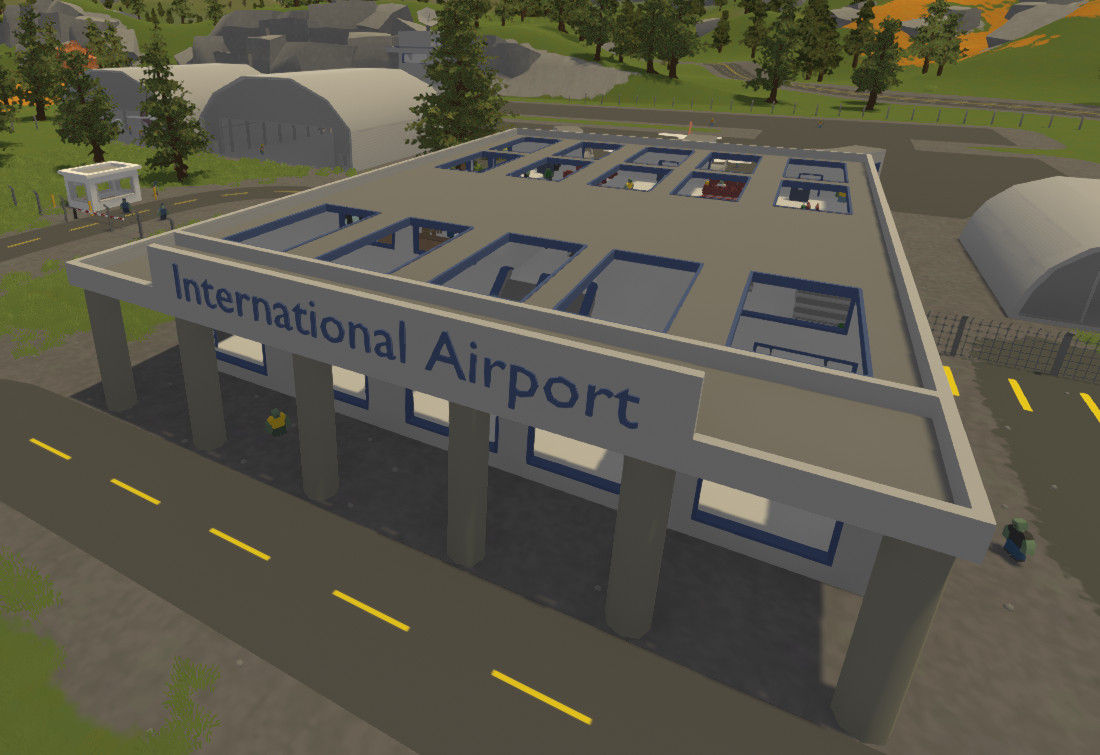
- He will task you to do a scouting mission at the Shereyavo International Airport, where the main objective will be placing a Horde Beacon and clearing 100 normal zombies and a mega zombie, which will spawn at the end.
- The recommended gear to bring along is a Horde Beacon (ID 1194) and the Thick Heatwave (ID 57489). You can bring the Headlamp (ID 1199) too if you are doing this mission at nighttime. All items can be found and spawned from the Items section of the Cheats menu.
- You must place the Horde Beacon first at a safe location before you start killing the zombies, as only zombies killed under the influence of the Horde Beacon will count for the quest. The zombies will possess a pair of red eyes when they are under the influence of the horde beacon. The safest place to place the Horde Beacon is on top of any airplanes that are located there.
- Note: You cannot leave the area entirely after placing the beacon, as doing so will result in the beacon getting destroyed automatically and all the kills you have accumulated will be gone, in which case you will need to place a new beacon and then accumulate the kills all over again.
BUG NOTEDuring the mission, it is important to understand that after the mega zombie spawns after killing a certain amount of normal zombies, do note that if you accidentally kill the mega zombie when there are still a few normal zombies lying around, the quest will be glitched out and even after killing everything within the perimeter, the quest will simply not mark as complete. To easily fix this, make sure to kill all the normal zombies first before killing the mega zombie as your final kill. By doing so, the quest will now be marked as complete. |
- Return to the Liberator and report back to Lieutenant Oswald, where you will be given the next scouting mission and +5 reputation.
Mass Production
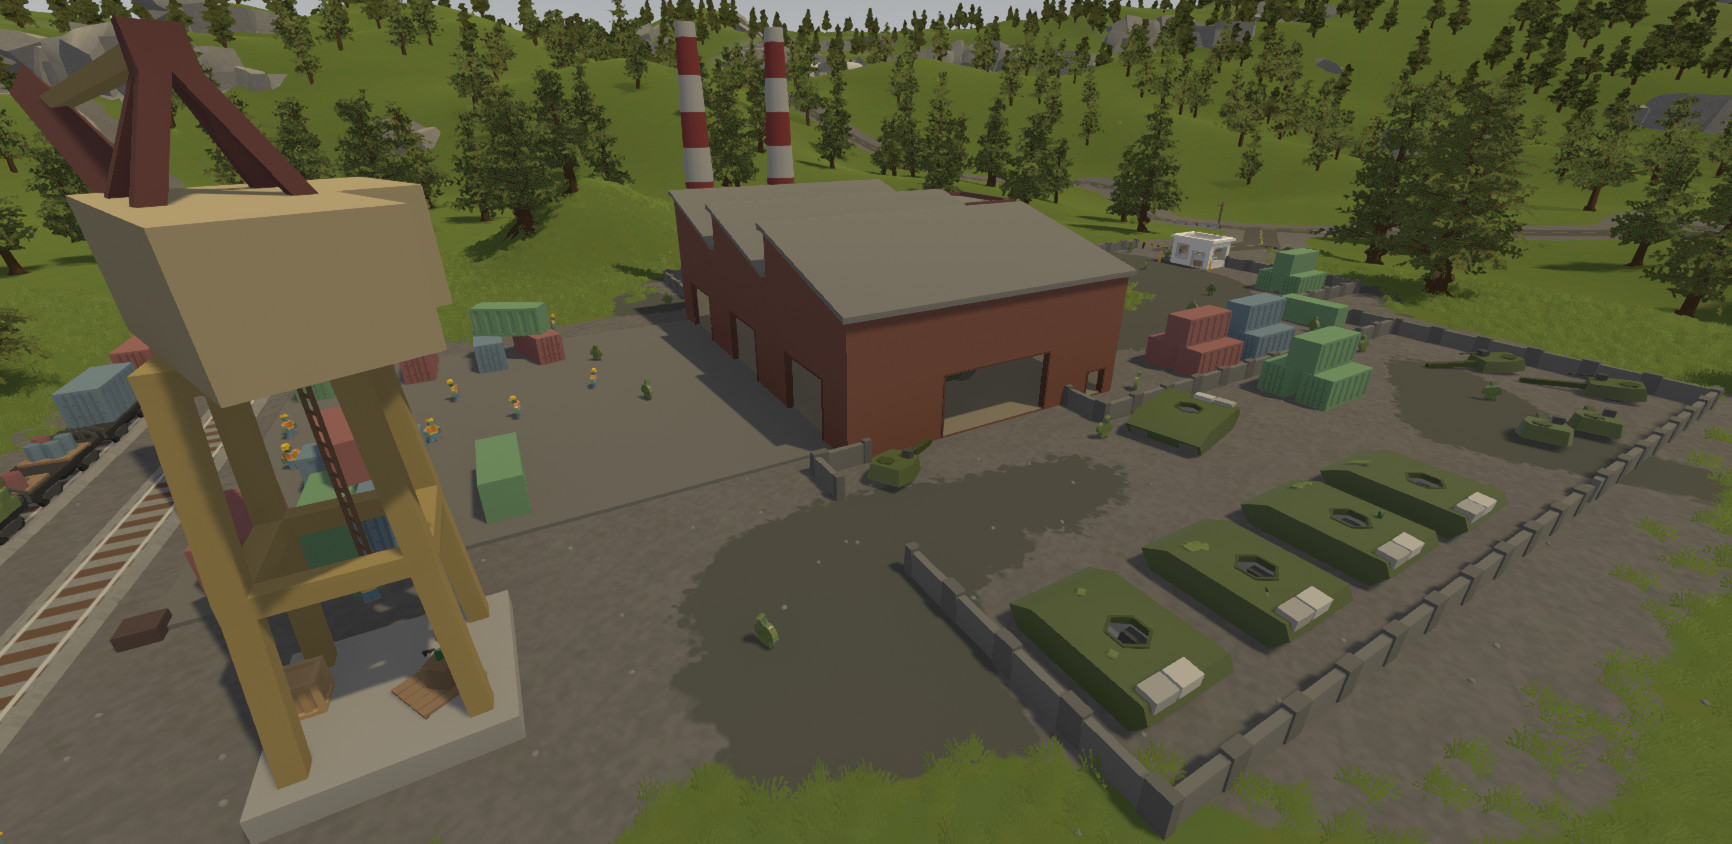
- Meet with Lieutenant Oswald once again, where he will task you with another scouting mission located at the Zavod Tank Factory.
- The recommended gear to bring along is a Horde Beacon (ID 1194) and the Thick Heatwave (ID 57489). You can bring the Headlamp (ID 1199) too if you are doing this mission at nighttime. All items can be found and spawned from the Items section of the Cheats menu.
- You must place the Horde Beacon first at a safe location before you start killing the zombies, as only zombies killed under the influence of the Horde Beacon will count for the quest. The zombies will possess a pair of red eyes when they are under the influence of the Horde Beacon, and the safest place to place it is inside any container that is located there. You can open the door of the container, then place the beacon inside and shut it close.
- Note: You cannot leave the area entirely as well after placing the beacon, as doing so will result in the beacon getting destroyed automatically and all the kills you have accumulated disappearing, in which case you will need to place a new beacon and accumulate the kills all over again.
BUG NOTEDuring the mission, it is important that after the mega zombie has spawned after killing a certain amount of normal zombies, do note that if you accidentally kill the mega zombie when there are still a few normal zombies lying around, the quest will glitch out and even after killing everything within the perimeter, the quest will simply not mark as complete. To easily fix this, make sure to kill all the normal zombies first before killing the mega zombie as your final kill. By doing so, the quest will now be marked as complete. |
- Return to the Liberator and report back to Lieutenant Oswald, where you will be given the next scouting mission and +5 reputation.
The Wolf's Den
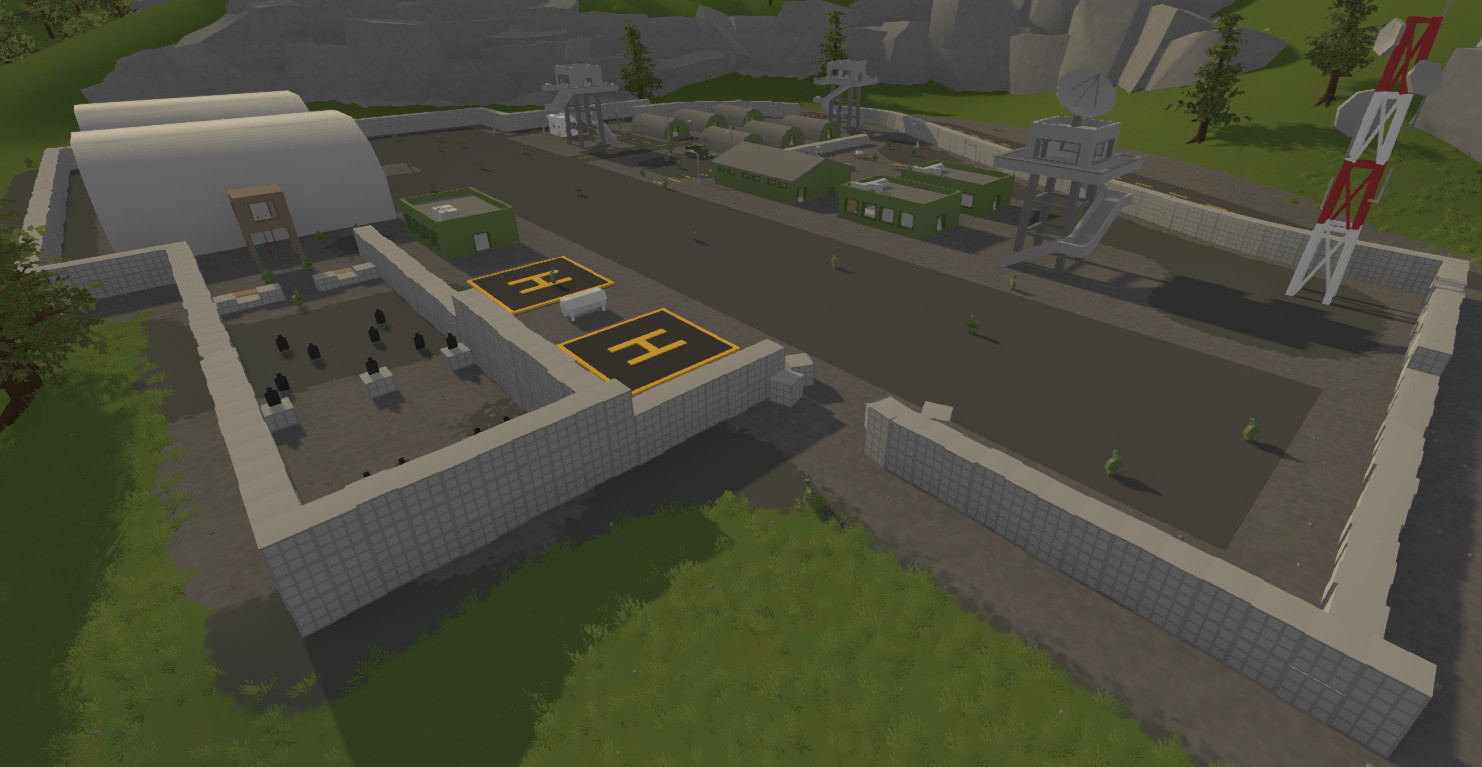
- Meet up with Lieutenant Oswald again. He will task you with yet another scouting mission, this time at the Volk Military Base.
- The recommended gear to bring along is a Horde Beacon (ID 1194) and the Thick Heatwave (ID 57489). You can bring the Headlamp (ID 1199) too if you are doing this mission at nigh time. All items can be found and spawned from the Items section of the Cheats menu.
- You must place the Horde Beacon first at a safe location before you start killing the zombies, as only zombies killed under the influence of it will count for the quest. The zombies will possess a pair of red eyes when they are under the influence of the Horde Beacon, and the safest place to place the Horde Beacon is inside any of the communication buildings located there. Go up and place the beacon at a safe place and go back down to deal with the zombies in the open space.
- Note: You cannot leave the area entirely after placing the beacon, as doing so will result in the beacon getting destroyed automatically and all the kills you have accumulated disappearing, in which case you will need to place a new beacon and then accumulate the kills all over again.
BUG NOTEDuring the mission, it is important that after the mega Zombie has spawned after killing a certain amount of normal zombies, do note that if you accidentally kill the mega zombie when there are still a few normal zombies lying around, the quest will glitch out, and even after killing everything within the perimeter, the quest will simply not mark as complete. To easily fix this, make sure to kill all the normal zombies first before killing the mega zombie as your final kill, as by doing so, the quest will now be marked as complete. |
- Return to the Liberator and report back to Lieutenant Oswald, where you will be given the next scouting mission and +5 reputation.
W.M.D.
- Meet up with Lieutenant Oswald again, and he will task you without another scouting mission, which is located at Silo 22.
- The recommended gear to bring along is a Horde Beacon (ID 1194), the Thick Heatwave (ID 57489), and the Gasmask and a few of its filters (ID 1271 and 1272, respectively). You can bring the Headlamp (ID 1199) as well if you are doing this mission at nighttime. All items can be found and spawned from the Items section of the Cheats menu.
- You must place the Horde Beacon first at a safe location before you start killing the zombies, as only zombies killed under the influence of the Horde Beacon will count for the quest. The zombies will possess a pair of red eyes when they are under its influence, and the safest place to place the Horde Beacon is inside, at the top of the watchtower located there. Go up and place the beacon inside, and you can even deal with the zombies while staying at the top as the zombies will all gather below by the ladder, making an easy target for you to kill them.
- Note: You cannot leave the area entirely after placing the beacon, as doing so will result in the beacon getting destroyed automatically and all the kills you have accumulated disappearing, in which case you will need to place a new beacon and then accumulate the kills all over again.
BUG NOTEDuring the mission, it is important that after the mega zombie has spawned after killing a certain amount of normal zombies, do note that if you accidentally kill the mega zombie when there are still a few normal zombies lying around, the quest will be glitched out, and even after killing everything within the perimeter, the quest will simply not mark as complete. To easily fix this, make sure to kill all the normal zombies first before killing the mega zombie as your final kill, as by doing so, the quest will now be marked as complete. |
- Return to the Liberator and report back to Lieutenant Oswald, where you will be given the final scouting mission and +10 reputation.
First Contact
MINOR BUG NOTESince you can skip one quest and still reach Major rank, this is the quest that is recommended for you to skip, since to reach the oil rig, you will need to spawn a helicopter from the Cheats menu, and the controls for this vehicle are absolutely horrendous and awkward on the console, not to mention that zombies can glitch out and spawn underwear underneath the oil rig, making it super frustrating to complete this quest. |
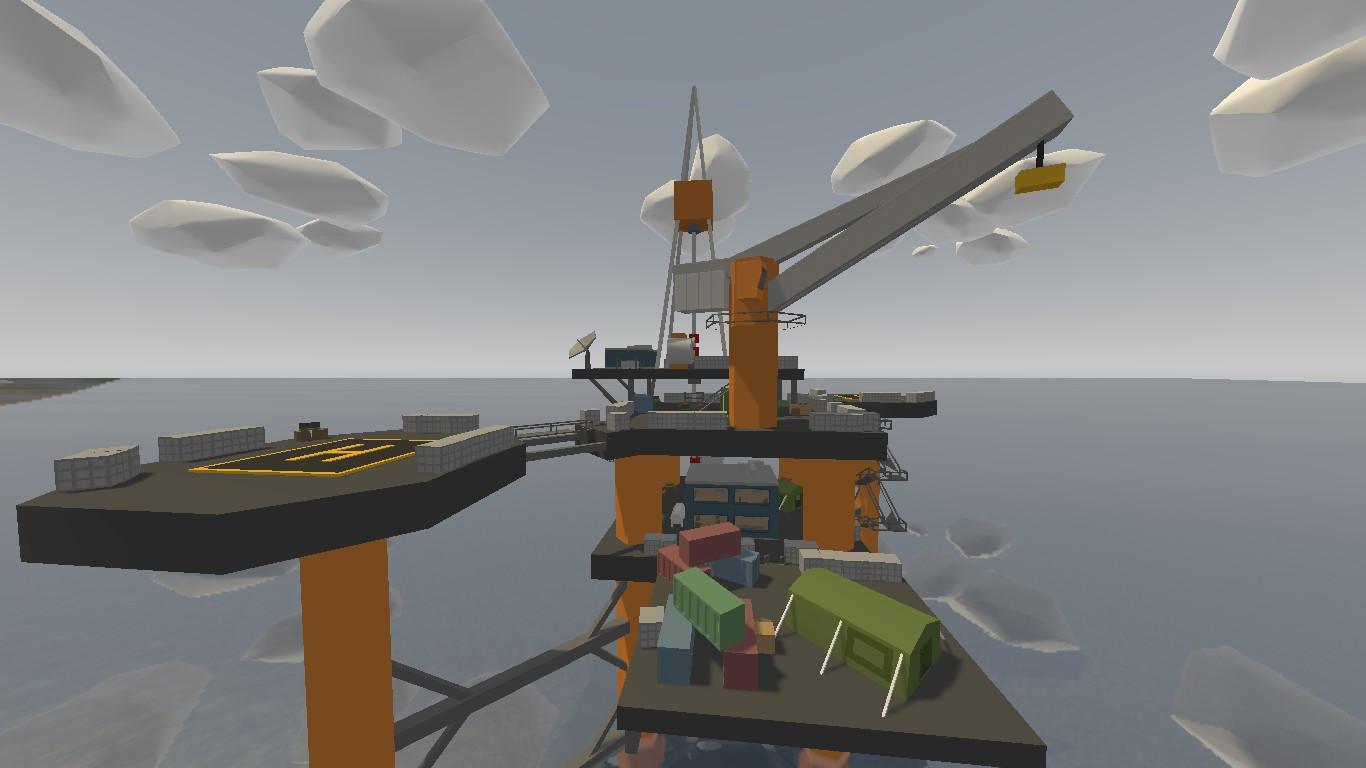
- Meet up with Lieutenant Oswald for one last time, who will task you with the final scouting mission, which is located at an Oil Rig south of the Kivgrad Harbor.

- The recommended gear to bring along is a Horde Beacon (ID 1194), the Thick Heatwave (ID 57489,) and the Gasmask and a few of its filters (ID 1271 and 1272, respectively). You can bring the Headlamp (ID 1199) too if you are doing this mission at nighttime. All items can be found and spawned from the Items section of the Cheats menu.
- You must place the Horde Beacon first at a safe location before you start killing the zombies, as only zombies killed under the influence of the Horde Beacon will count for the quest. The zombies will possess a pair of red eyes when they are under the influence of the Horde Beacon, and the safest place to place the Horde Beacon is inside one of the containers located there. Open the door of the container, then put the beacon inside and shut the door.
- Note: You cannot leave the area entirely after placing the beacon, as doing so will result in the beacon getting destroyed automatically and all the kills you have accumulated disappearing, in which case you will need to place a new beacon and accumulate the kills all over again.
BUG NOTEDuring the mission, it is important that after the mega zombie has spawned after killing a certain amount of normal zombies, do note that if you accidentally kill the mega zombie when there are still a few normal zombies lying around, the quest will be glitched out, and even after killing everything within the perimeter, the quest will simply not mark as complete. To easily fix this, make sure to kill all the normal zombies first before killing the mega zombie as your final kill. By doing so, the quest will now marked as complete. |
- Return to the Liberator and report back to Lieutenant Oswald, where you will be given +10 reputation.
Research Recovery
- Meet up with Doctor Swanson, who is located at the infirmary.
- She will task you with finding 4 missing capsules that are scattered all around the area of Silo 22.
- You will need to bring the Gasmask and a few of its filters (ID 1271 and 1272) before departing.
- Below is a map showing the locations of all 4 capsules and a picture of what the capsule looks like.
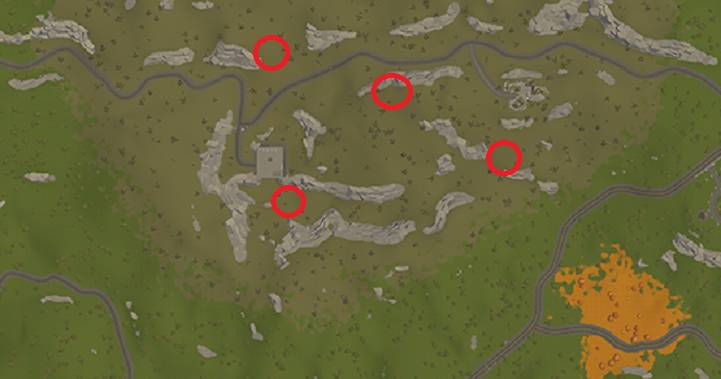
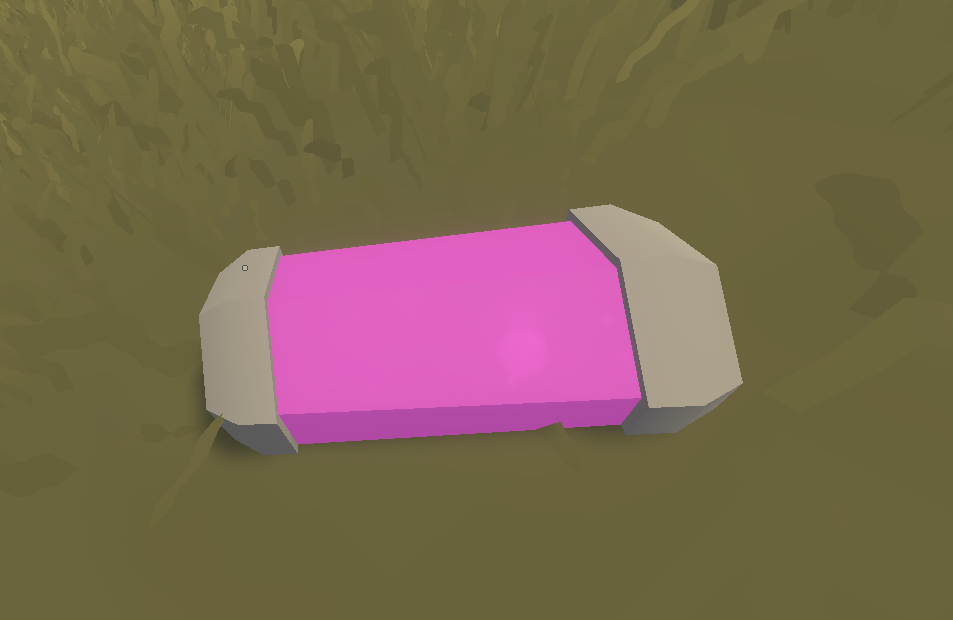
- Return to the Liberator and meet up with Doctor Swanson again, where you will receive +5 reputation and the Scorpio-7 Keycard.
The Secret Snack
- Meet up with Chief Brian, who is located at the observatory deck above the captain's deck.
- He will task you with finding the Baked Doughnut, which you can find and spawn in the Cheats menu (ID 1163).
- After you spawn the doughnut, interact with Chief Brian again, and you will receive +5 reputation.
Smuggler's Cove
- Before triggering this quest, you will need to find and interact with a mysterious NPC who has no name but is only known as "???". He is located outside, behind the fuel tank, to the left of Andy. You will also need to pay him 1XP, where he will then tell you that Major Len is conducting a smuggling business within the Liberator.
- Next, you will want to meet Chief Brian and report this incident to him, and he will ask you to gather some evidence, in which you must find the uniform scrap which is located under the stone bridge located at the east of Kivgrad Harbor.
- Once you head there, you will want to head inside under the stone bridge, and you will notice there are a few items lying around the ground. The uniform scrap will be among the items you will find there.
- Once you have found and collected the uniform scrap, return back to the Liberator and report the progress of the investigation back to Chief Brian. You will receive +10 reputation and also the next quest.
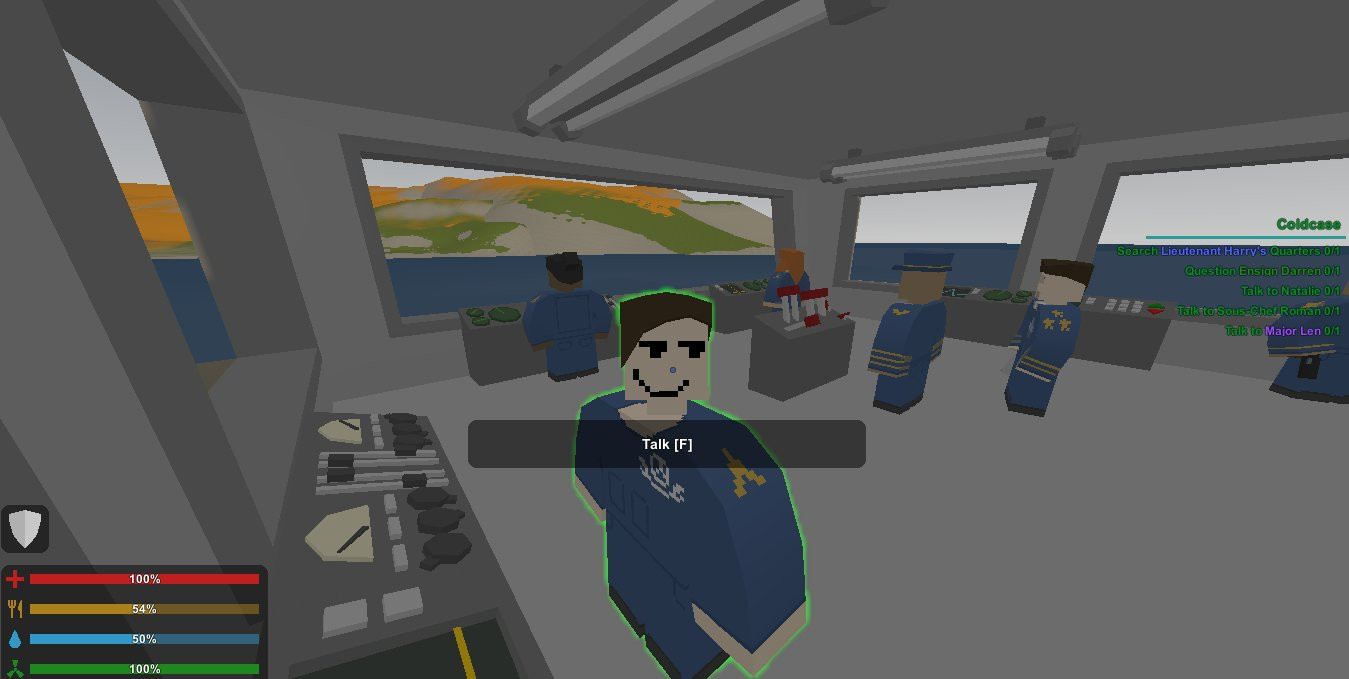
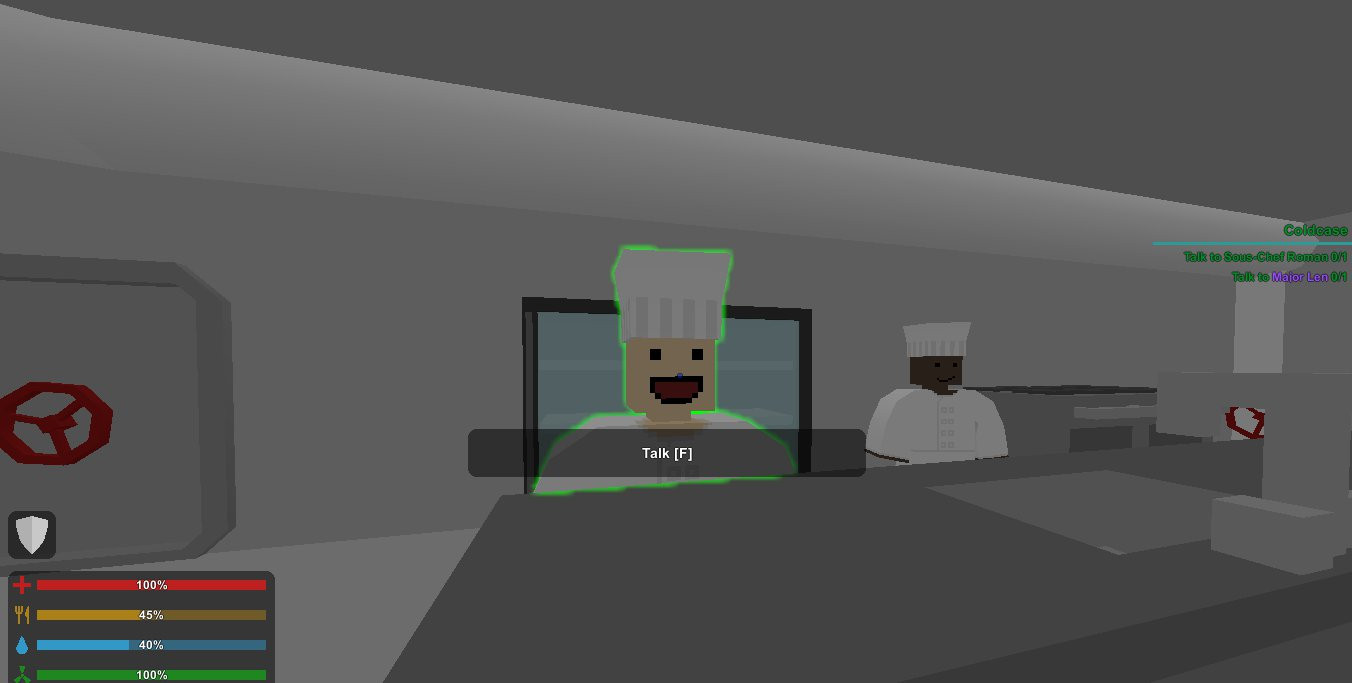
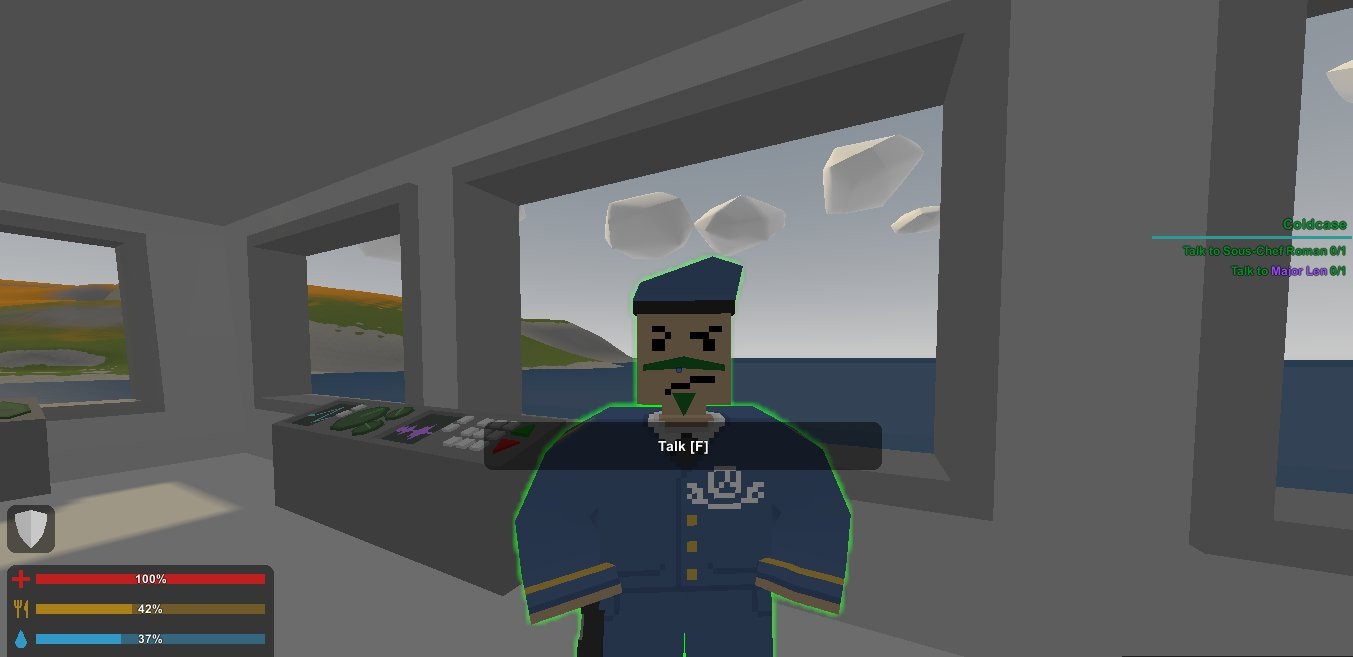
Coldcase
- Chief Brian will provide you with several tasks where you will travel around the Liberator to question several NPCs.
- Start by searching for a note that is located in Lieutenant Harry's Quarters. The note is located underneath one of the beds.

- After you collect the note, head back to the captain's deck and question Ensign Darren, who is located to the left of Captain Sydney.
- Next, head to the engine room and talk to Natalie the Engineer.
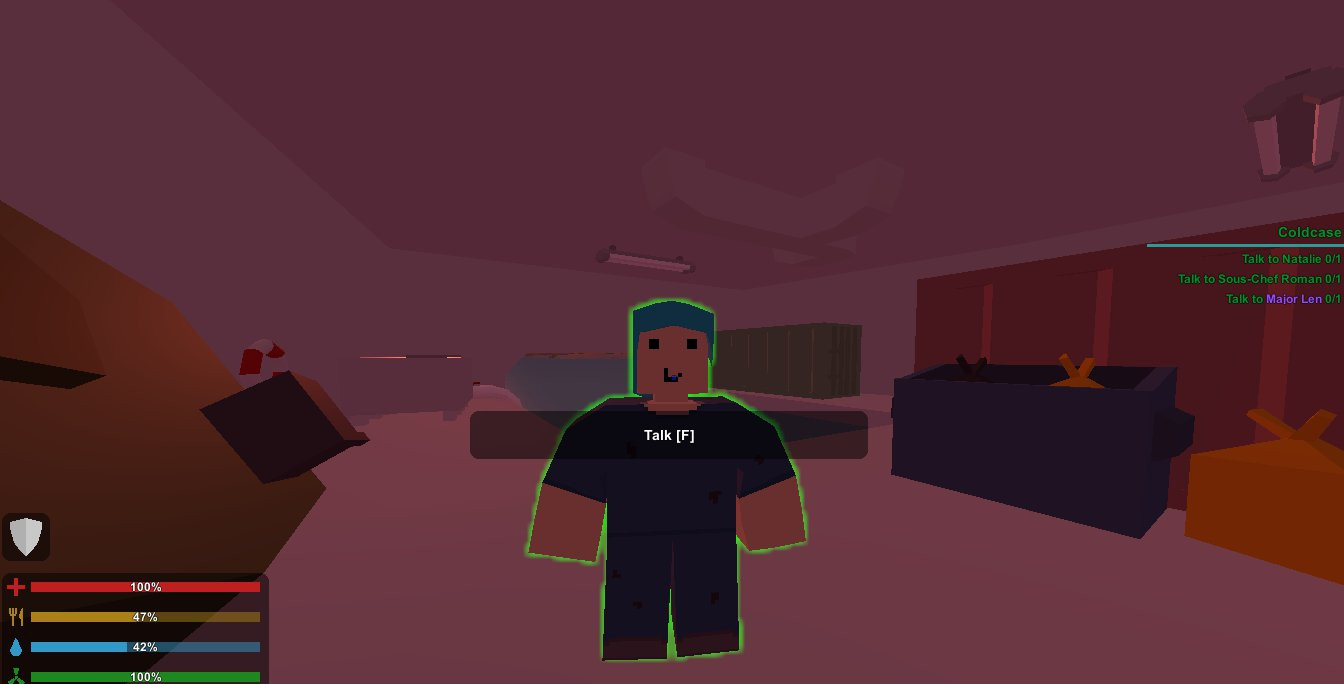
- Afterwards, head to the cafeteria and talk to Sous-Chef Roman, who is located in front of Chef Leonard.
- Finally, head back to the Captain's Deck and talk to Major Len, who is located to the right of Captain Sydney.
- Once everything is settled, head back to meet with Chief Brian and report the conclusion of the investigation to him, where he will ask you to report this incident to Captain Sydney for the next quest and also give you +10 reputation.
The Conspiracy's Conclusion
- Meet up with Captain Sydney and report this incident to her, where she will tell you that Major Len is actually working undercover under her command to investigate the real mastermind behind this sinister plot. She will also ask you to meet and work together with Major Len to uncover and catch the real mastermind.
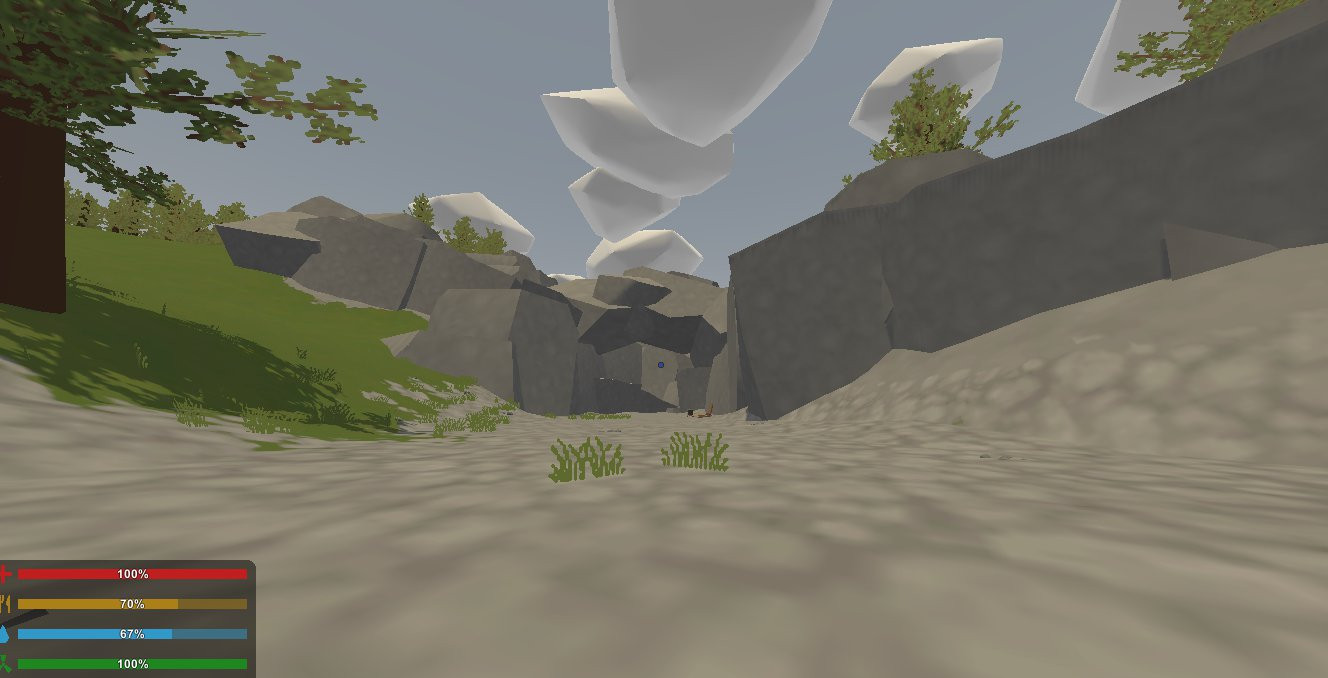
- Start by travelling to Silo 22, once you reached there, you will want to travel underground through the oval pathway until reach the command center, where you will need to find a note, which is located and sticking out of one of the computers located there. You will need the Gasmask and a few of its filters (ID 1271 and 1272, respectively), and also the Thick Heatwave (ID 57489) to deal with the zombies there.
- Note: There are actually 2 entrances that you can use when you reached Silo 22, one is the main entrance which is located at the front where several zombies are stationed around at there, where you will need to travel underground through the oval pathway to reach the command center, and another is at the back where the entrance is locked behind by a giant automated gate where you will need to spawn both the generator and the gas can (ID 458 and 28 respectively from the cheats menu) to again access to the command center, start by spawning the generator and place it near the giant gate, then spawn the gas can and use it to refill the generator in which the giant gate will automatically be open, once the gate is open, enter the center and climb up the ladder that is located in front of you and find the note among the computers. So just pick whichever entrances that is most convenient to you.

- Note: There are actually 2 entrances that you can use when you reached Silo 22, one is the main entrance which is located at the front where several zombies are stationed around at there, where you will need to travel underground through the oval pathway to reach the command center, and another is at the back where the entrance is locked behind by a giant automated gate where you will need to spawn both the generator and the gas can (ID 458 and 28 respectively from the cheats menu) to again access to the command center, start by spawning the generator and place it near the giant gate, then spawn the gas can and use it to refill the generator in which the giant gate will automatically be open, once the gate is open, enter the center and climb up the ladder that is located in front of you and find the note among the computers. So just pick whichever entrances that is most convenient to you.
- Once you have found and collected the note, return to the Liberator and report to Captain Sydney that Ensign Darren is the true mastermind, after which she will order his arrest and also reward you with +10 reputation.
Miscellaneous Side Quests
Now onto the miscellaneous quests that can be completed in any order.

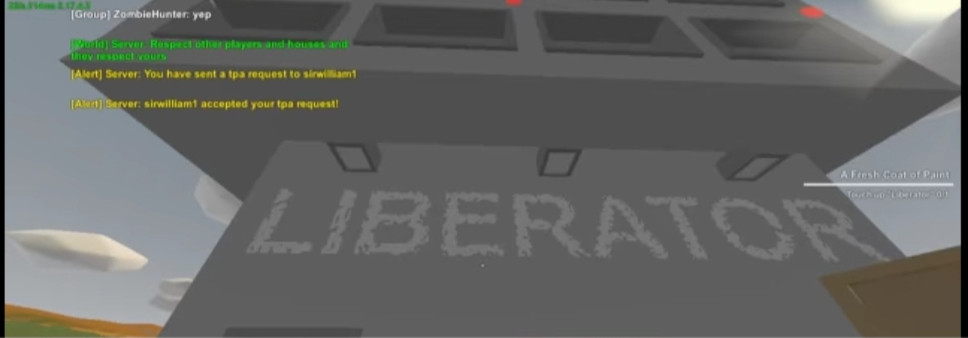
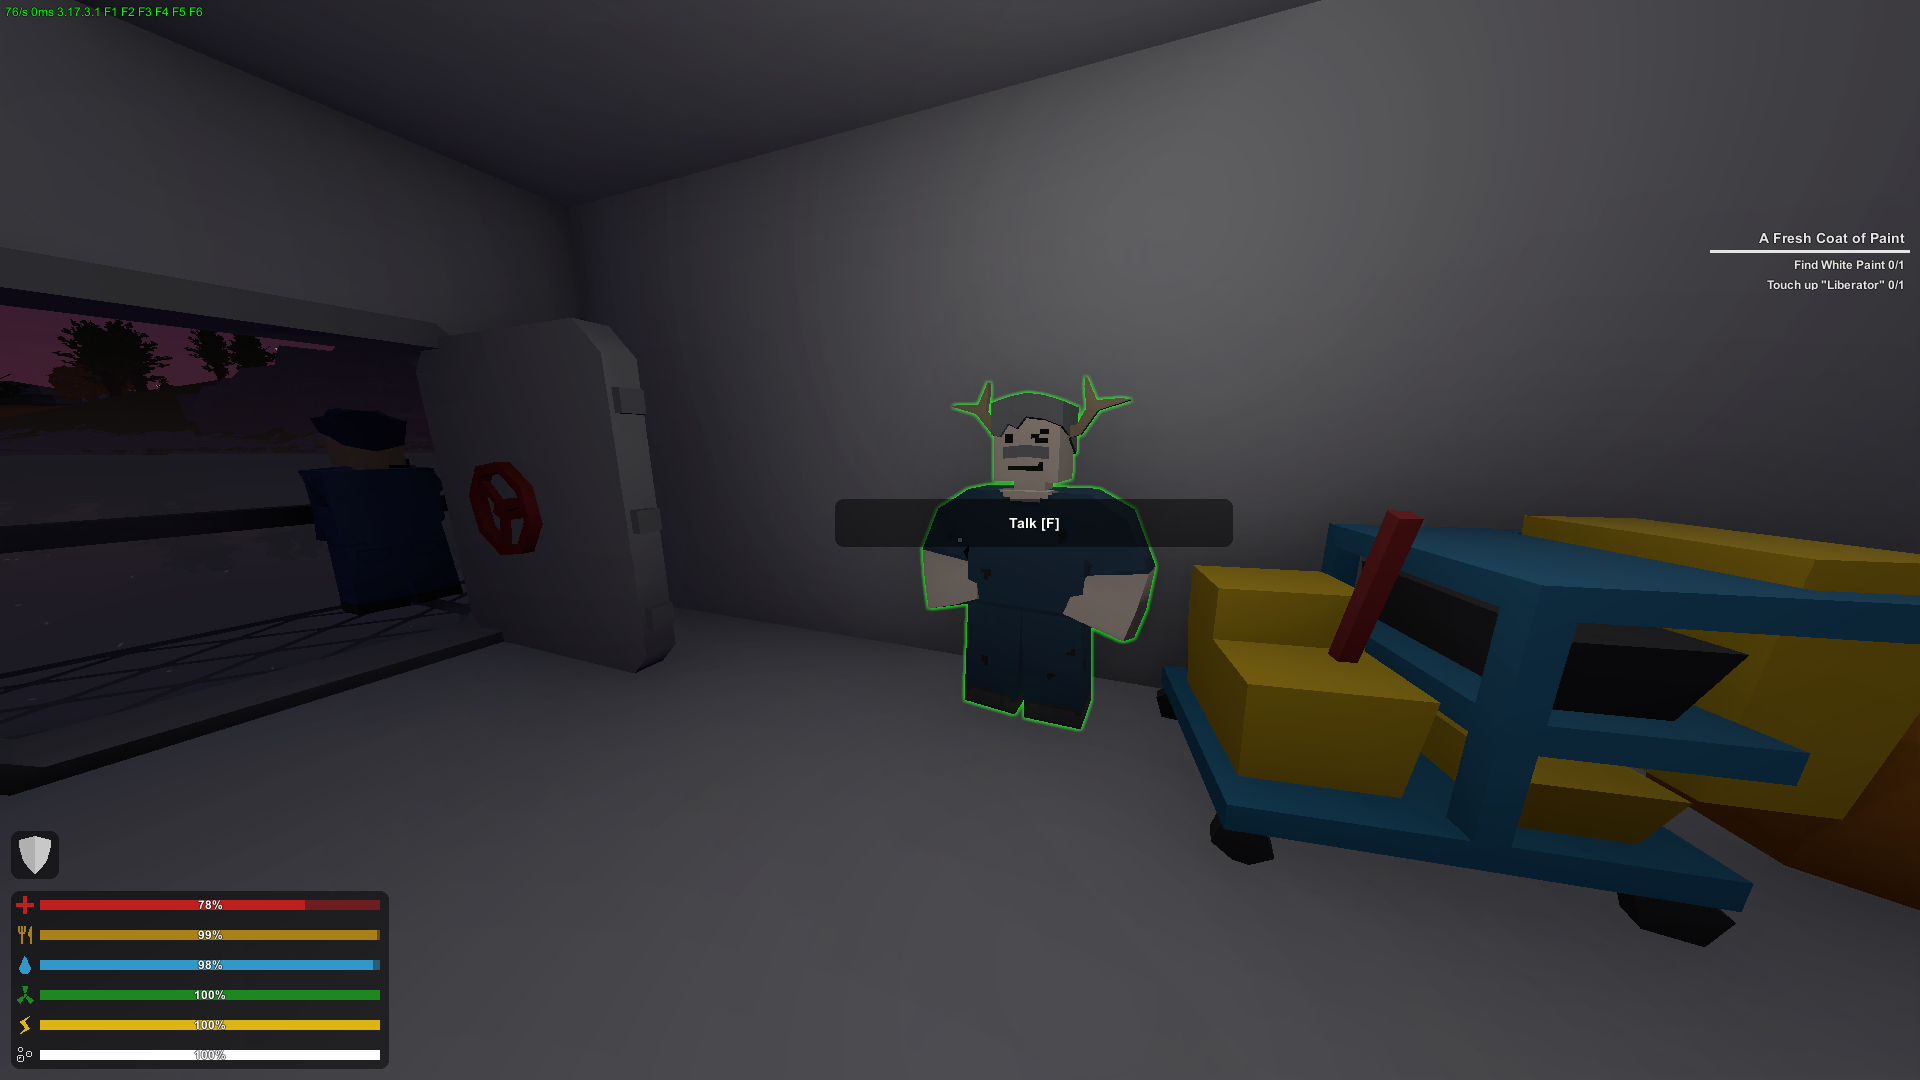
A Fresh Coat of Paint
- Meet and interact with Rusty the janitor, who is located in the janitor's room.

- You will then need to find some white paint, which is located in the hardware store in St. Petersburg.
- After you pick up the paint, return to the Liberator and apply the paint to the "LIBERATOR' text that is located above the entrance to the captain's deck. Here is a picture showing where the text is located.
- Once the paint is applied, head back to meet Rusty, who will assign you another quest and also award you with +5 reputation. Note: The Liberator text for some weird reason isn't visible at all on the consoles version but you should be able to interact and apply the paint on it.
Nautical Nuisance
- Meet and interact with Rusty the janitor, who is located in the janitor's room.
- You will need to dive underwater and clean all 9 of the barnacles that are stuck under the base of the ship. Make sure to upgrade your oxygen level to the max from the Skills menu before starting this quest.
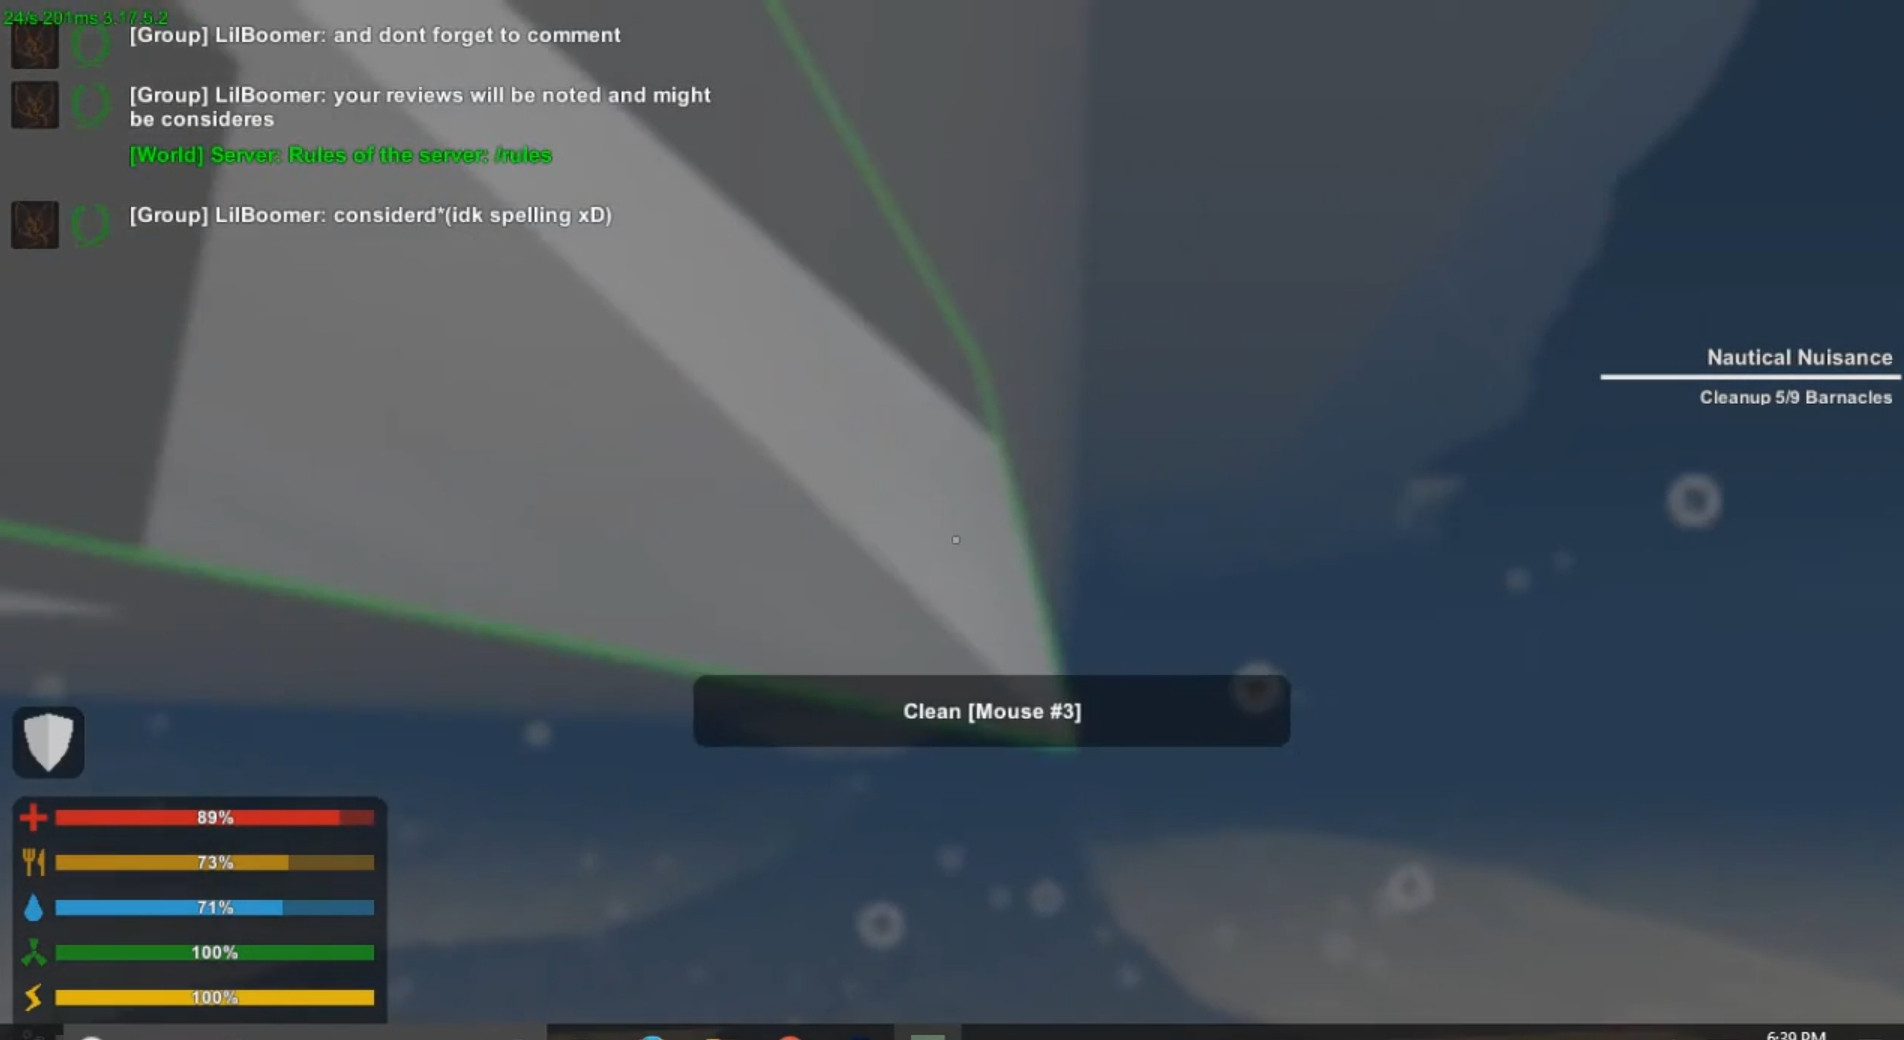
- After you have scraped off all the barnacles, return to Rusty and received +5 reputation.
The Ultimate Fishing Rod
- Meet and interact with Wallace the pirate, who is located outside, to the left of the ship.
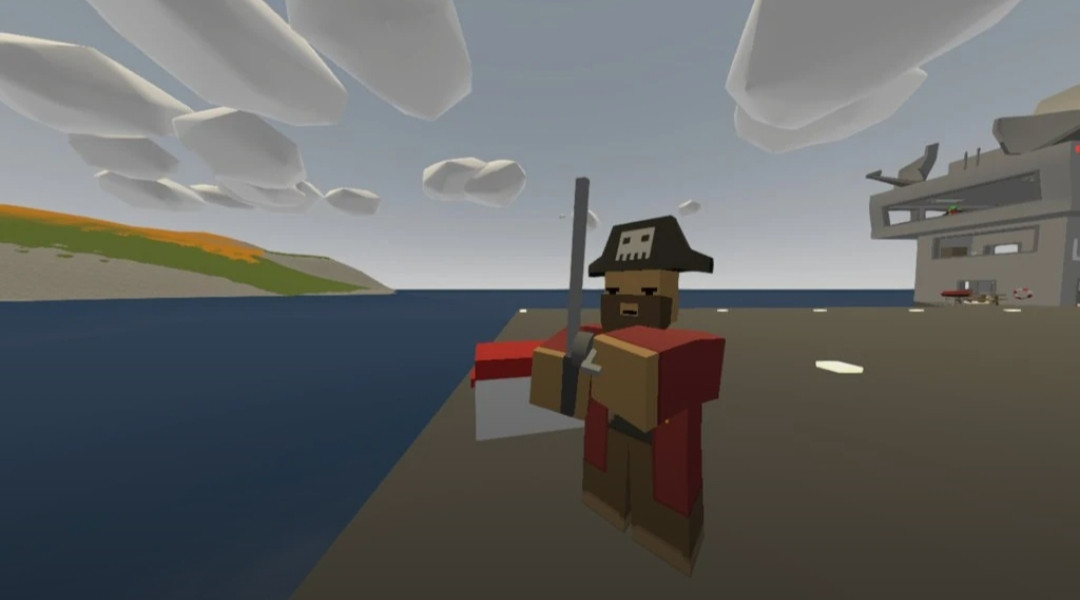
- You will need to find an Upgraded Fishing Rod (ID 1432), which you can spawn easily from the Cheats menu.
- After you have spawned the fishing rod, interact with Wallace again, and he will assign you another quest and also award +5 reputation.
The One That Got Away
- Meet and interact with Wallace the pirate, who is located outside, to the left of the ship.

- You will need to catch a Raw Squid (ID 1434), which you can spawn easily from the Cheats menu.
- Once you have spawned the Raw Squid, return to Wallace to receive +5 reputation.
The Great Escape
- You must meet and interact with P. Riso, who is located in the lowest ground level, hiding behind the stairs, which is the same area as the captain's deck.
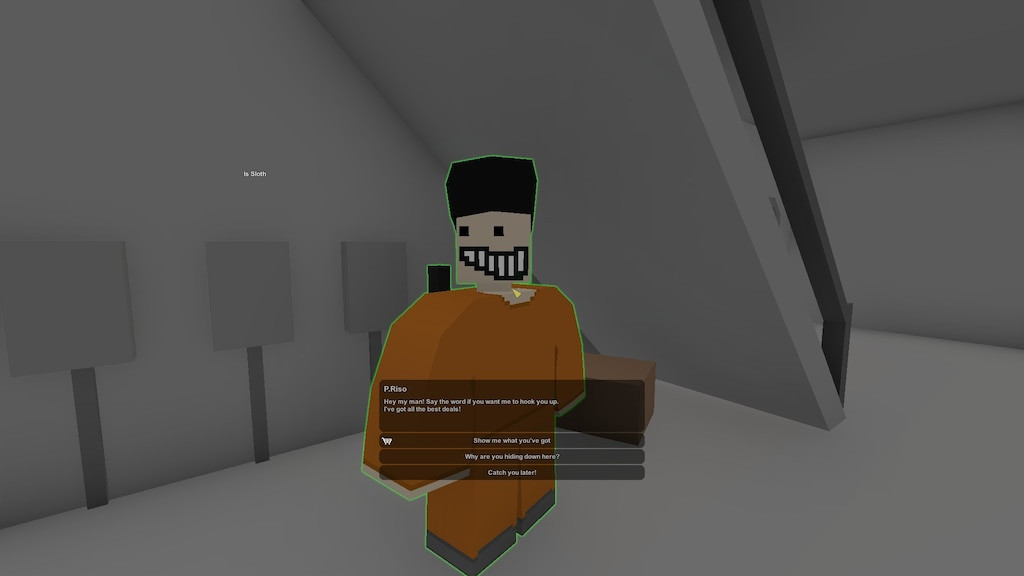
- Then you will need to find and interact with T. Rickster, who is located and locked up inside the prison jail, which is on the same level as the cafeteria.
- You will need to find the Upgrade Cake (ID 1431), which you spawn easily from the Cheats menu.
- After you have spawned the cake, give it to T. Rickster and you will receive +10 reputation.
Memoir
- Meet and Interact with Gwen. She is located outside, on the 3rd tent to the right.
- You will need to find the wedding ring that is lost under the ocean when Gwen first boards the Liberator. The location of the ring is right off from the catwalk where Ensign Simon (the officer that guards the catwalk when you first board the ship) is located. Start by walking down this ramp.
- Then you will want to make a jump from this position.
- Dive underwater and start looking for the ring. You will want to be looking for a yellow squared-shape object which is the wedding ring. Make sure you also max out your oxygen level in the Skills menu before you dive underwater, and also do this quest during the daytime as it's extremely difficult to search for it at night. Here is a picture of the wedding ring.
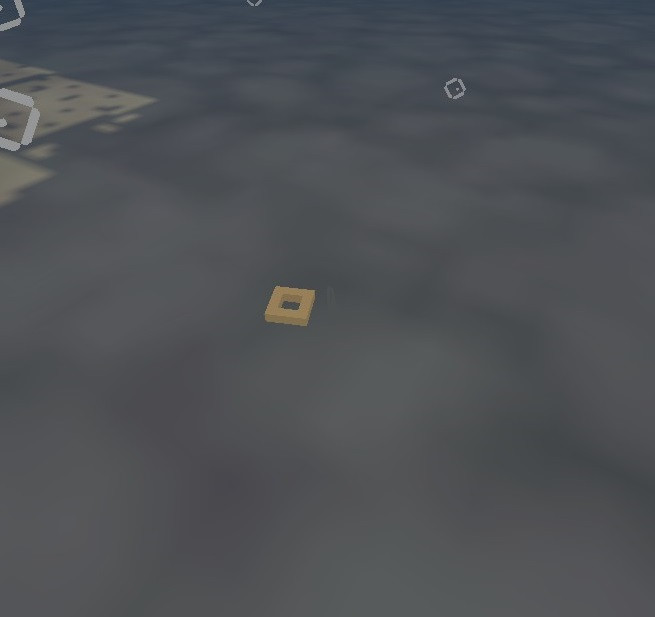
- After you have found and retrieved the ring, head back and interact with Gwen and receive +5 reputation.
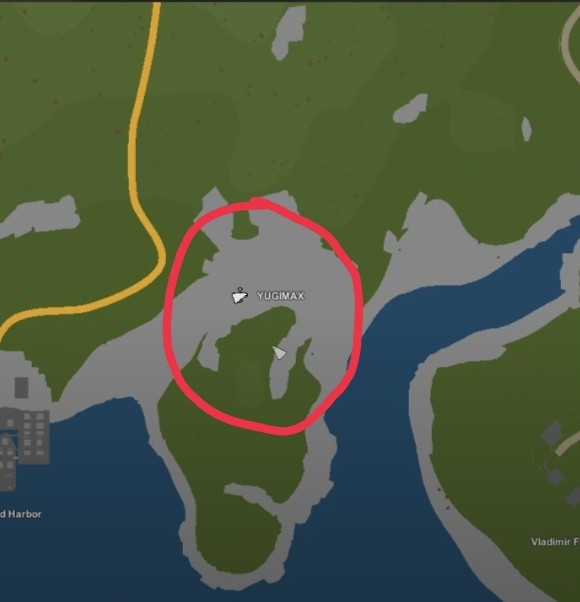
Sparks
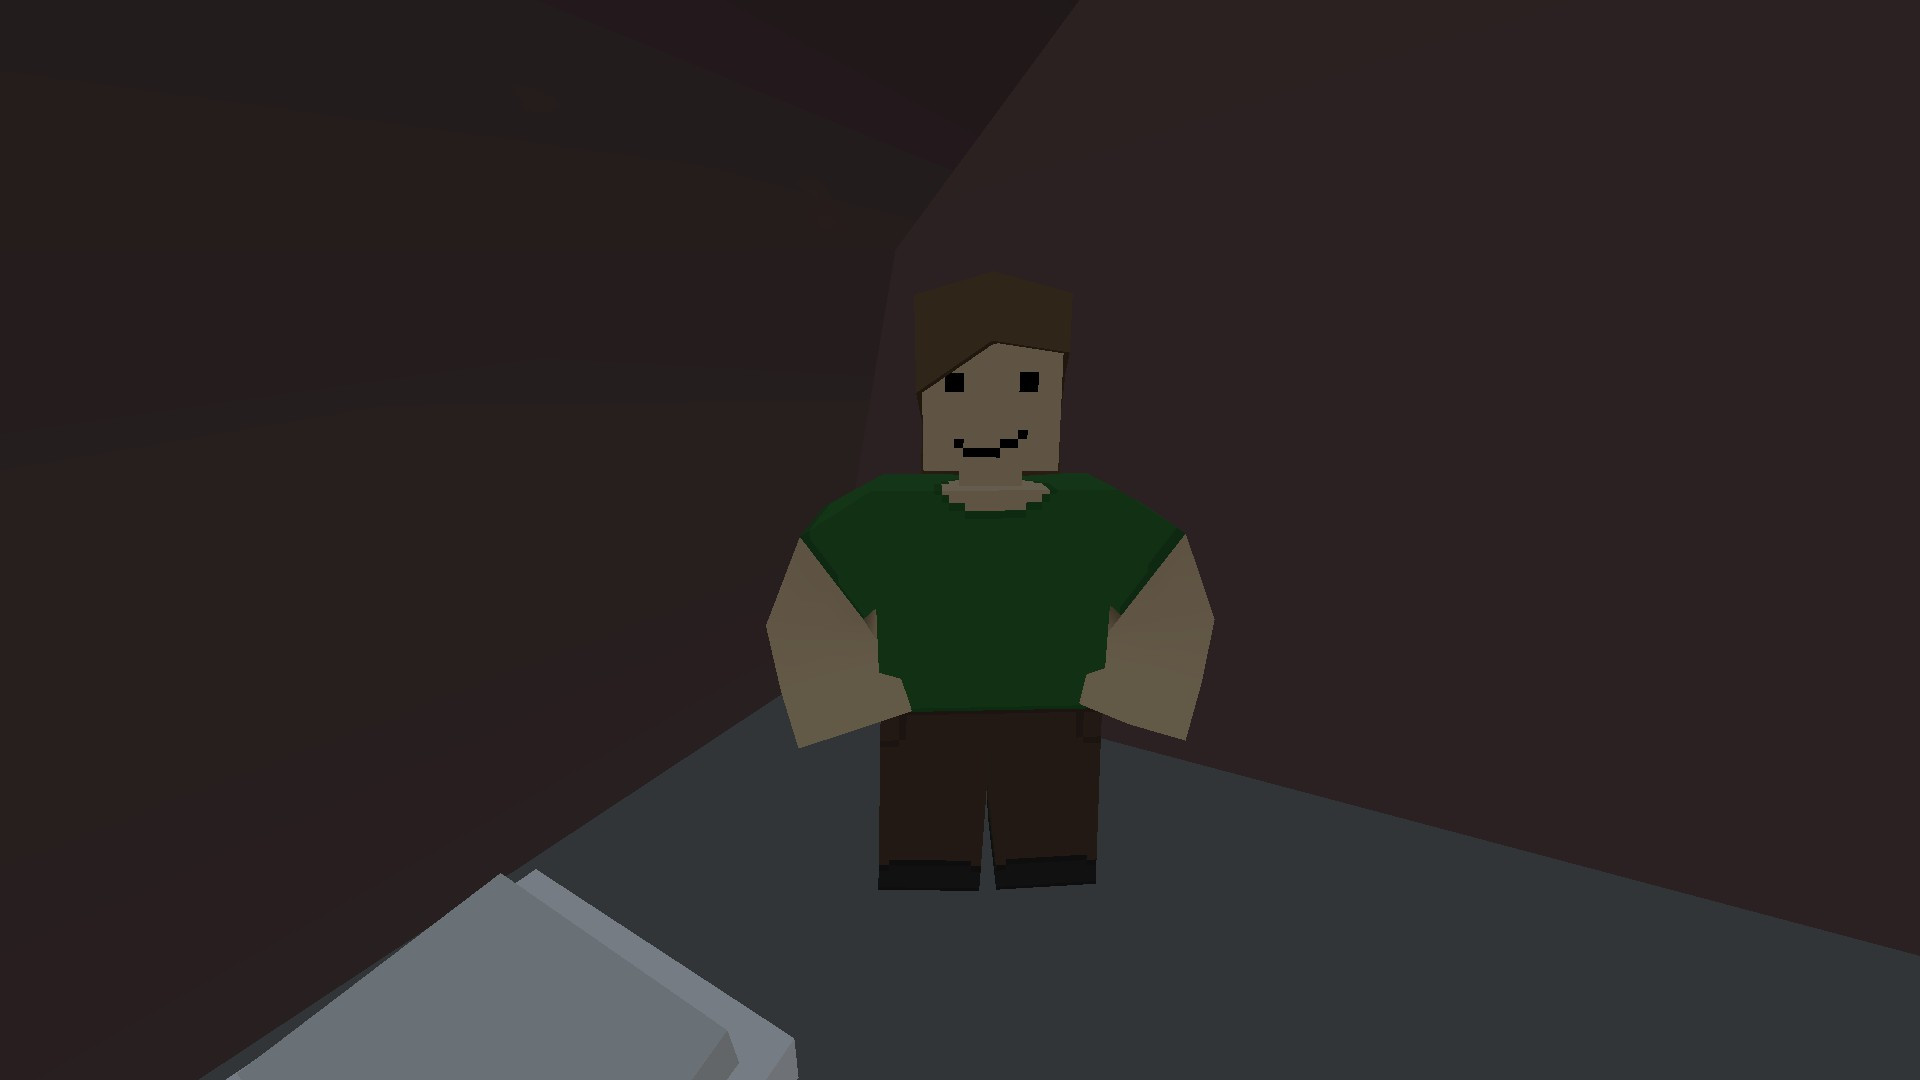
- Meet up and interact with Ensign Cliff, who is located in the crew cabins, on the same level as the cafeteria.
- You will want to travel to Jhavesk and kill the Lightningstrike boss, which is a lightning-powered mega zombie with a lightning blast ability. Here's a picture of the boss.
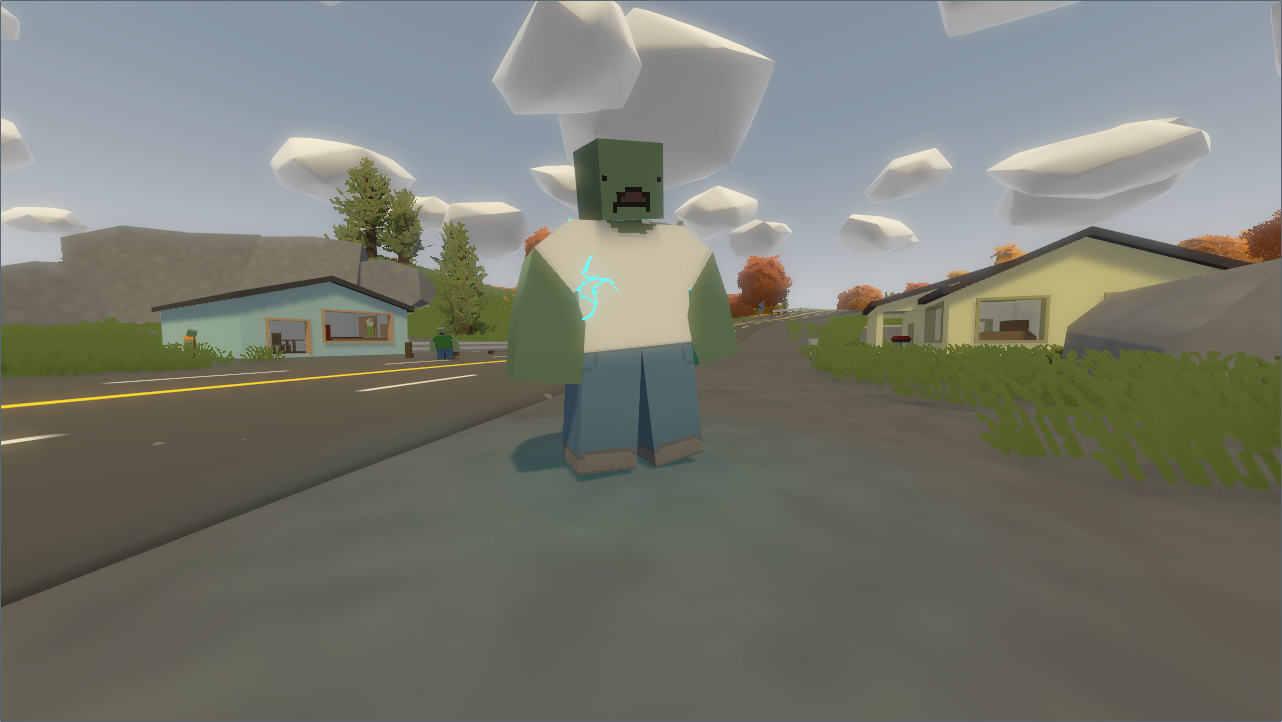
- You will want to spawn the Thick Heatwave (ID 57489). Once you have identified the boss, just keep shooting until the boss is dead, and the damage from the Thick Heatwave will easily obliterate the boss in less than 5 seconds.
- Return to the Liberator and interact with Ensign Cliff to receive +20 reputation. It is recommended that after you defeat this boss, you don't return back to the Liberator yet. Instead, travel to the locations of the 2 remaining bosses and kill them off to save yourself the hassle of traveling back and forth before returning to the Liberator. Make sure to also meet and interact with all 3 of the boss fight NPCs first before heading out.
Aftershock
- Meet and Interact with Peter. He is located outside, on the 2nd tent to the left.

- You will want to travel to Yekativurg and kill the Groundpounder boss, which is just a mega zombie with a ground-pounding ability. Here is a picture of the Groundpounder boss.
- You will want to spawn the Thick Heatwave (ID 57489). Once you have identified the boss, just keep shooting until the boss is dead; the damage from the Thick Heatwave will easily obliterate the boss in less than 5 seconds.
- Return to the Liberator and interact with Peter to receive +20 reputation. It is recommended that after you defeat this boss, you don't return back to the Liberator yet, and instead travel to the locations of the 2 remaining bosses and kill them off to save you the hassle of traveling back and forth before returning to the Liberator. Make sure to meet and interact with all 3 of the boss fight NPCs first before heading out.
Scorched Earth
- Meet and interact with Norbert, who is located outside, on the first tent to the left.


- You will want to travel to Novobirsk and kill the Flamethrower boss, which is a fire-powered mega zombie with a fire blast ability. Here's a picture of the boss.
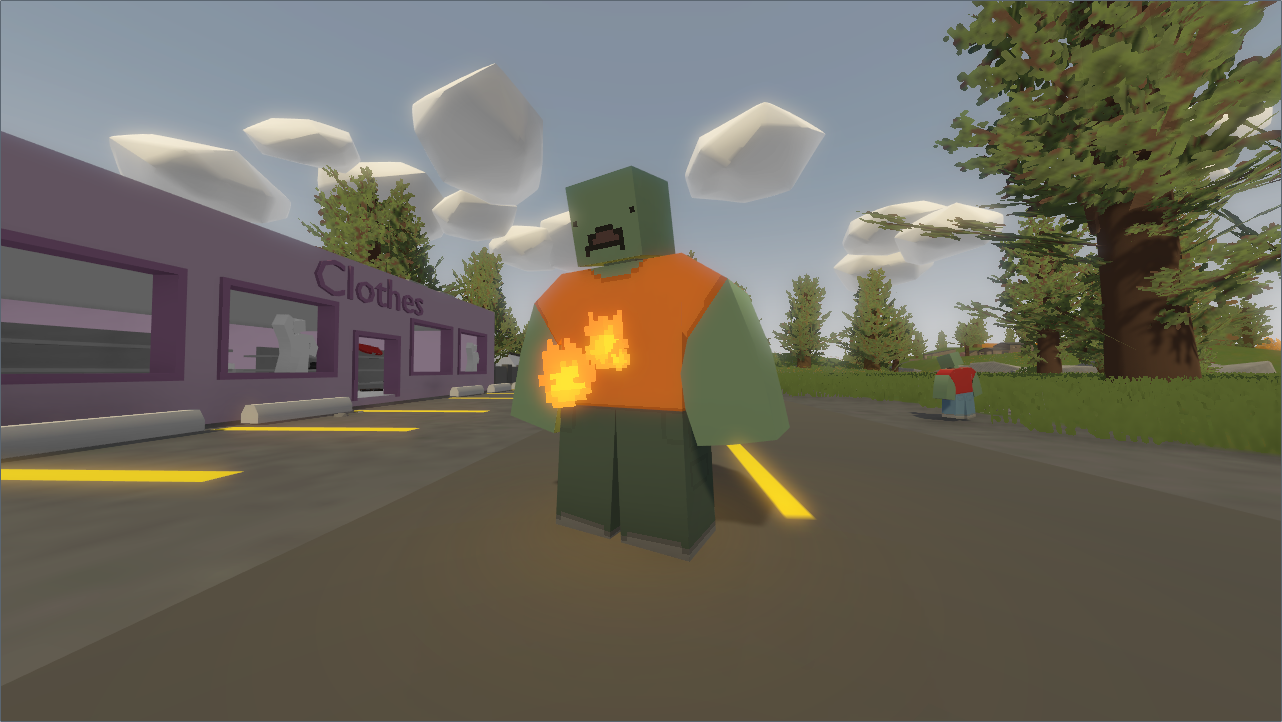
- You will want to spawn the Thick Heatwave (ID 57489). Once you have identified the boss, just keep shooting until the boss is dead, and the damage from the Thick Heatwave will easily obliterate the boss in less than 5 seconds.
- Return to the Liberator and interact with Norbert to receive +20 reputation. It is also recommended that after you defeat this boss, you don't return back to the Liberator yet, and instead travel to the locations of the 2 remaining bosses and kill them off to save yourself the hassle of traveling back and forth before returning to the Liberator. Also, make sure to meet and interact with all 3 of the boss fight NPCs first before heading out.
Top Gun
Side NoteYou will need to reach Major Rank before you gain access to this quest, but you don't actually need to complete this quest as you will have already reached Major rank prior to this. |
- Meet and Interact with Andy. He is located outside, standing in front of the fighter jet.
- You will first need to find the Jet Compressor, which is located at the oil rig south of Kivgrad Harbor above the ocean. You will need sufficient oxygen, which you can upgrade to the max from the Skills menu before starting this mission, since the Jet Compressor is located under the water underneath the rig. You will also need to find the Fighter Pilot Helmet (ID 1472), Fighter Pilot Top (ID 1473), and the Fighter Pilot Bottom (ID 1474), which you can all spawn easily from the Cheats menu. You will also need to spawn the Gasmask and several filters (ID 1271 and 1272) as you are heading into a deadzone (radiation zone). Finally, you will need a Helicopter from the Cheats menu, which is the only way to reach the oil rig.
- Dive underwater and locate the Jet Compressor.
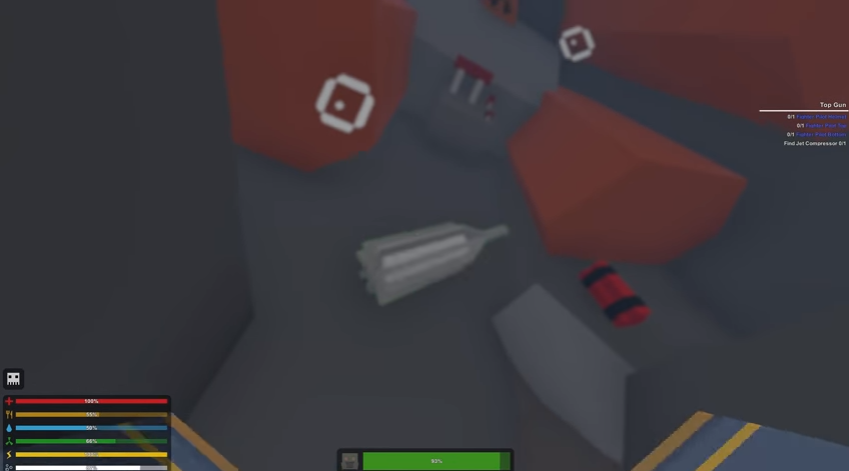
- After you have collected everything, head back to the Liberator and interact with Andy, where you will receive +5 reputation and also the ability to pilot the fighter jet now.

|
PS4
|
|
Related Guides
| Welcome to the trophy guide for this open-world zombies survival RPG game. In this guide, you will find all the necessary tips and strategies for adding this sweet ultra-rare platinum to your collection. |