DIY Fabric Yo-Yo Necklace with Clover's "Quick" Yo-Yo Maker

*This post was created through a paid partnership with Clover. However, all opinions are honest and 100% my own.
*This post contains affiliate links. For more information, please see my disclosure page here.
Grandmillenial style is still holding strong as a popular trend in design and fashion, and I love its feminine and vintage-inspired feel. Today I am so excited to partner with Clover and take a nod from the grandmillenial style to create a sweet, handmade necklace using Clover’s amazing “Quick” Yo-Yo Makers and some scrap fabric.
When choosing a color palette, I recommend finding an inspiration fabric that you really like as the starting point. Then pull colors from that inspiration fabric. For this project, I used 5 different fabrics to create beautiful dimension and vintage-inspired charm.

Want to see more projects using Clover’s amazing products? Then click HERE.
This is the third time that I used Clover’s “Quick” Yo-Yo Maker for a blog project, and just like their pom-pom makers and tassel makers it is so easy and fun to use. For my first fabric yo-yo project, I created a Fabric Yo-Yo Wreath and for my most recent project, I created Fabric Yo-Yo Earrings. The beauty in making yo-yos is that you can use up scrap fabric, and they can be used in many different applications. When sewn together they can make a charming quilt, or they can be added to different projects to create that sweet factor.
For your convenience, I created a step-by-step video so you can see how I made the fabric yo-yo necklace using Clover’s “Quick” Yo-Yo Maker. Then continue below to follow the step-by-step images to make your own DIY Fabric Yo-Yo Necklace.
Enjoy the video below to learn how to make your own fabric yo-yo necklace with Clover’s “Quick” Yo-Yo Maker, then follow along for the step-by-step tutorial to make your own!
Follow Below for the Step-By-Step Picture Tutorial

To make your own fabric yo-yo necklace, you will need:
Step 1: Make the Fabric Yo-Yos using Clover’s “Quick” Yo-Yo Maker
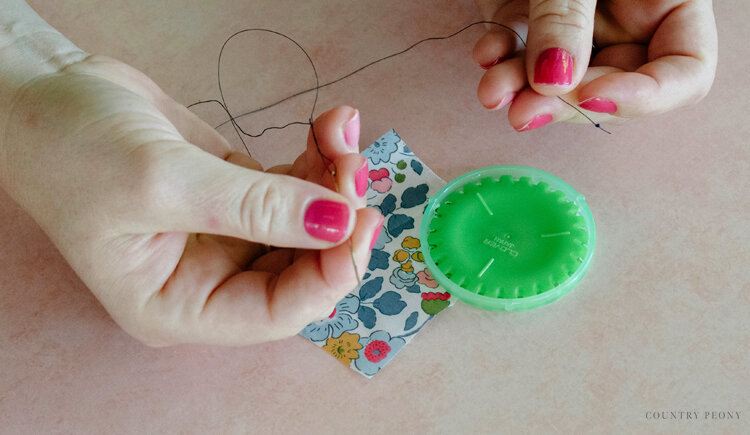
Prepare the needle with thread, and double knot the thread.
Using the “Quick” Yo-Yo Maker as a guideline, cut a fabric square that is a 1/4” wider than the maker on all sides.
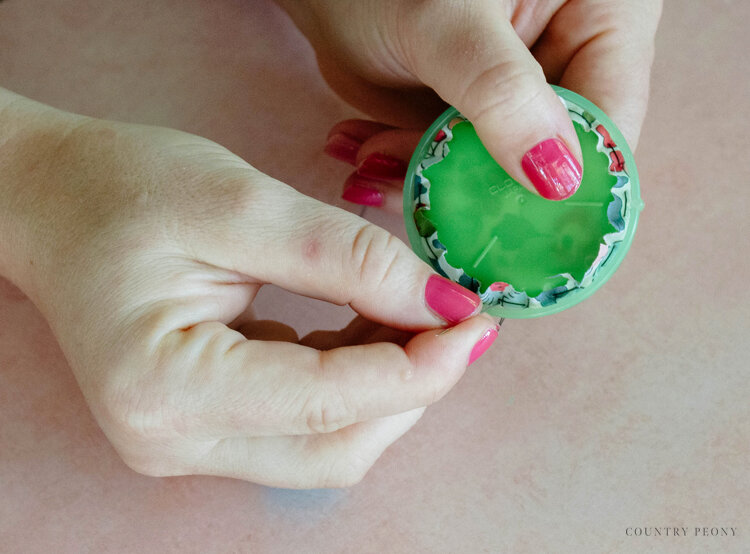
Separate the “Quick” Yo-Yo Maker, and place the fabric in between the maker plate and disk.
Place the right side of the fabric peeking through the hole in the plate.
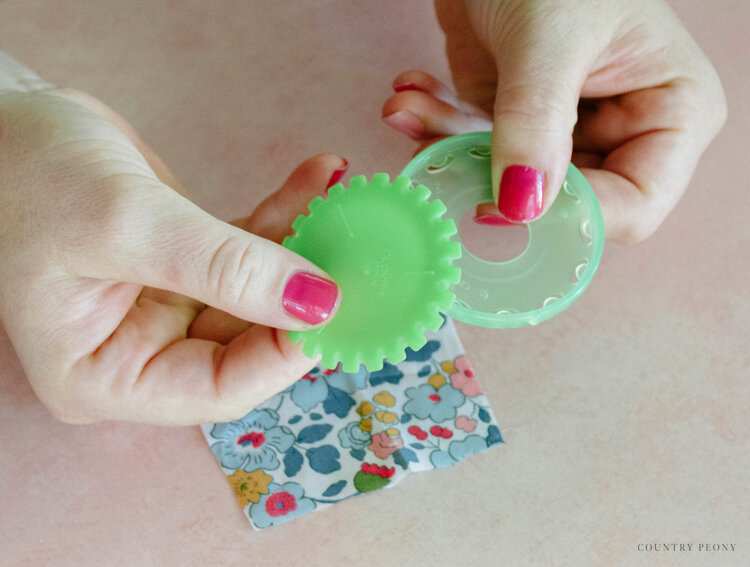
Align the disk lines with the plate marks, and snap into place.
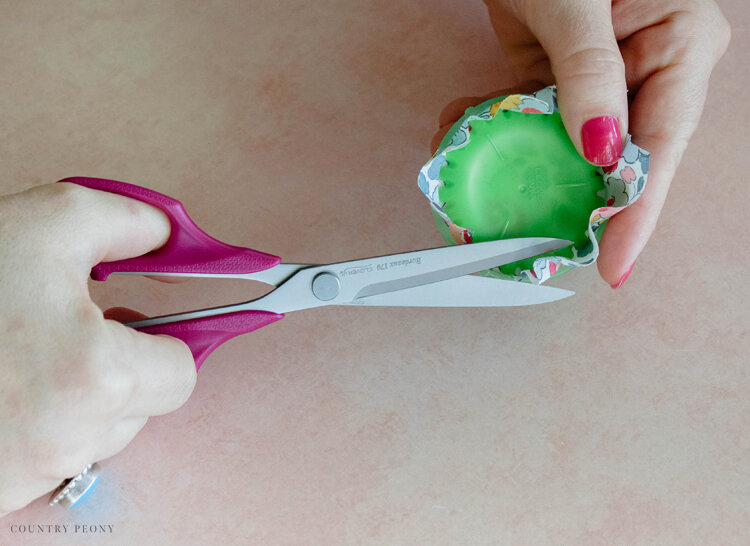
Trim the fabric along the “Quick” Yo-Yo Maker plate line.
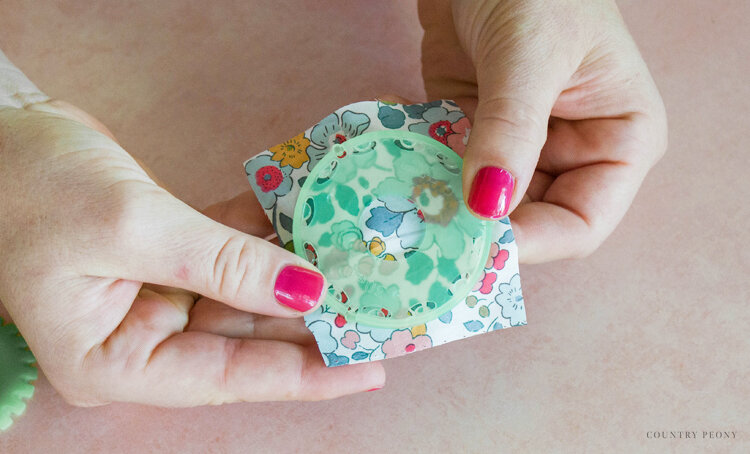
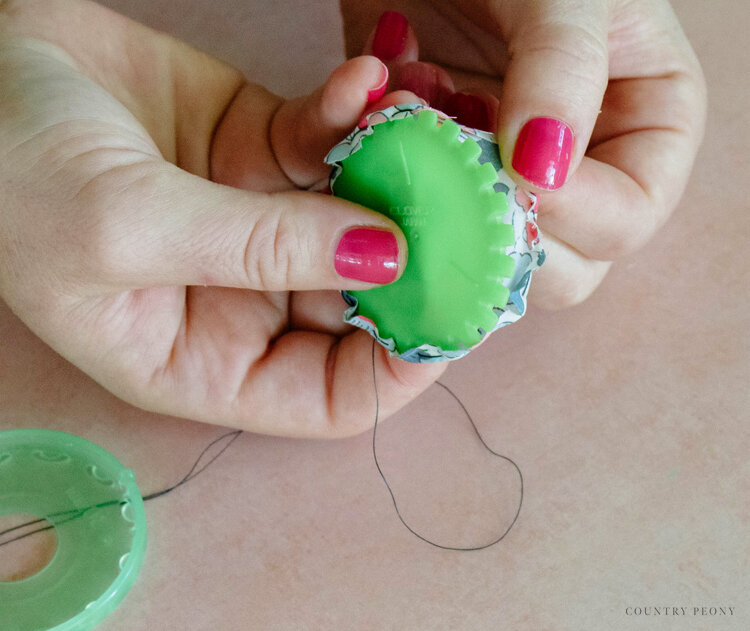
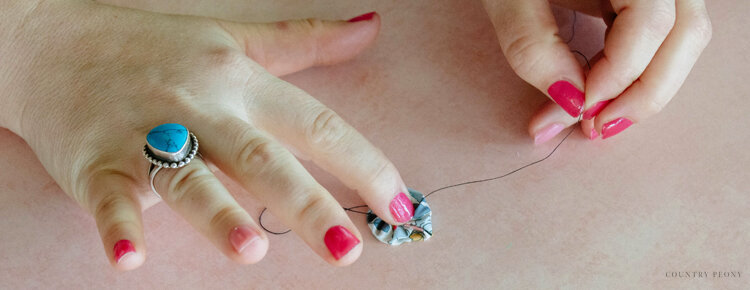
With the fabric folded in, thread through the fabric and insert the needle through the hole from the disk side to the plate side.
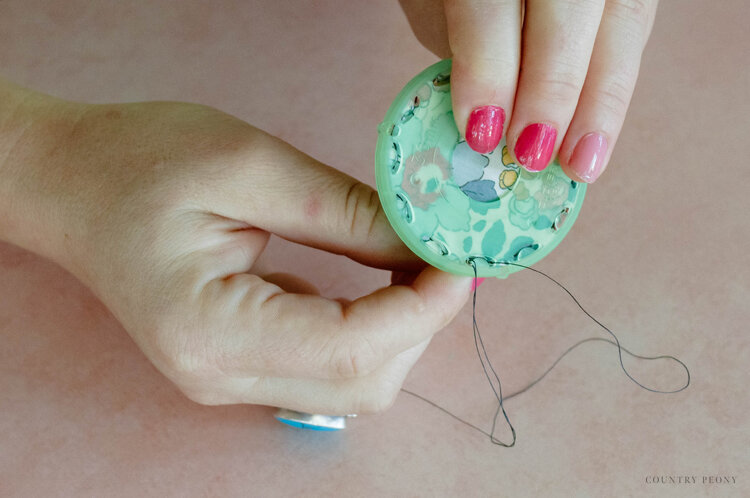
Repeat until you sew all the way around the circumference of the “Quick” Yo-Yo Maker.
Once you reach the end, sew one more stitch after the first stitch.
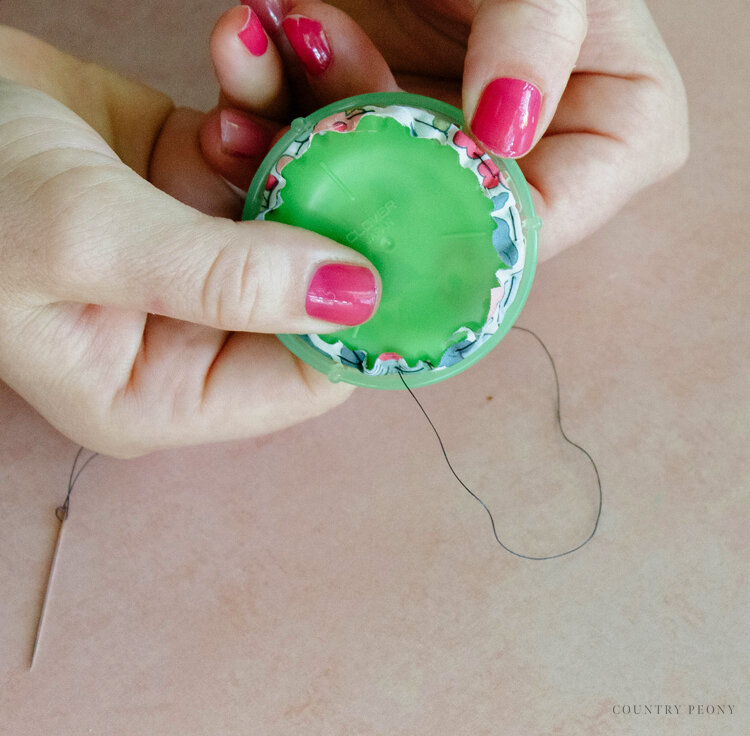
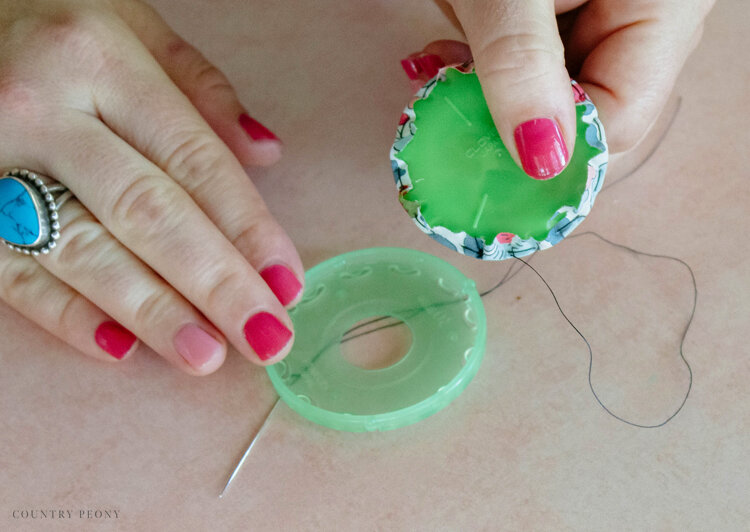
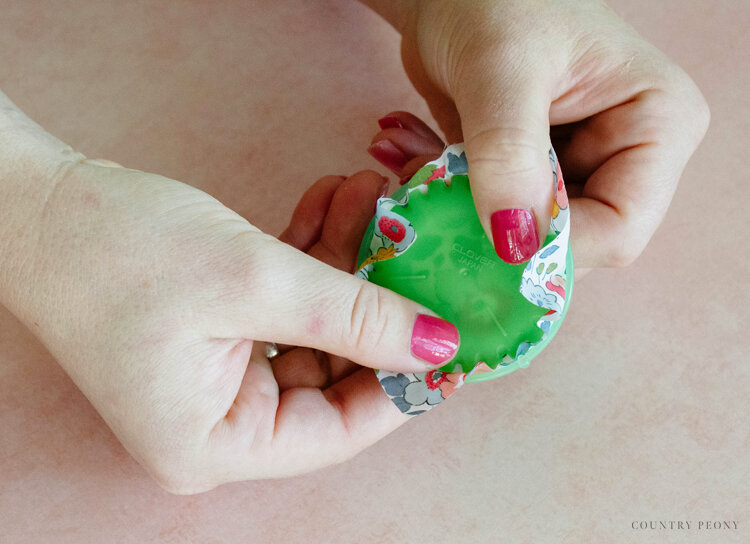
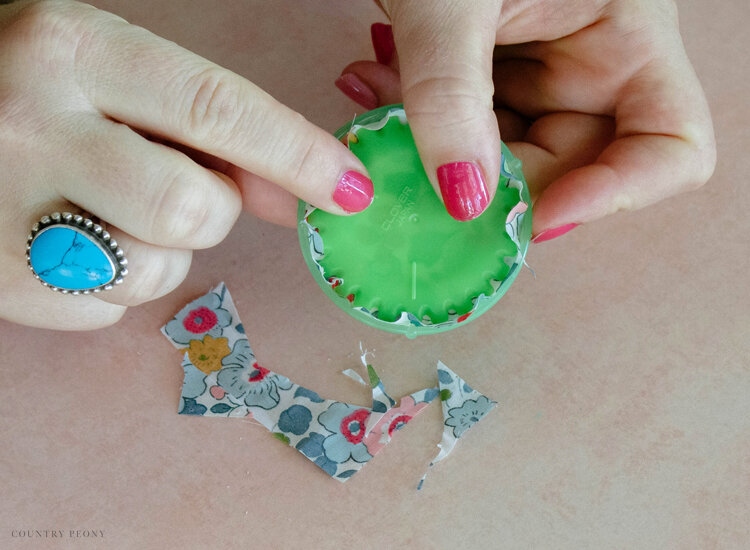
Remove the disk from the plate.
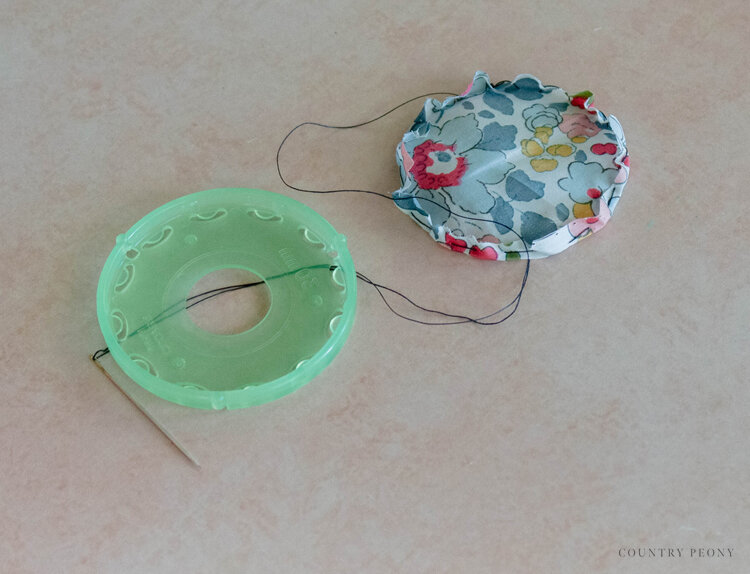
Remove the fabric from the disk.
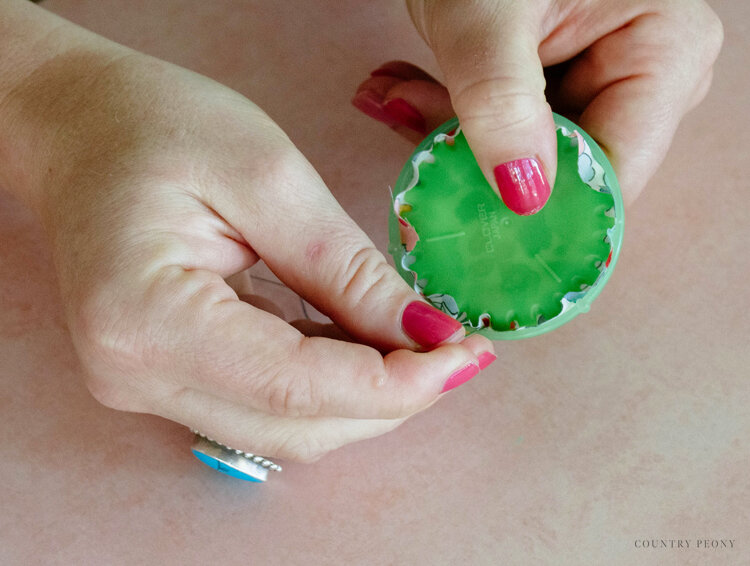
Pull the thread to create the circular shape.
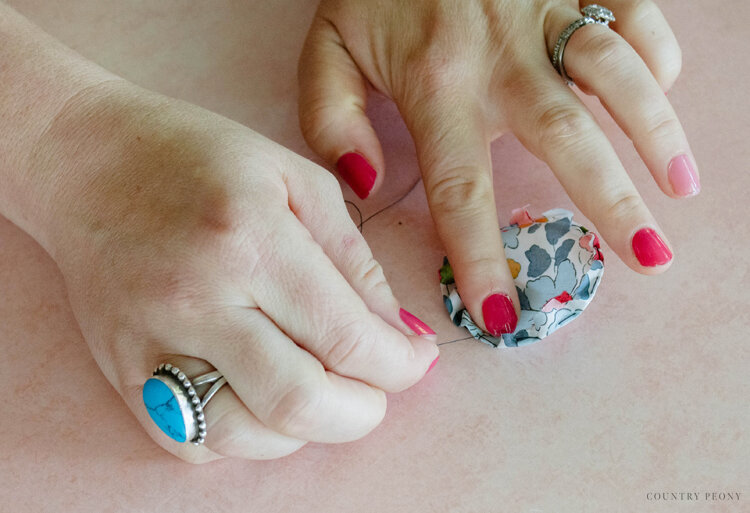
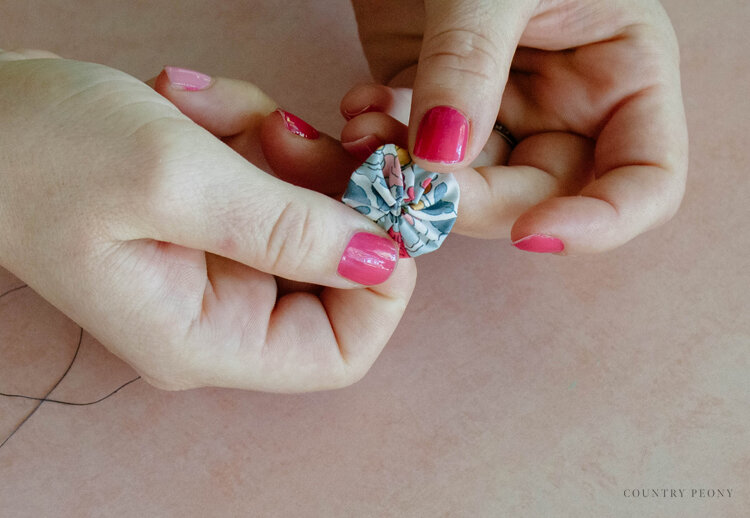
Fluff up the yo-yo to create the round shape.
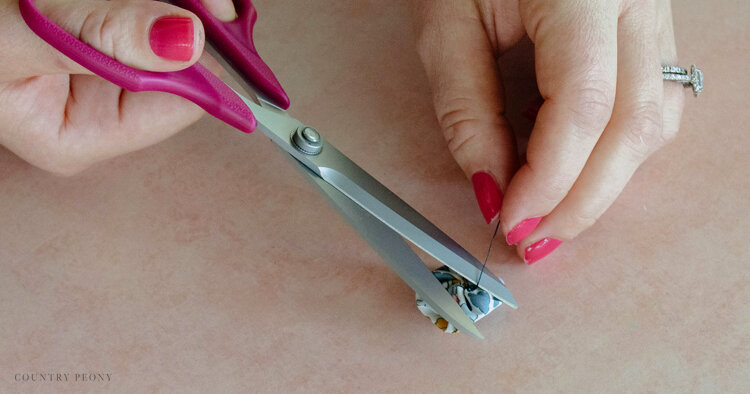
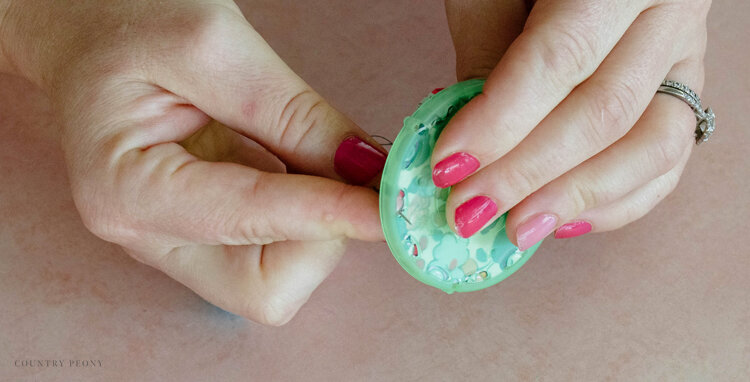
Double knot the thread to create a secure hold on the fabric yo-yo, and trim the thread.

Make several fabric yo-yos in various sizes with different fabric patterns and colors.
I created 4 small fabric yo-yos and 6 large yo-yos for this DIY.
Step 2: Create a Pattern with the Fabric Yo-Yos on the Felt

Step 3: One at a Time, Attach the Fabric Yo-Yos to the Felt with Permanent Fabric Glue

*I recommend using glue instead of a needle and thread to secure the fabric yo-yos to the felt, because it is easier and quicker to adhere all sides of the yo-yo to the felt.


Step 4: Trim the Felt Around the Fabric Yo-Yos to Create the Necklace Base


Step 5: Cut the Ribbon

Make sure the ribbon is long enough to tie around the back of your neck.

*Attach fabric glue to the end of the ribbons to avoid raveling.
Step 6: Attach the Ribbon Ends to the Back of the Felt with Fabric Glue

Step 7: Enjoy your Custom, Fabric Yo-Yo Necklace!

I had so much fun making this grandmillenial inspired fabric yo-yo necklace. I hope you enjoy making yours, just as much!

Thank you so much to Clover for the opportunity to make this very sweet and vintage-inspired necklace.

I believe crafting is more fun when we share our projects. Please email me at elizabeth@countrypeony.com, or please tag me @thecountrypeony or #countrypeony to show me your beautiful, custom creations!
Thank you so much for following along!

