csm table

2019 July 6 - Harbor Freight Table

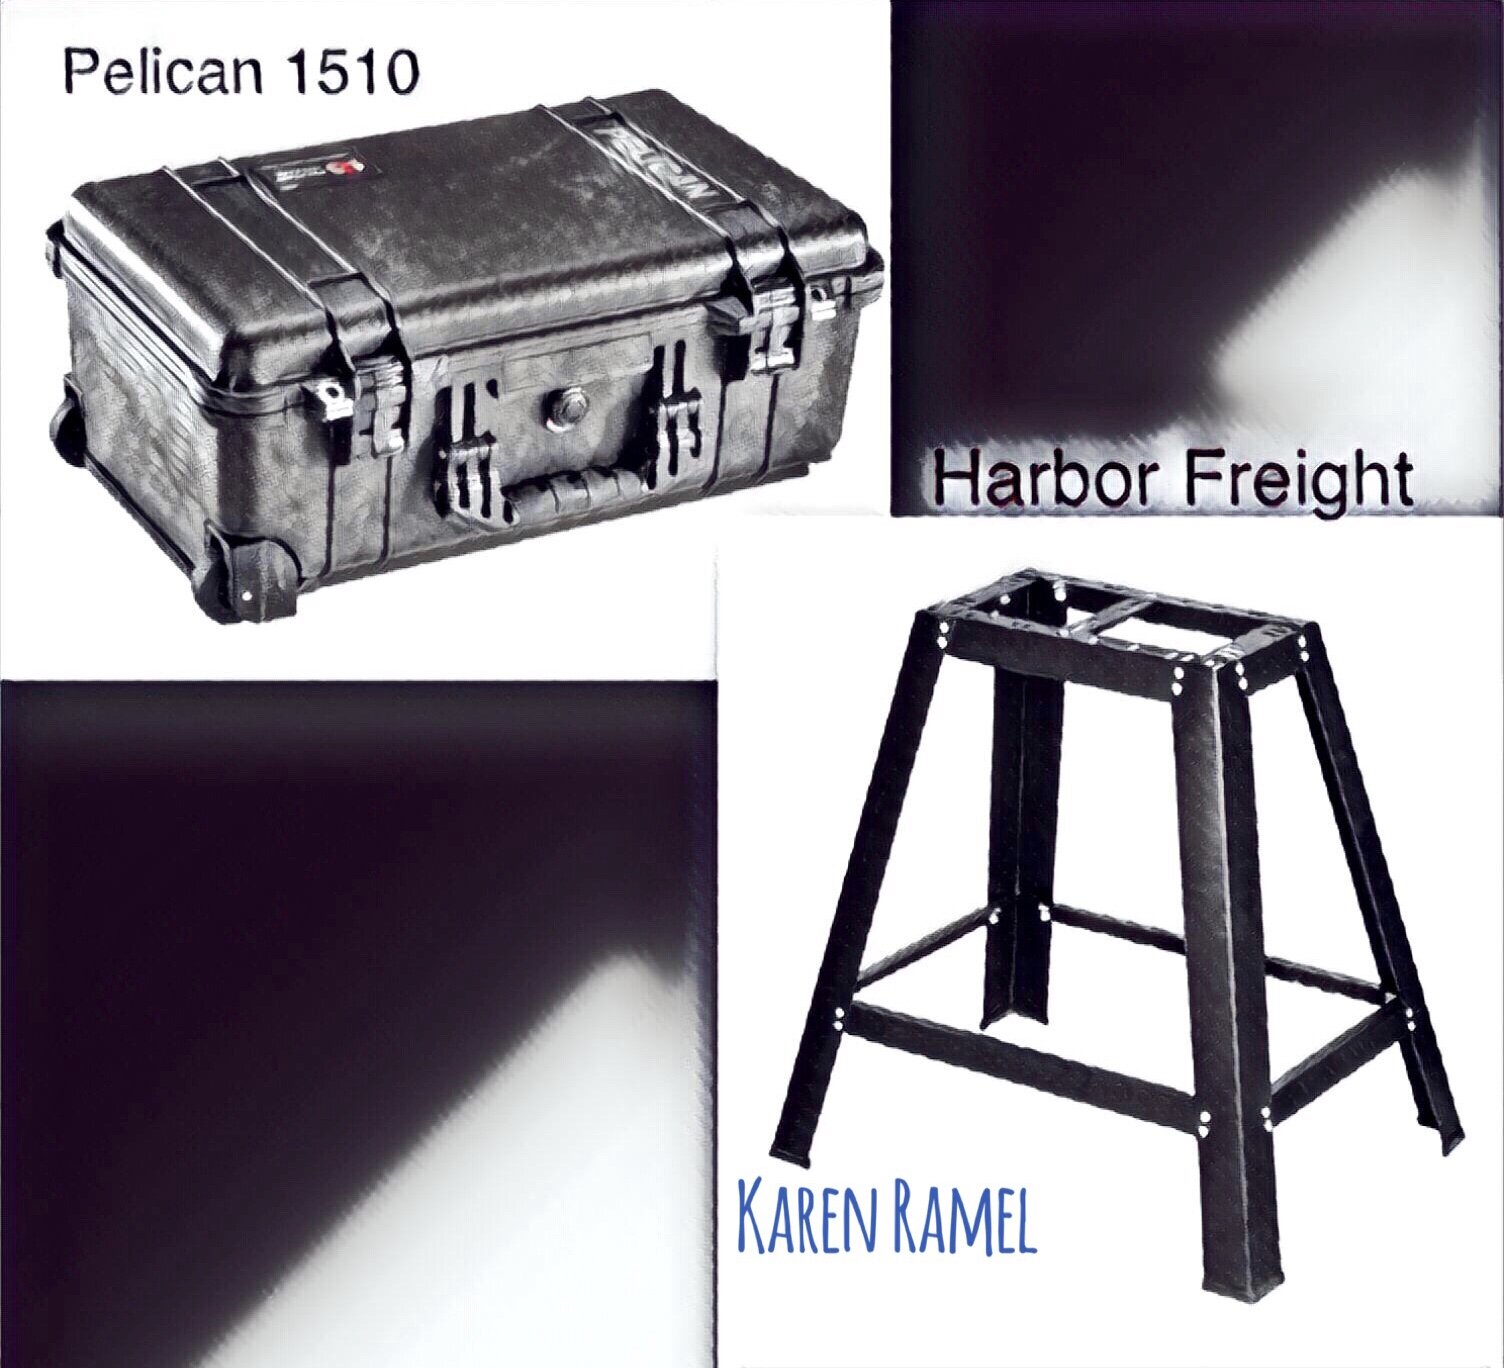
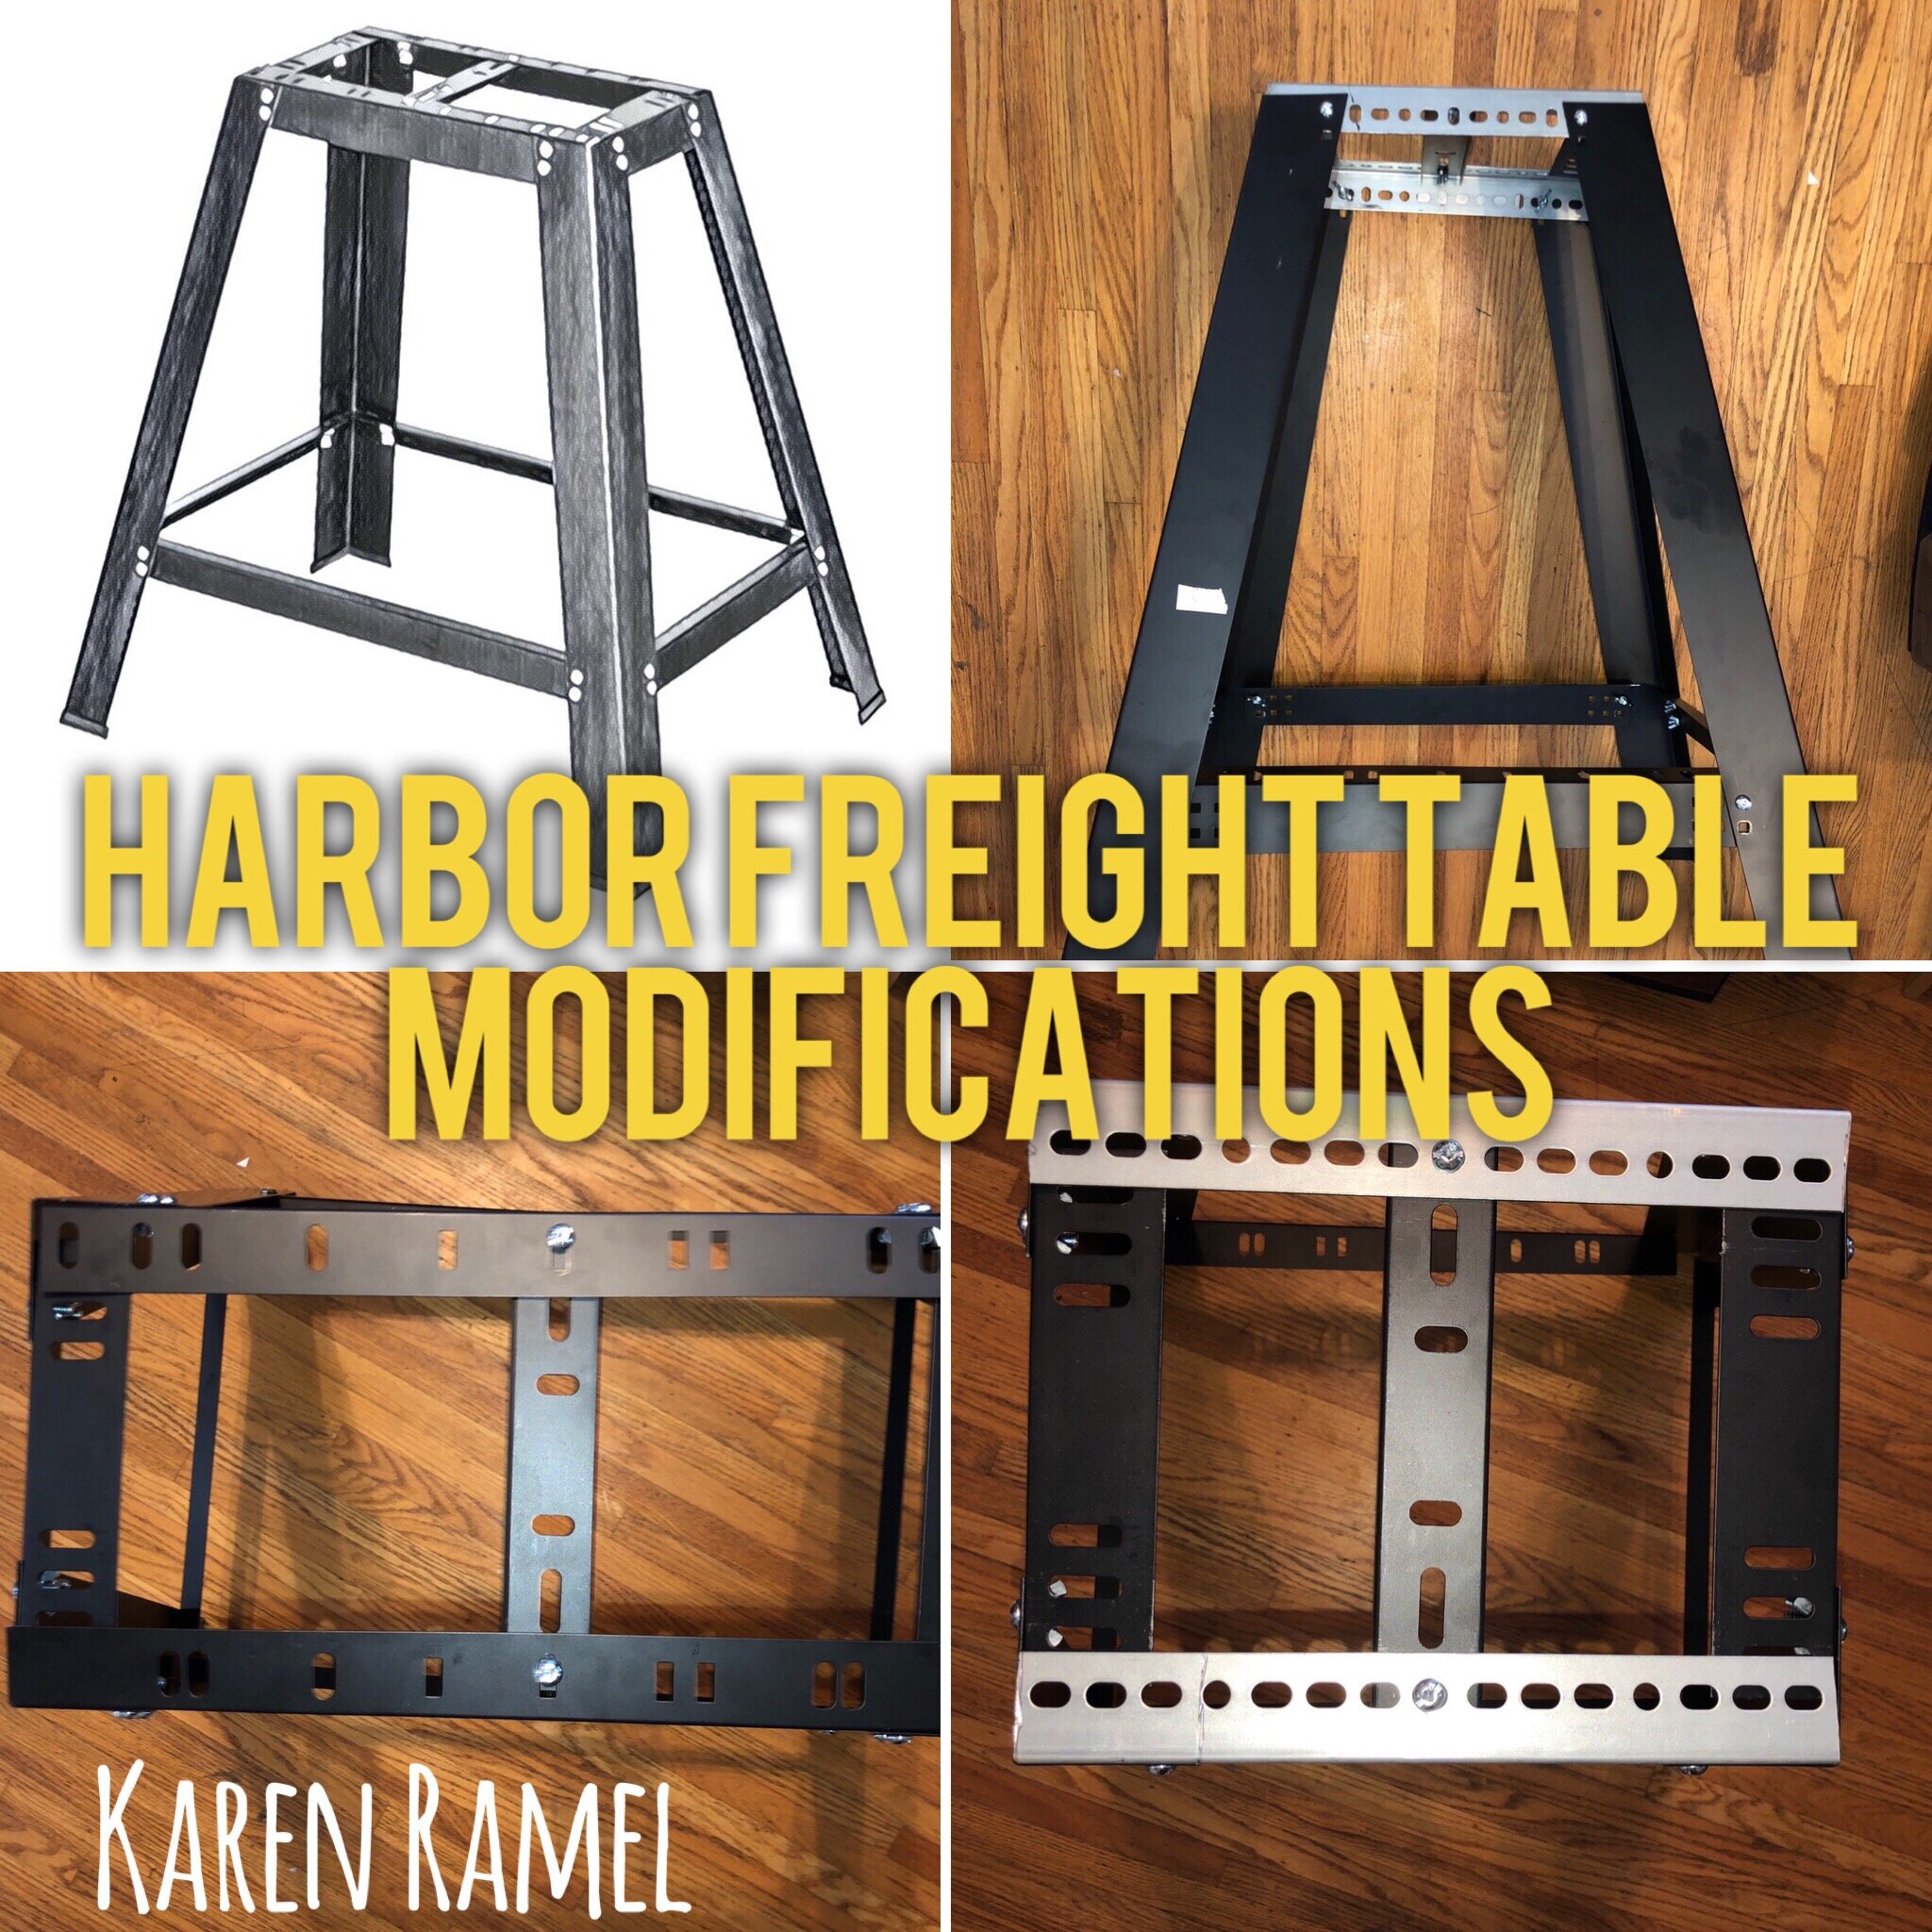
My Goal: Configure a Pelican 1510 to secure my CSM and also contain a sturdy but lightweight table.

JULY 6: Inspired by the idea to have a lighter CSM travel with table option, today my boyfriend and I are overnighting in Bellingham, Wa to pickup a Harbor Freight inexpensive and light but sturdy table.

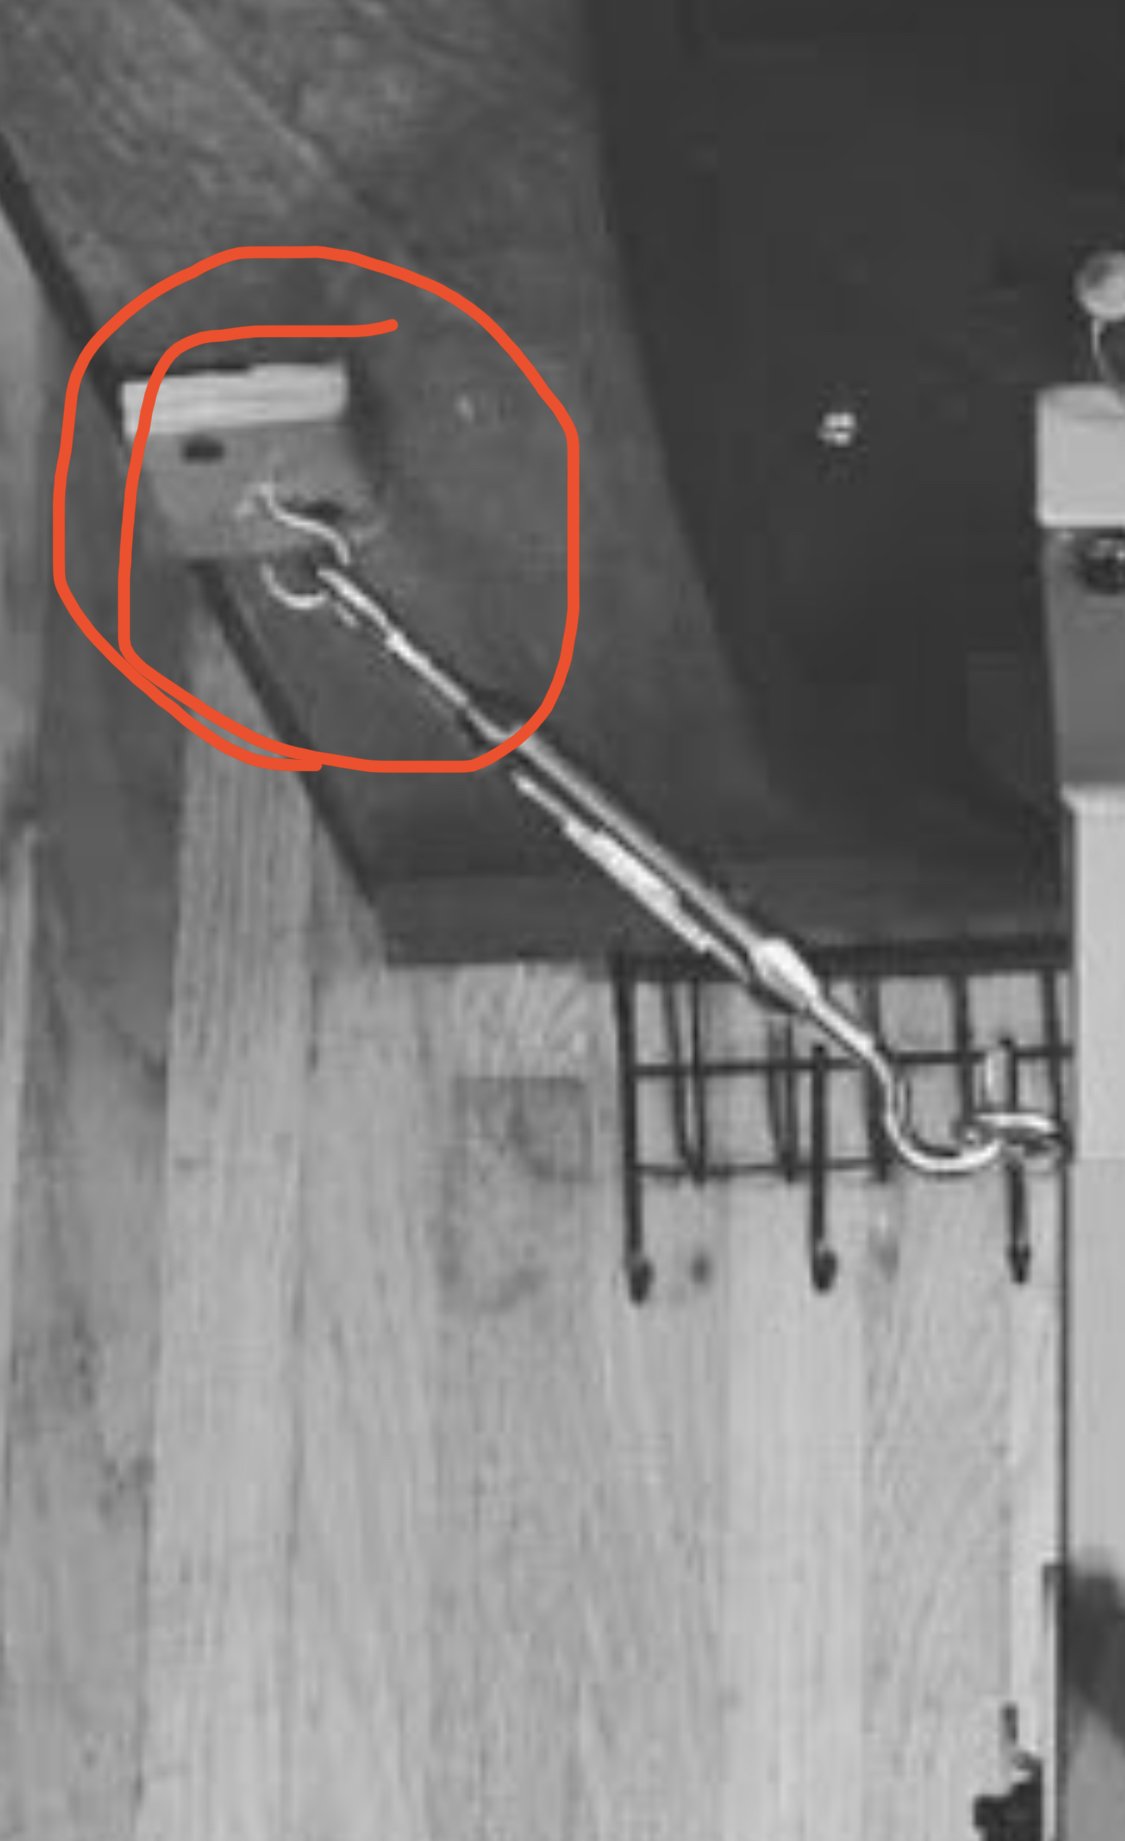
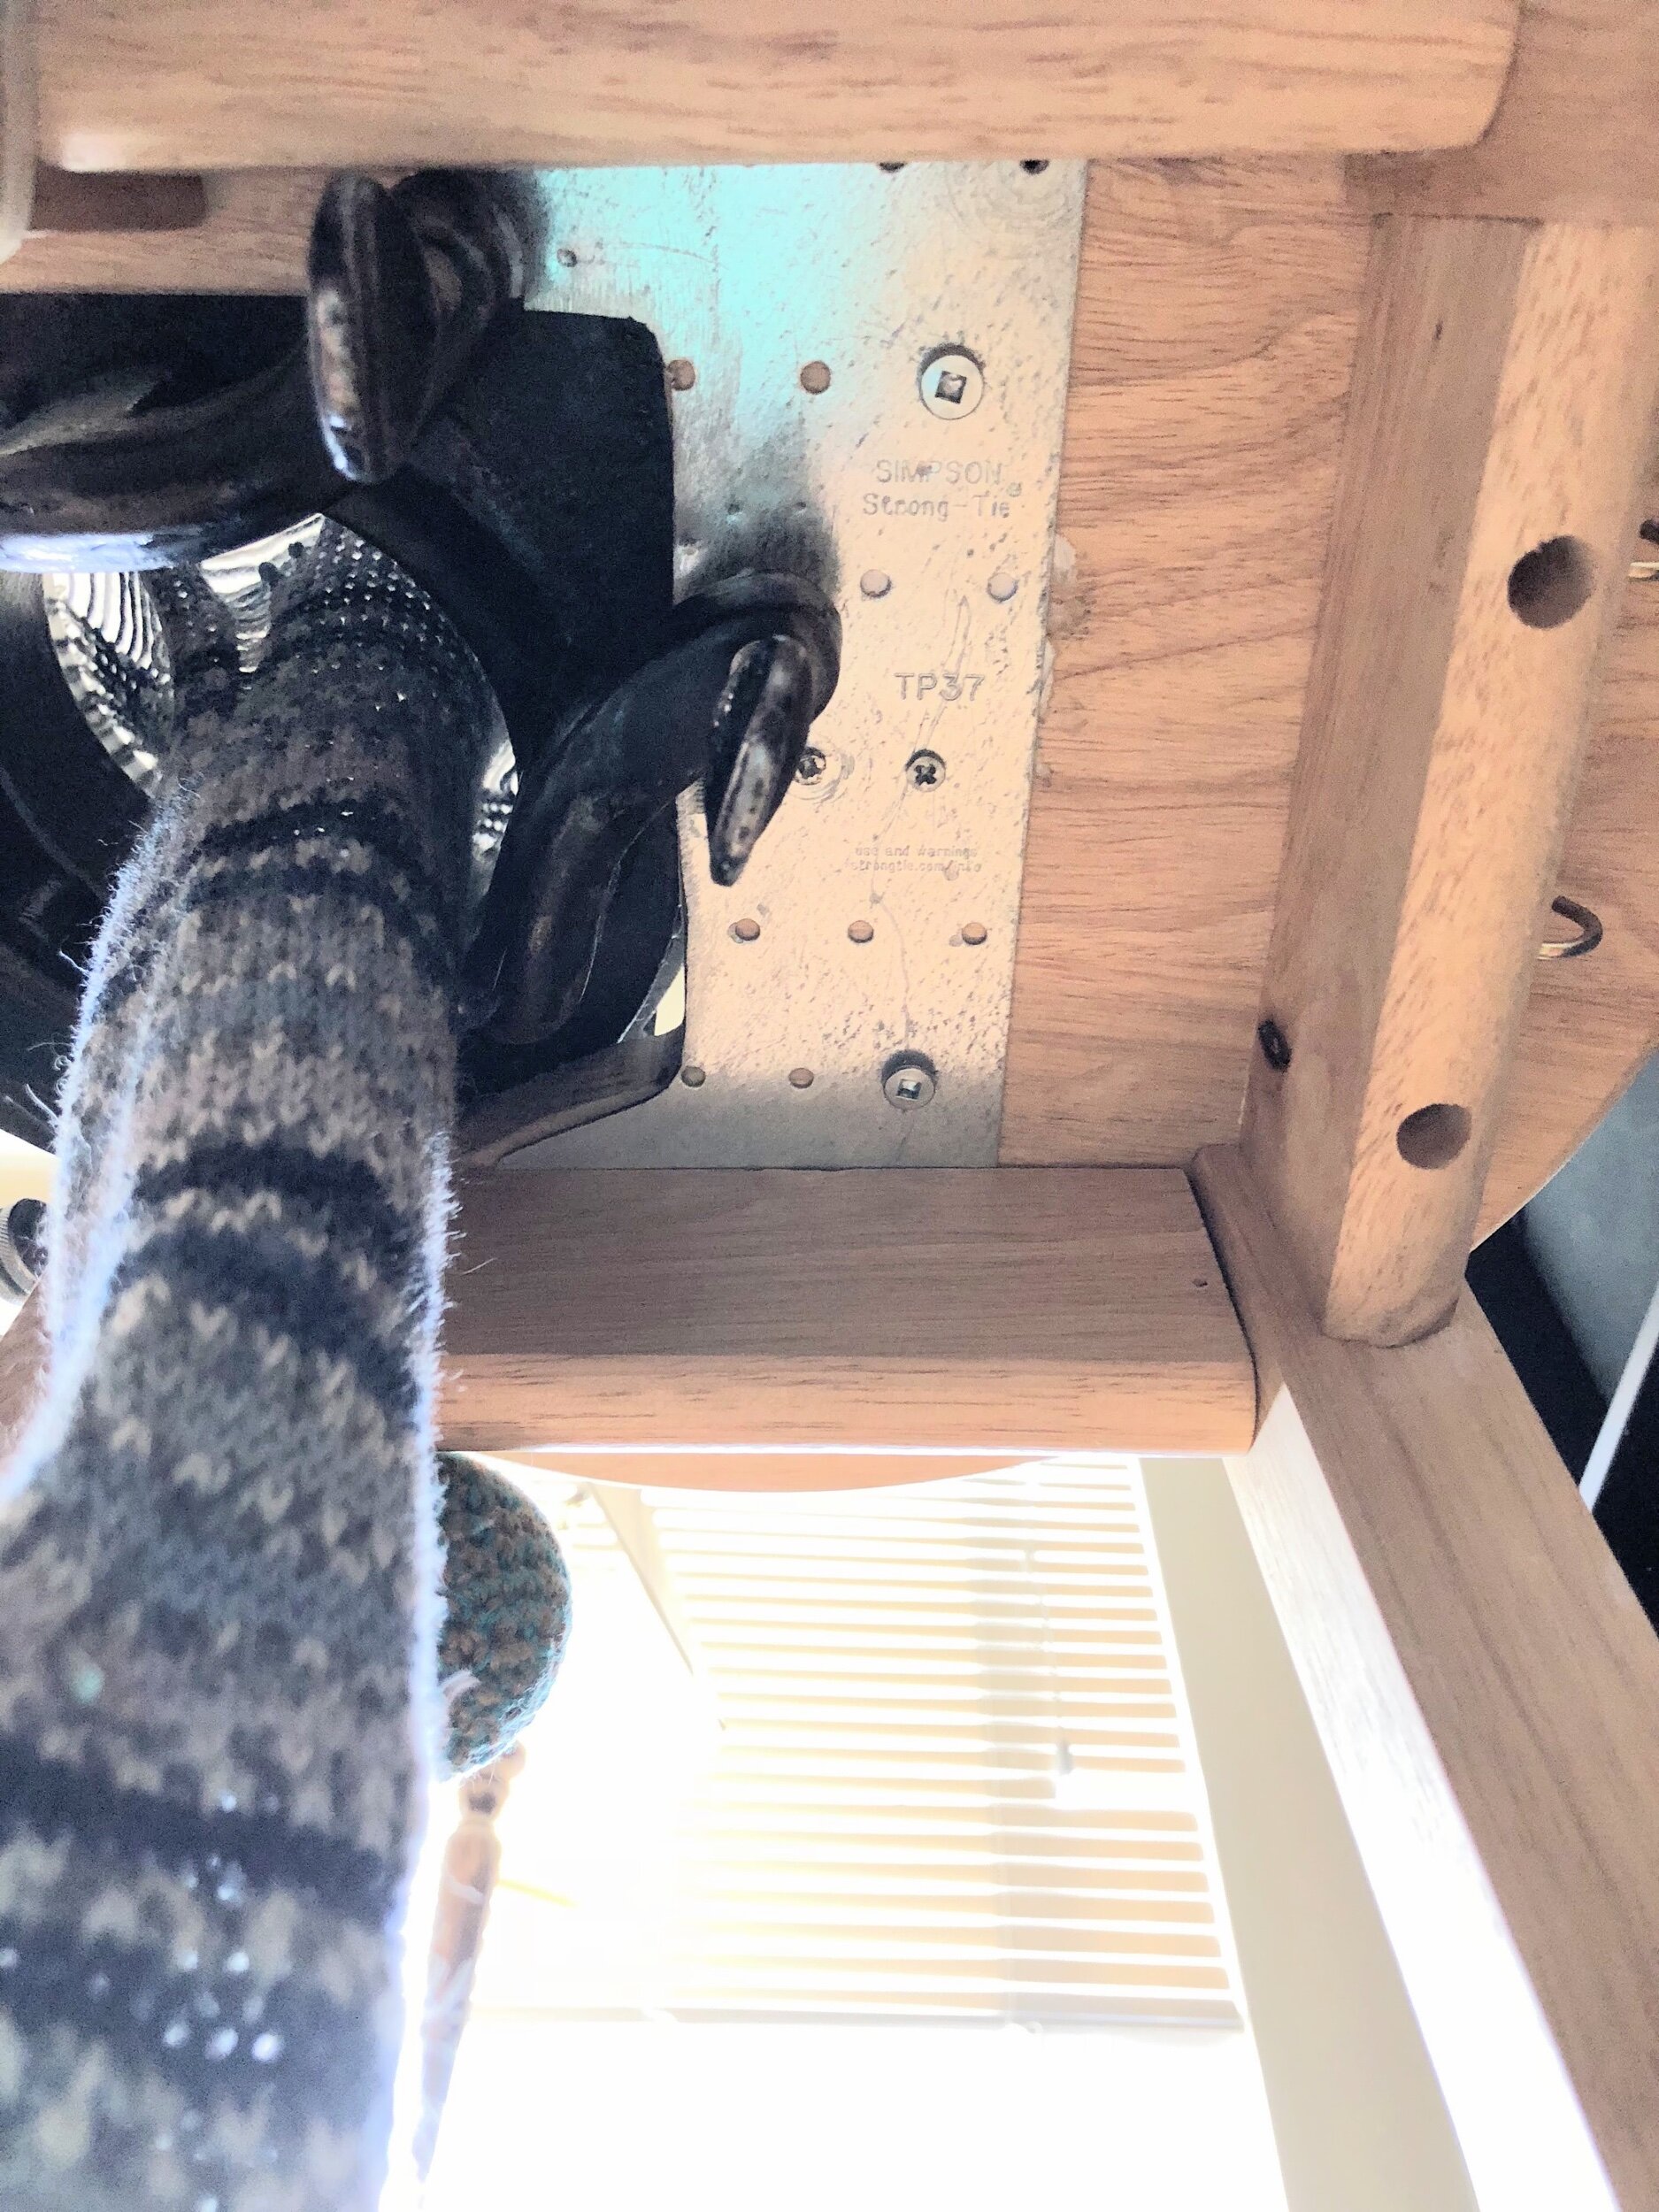
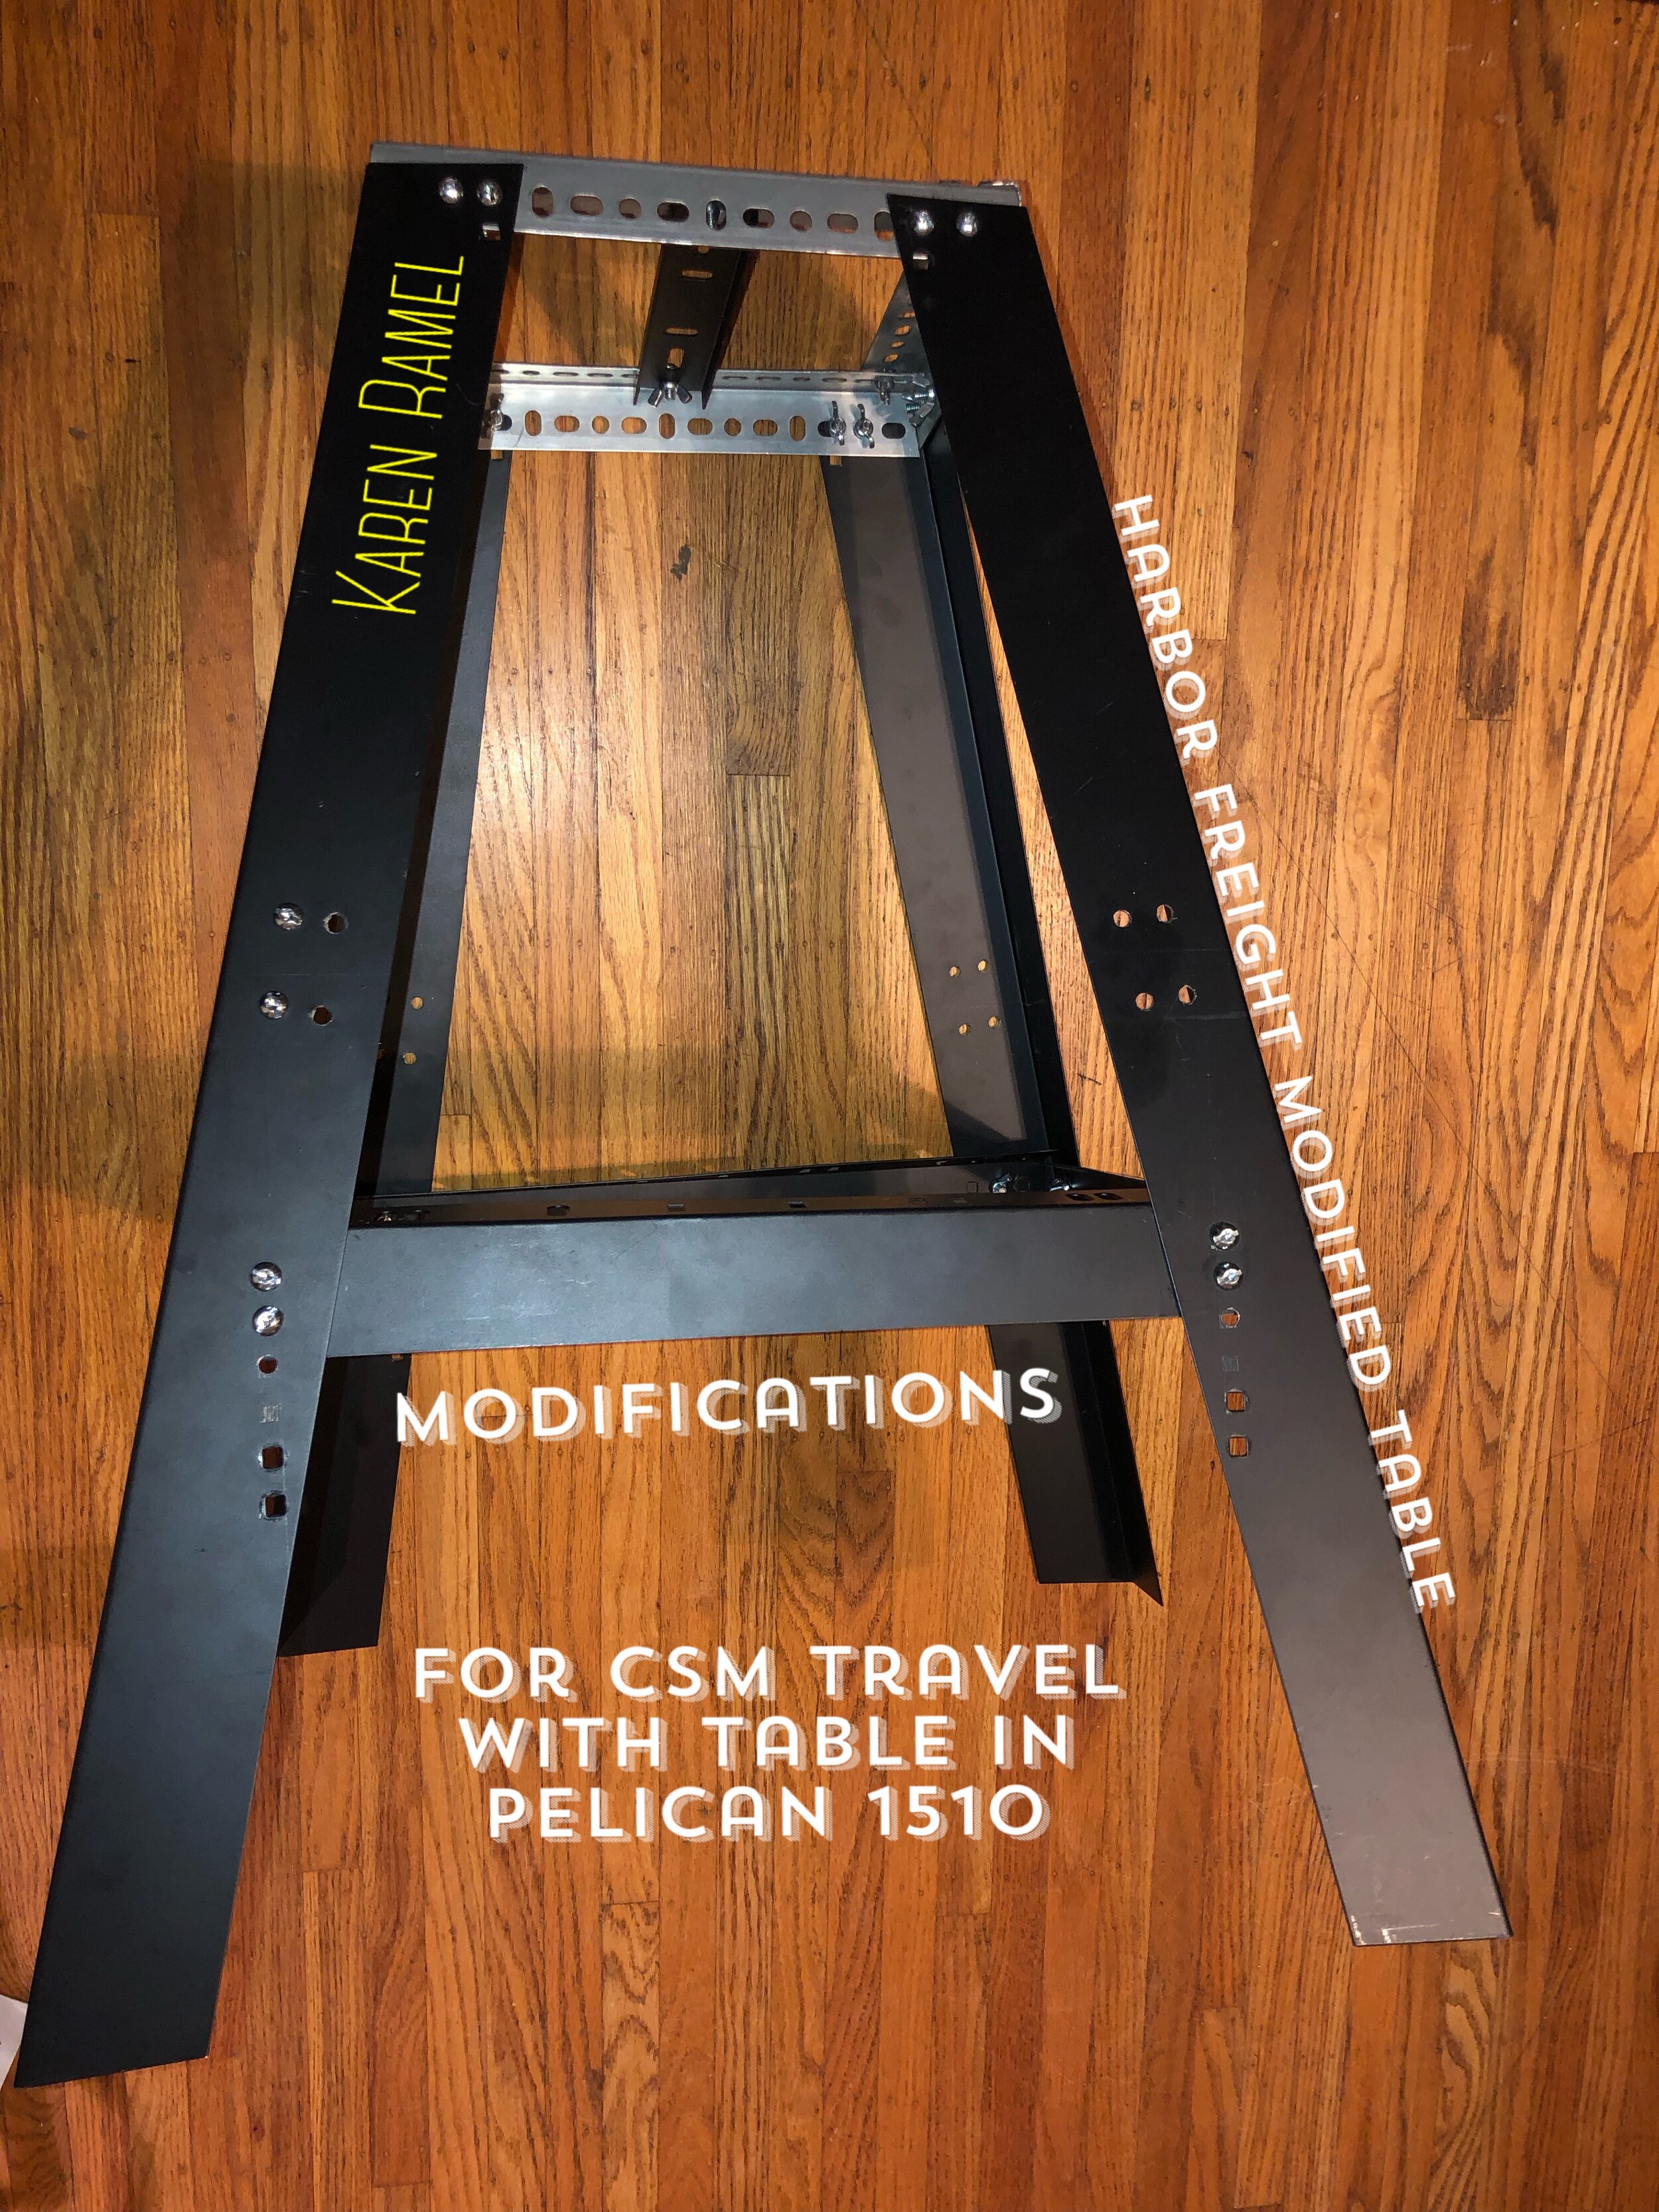
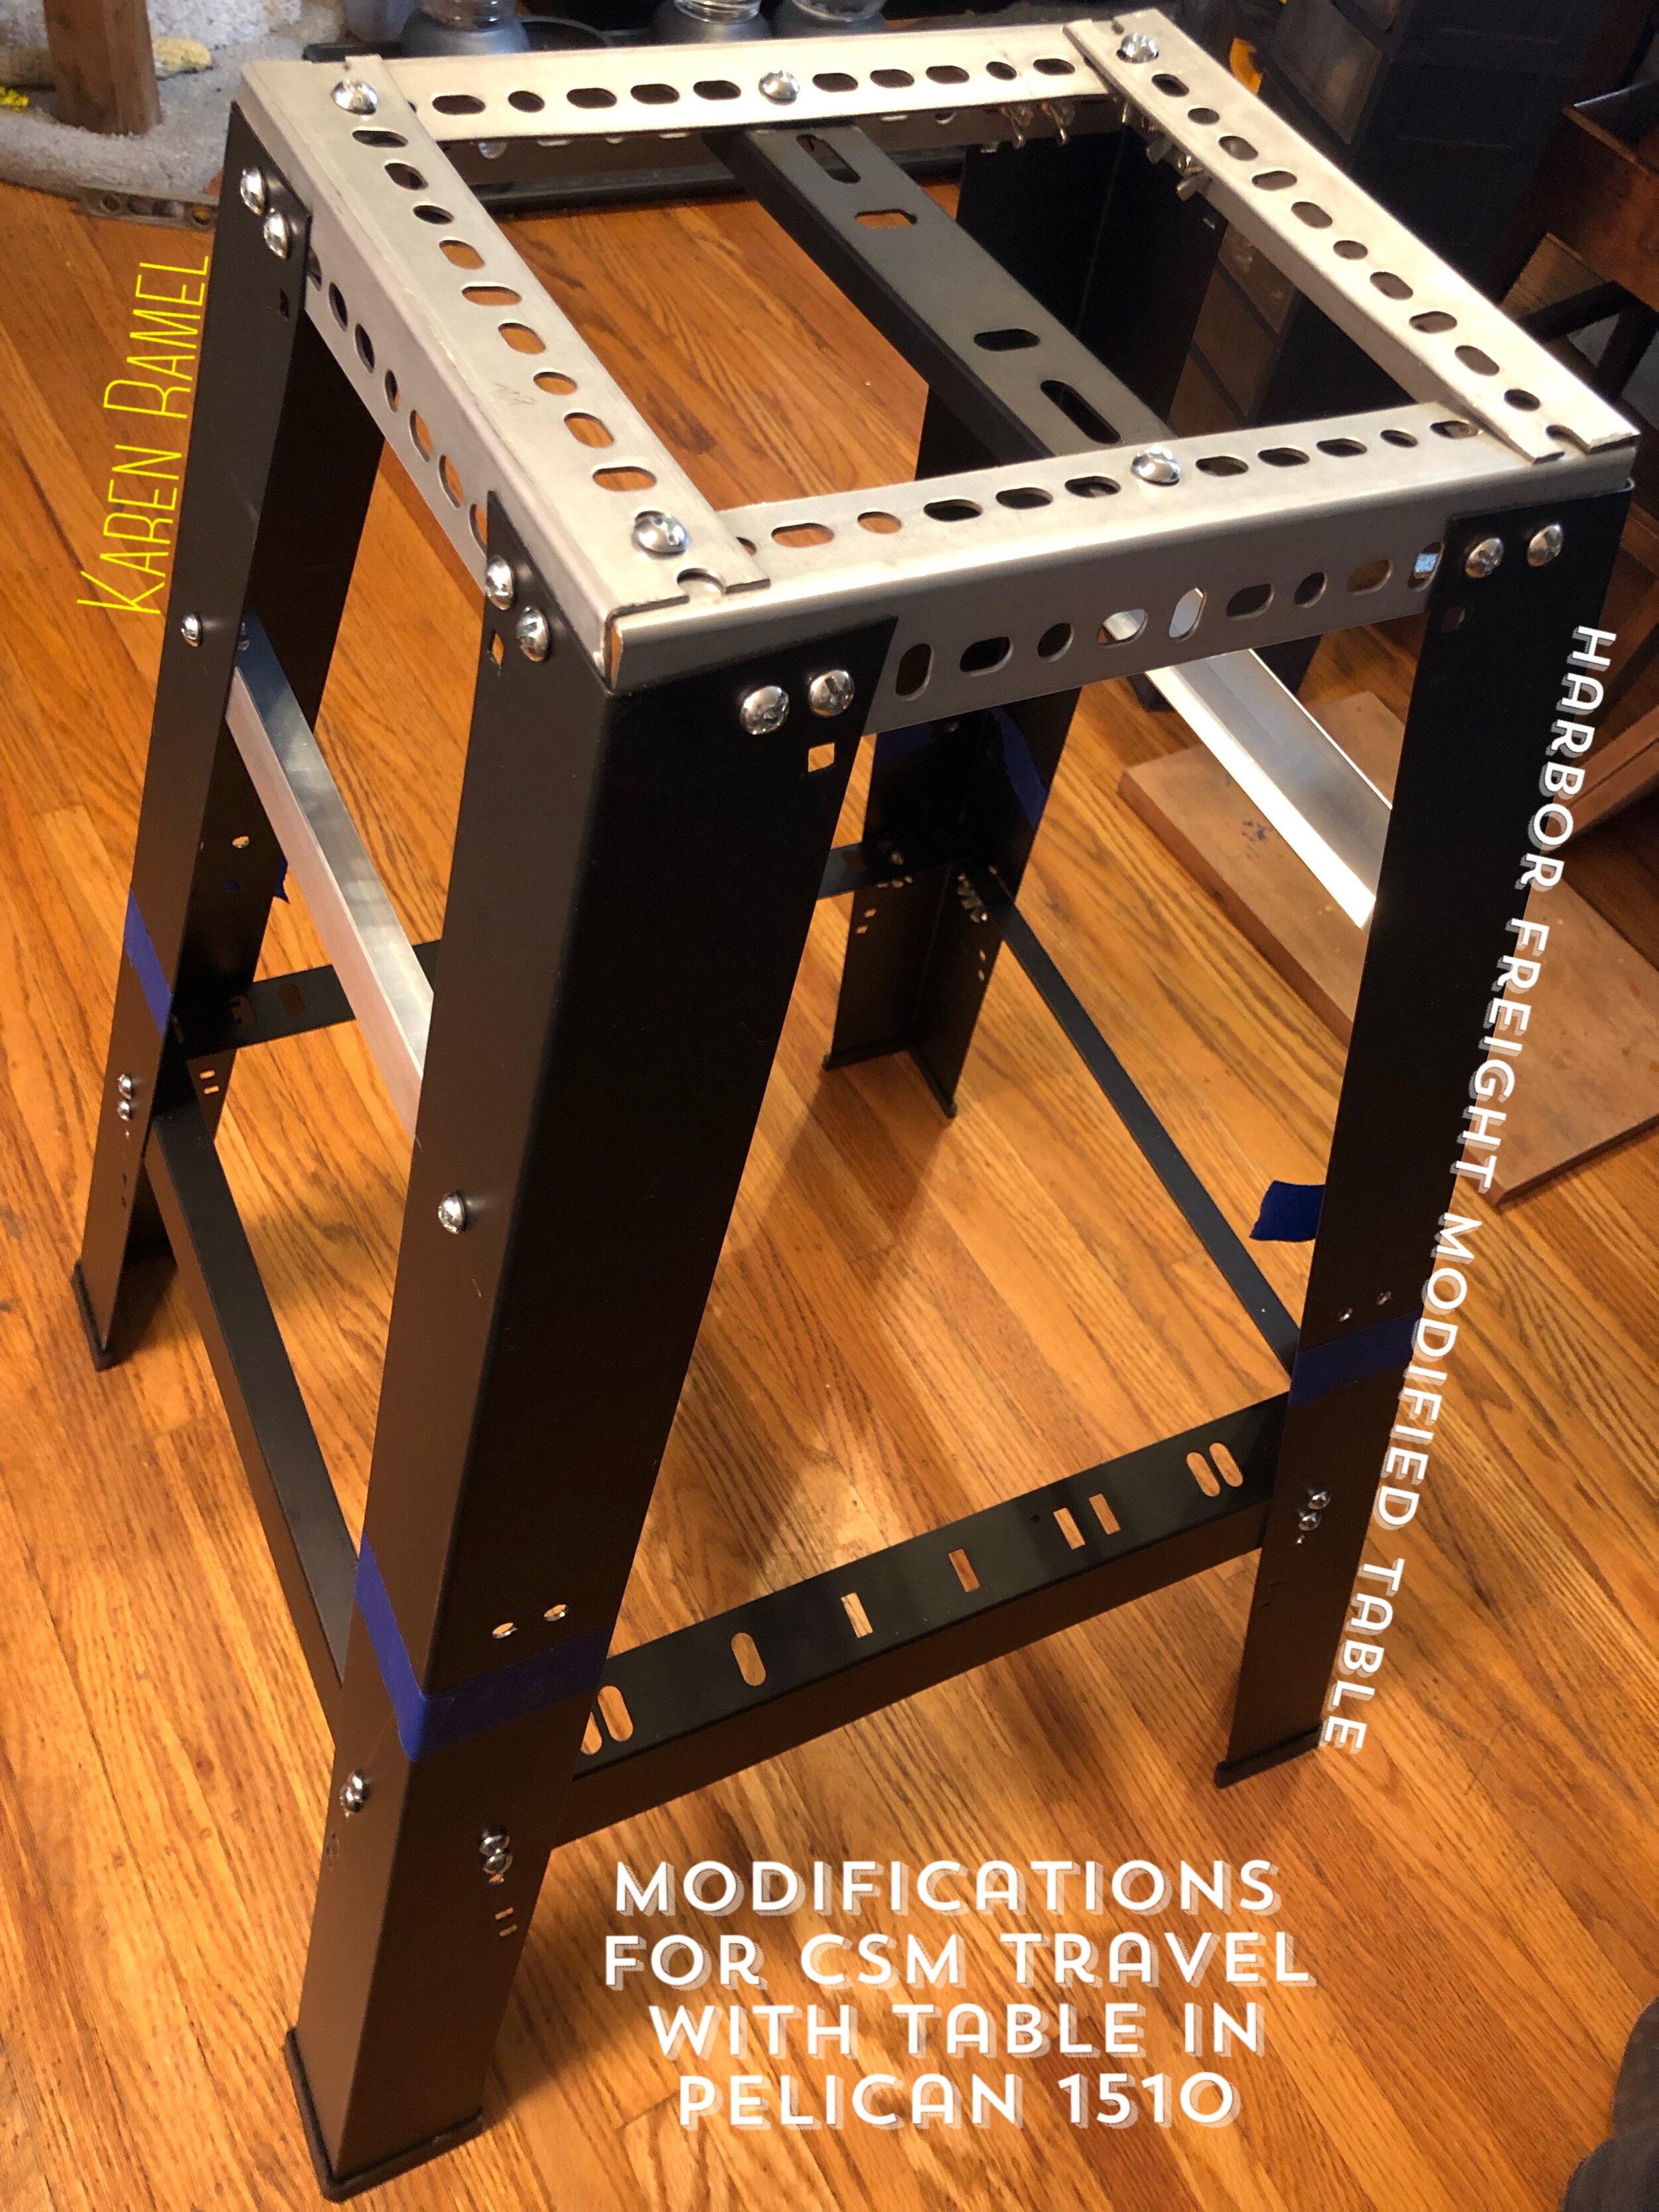
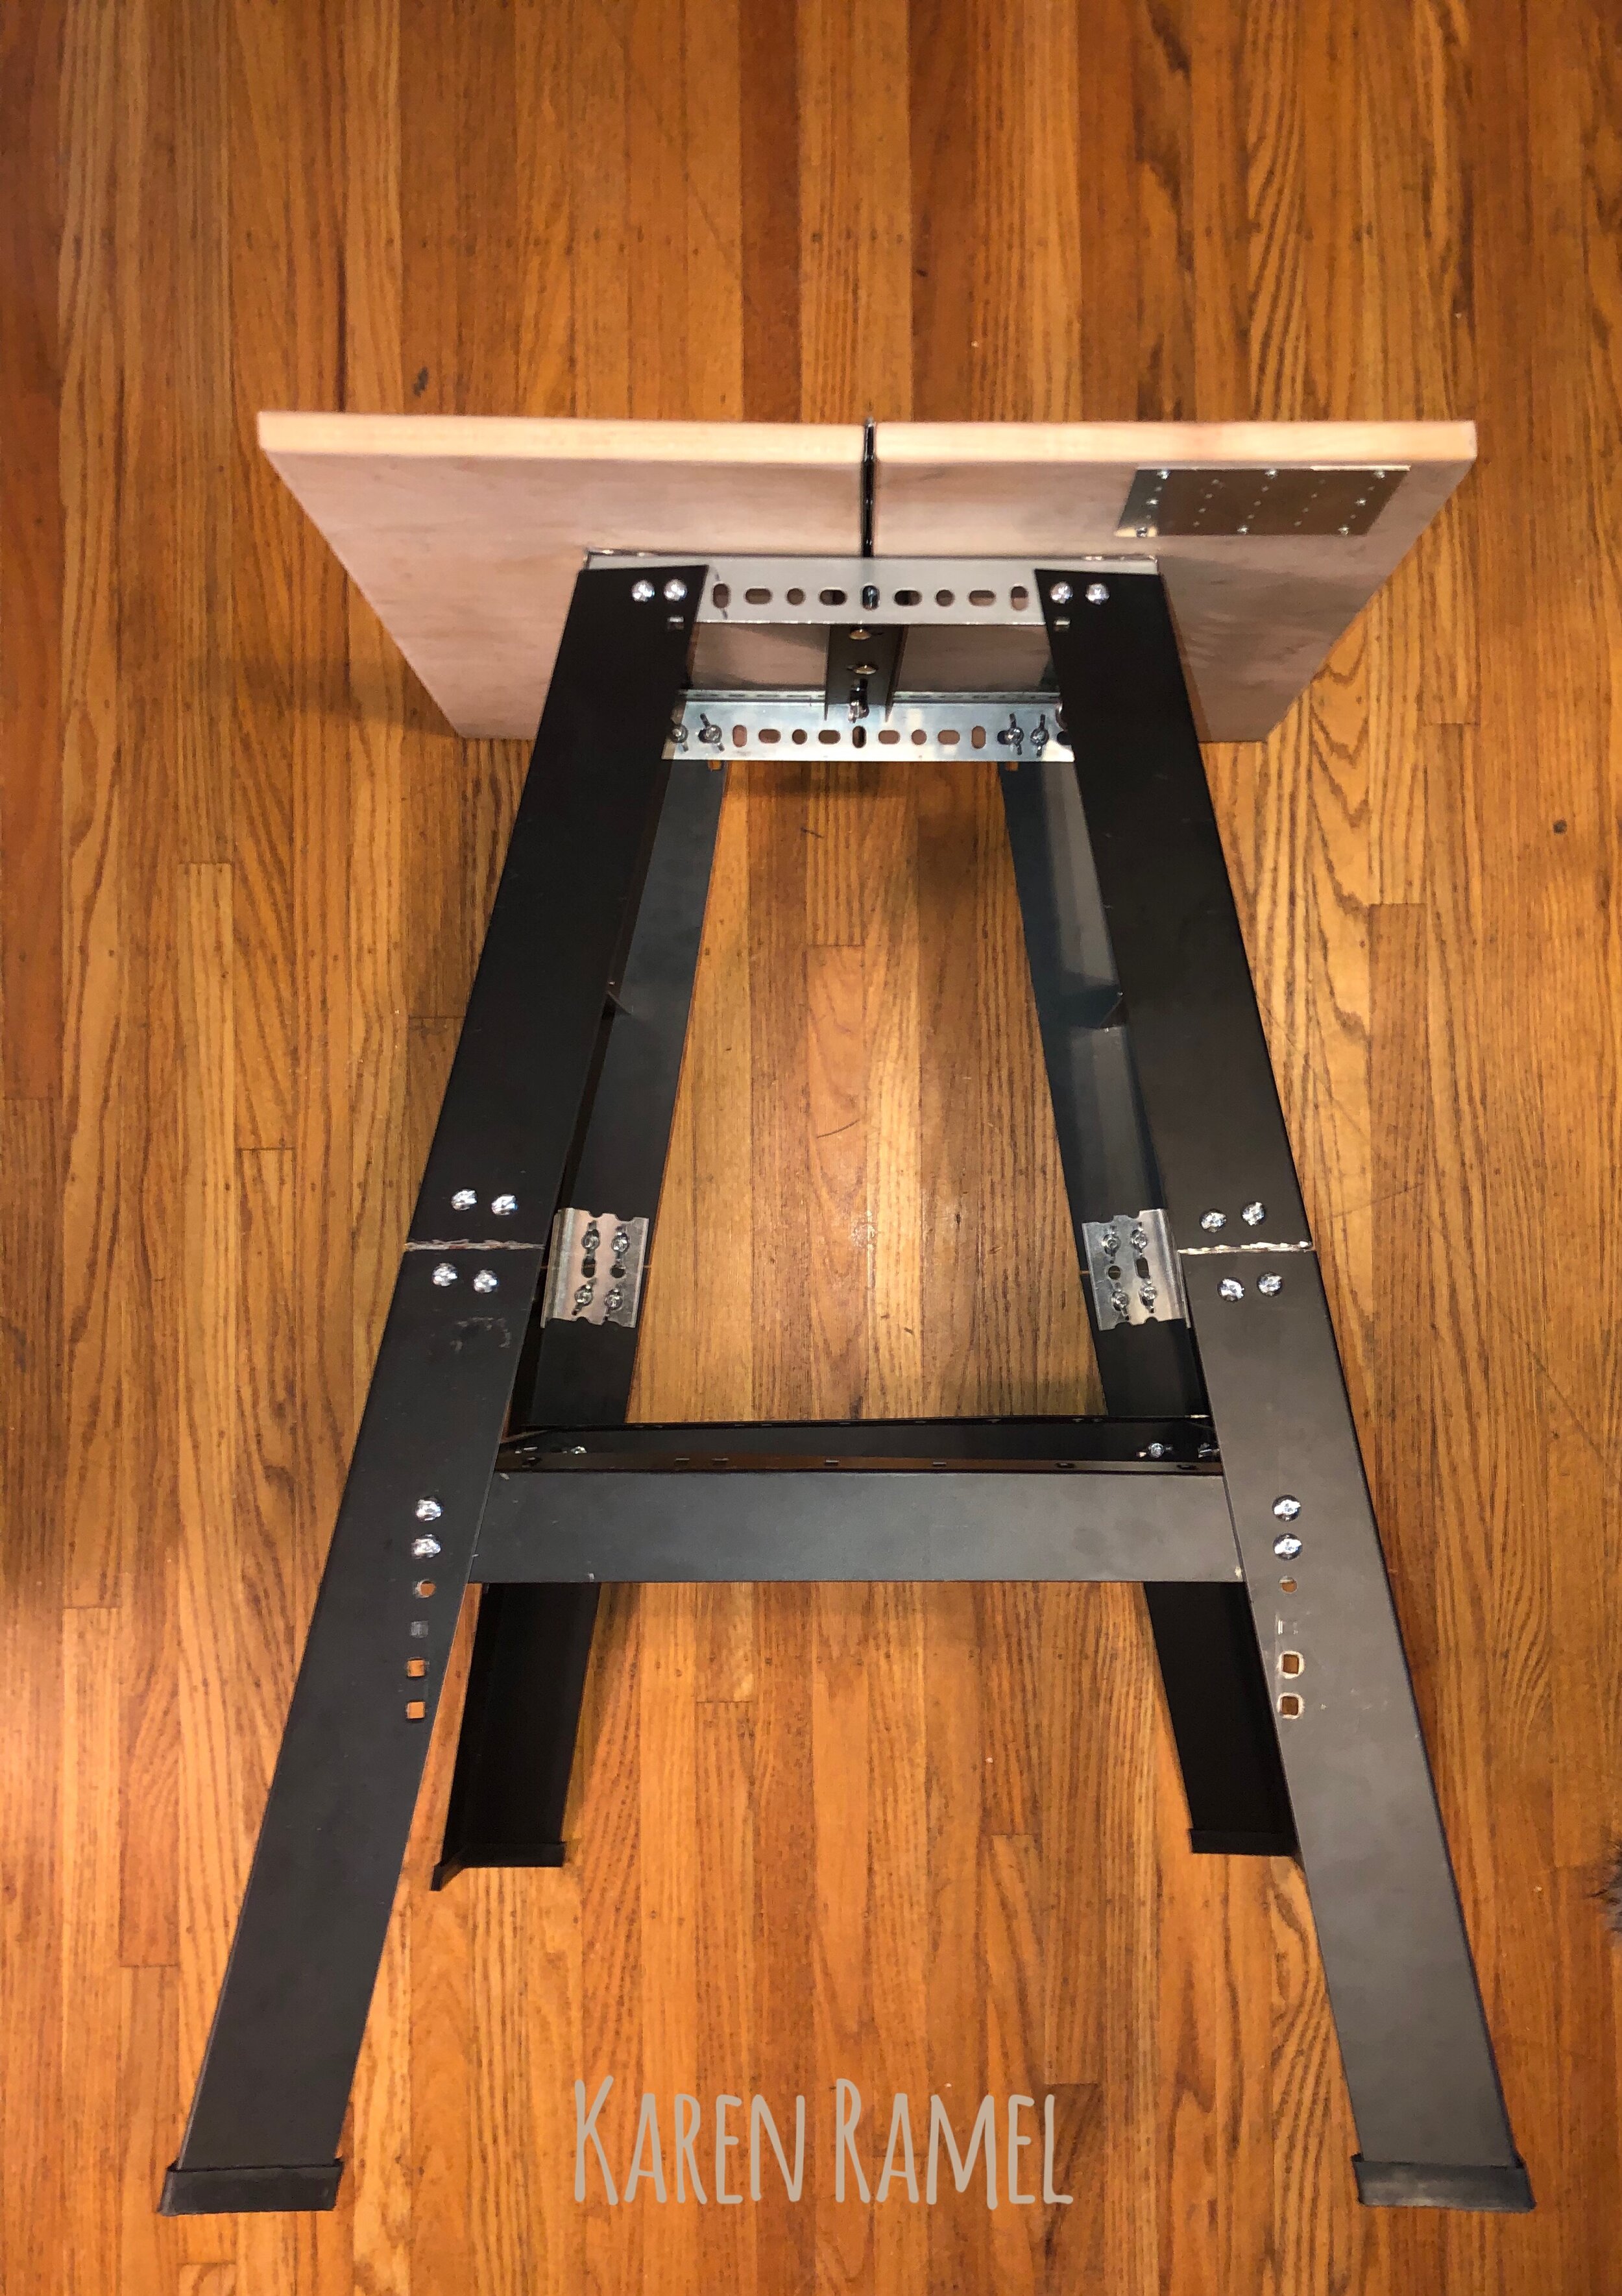
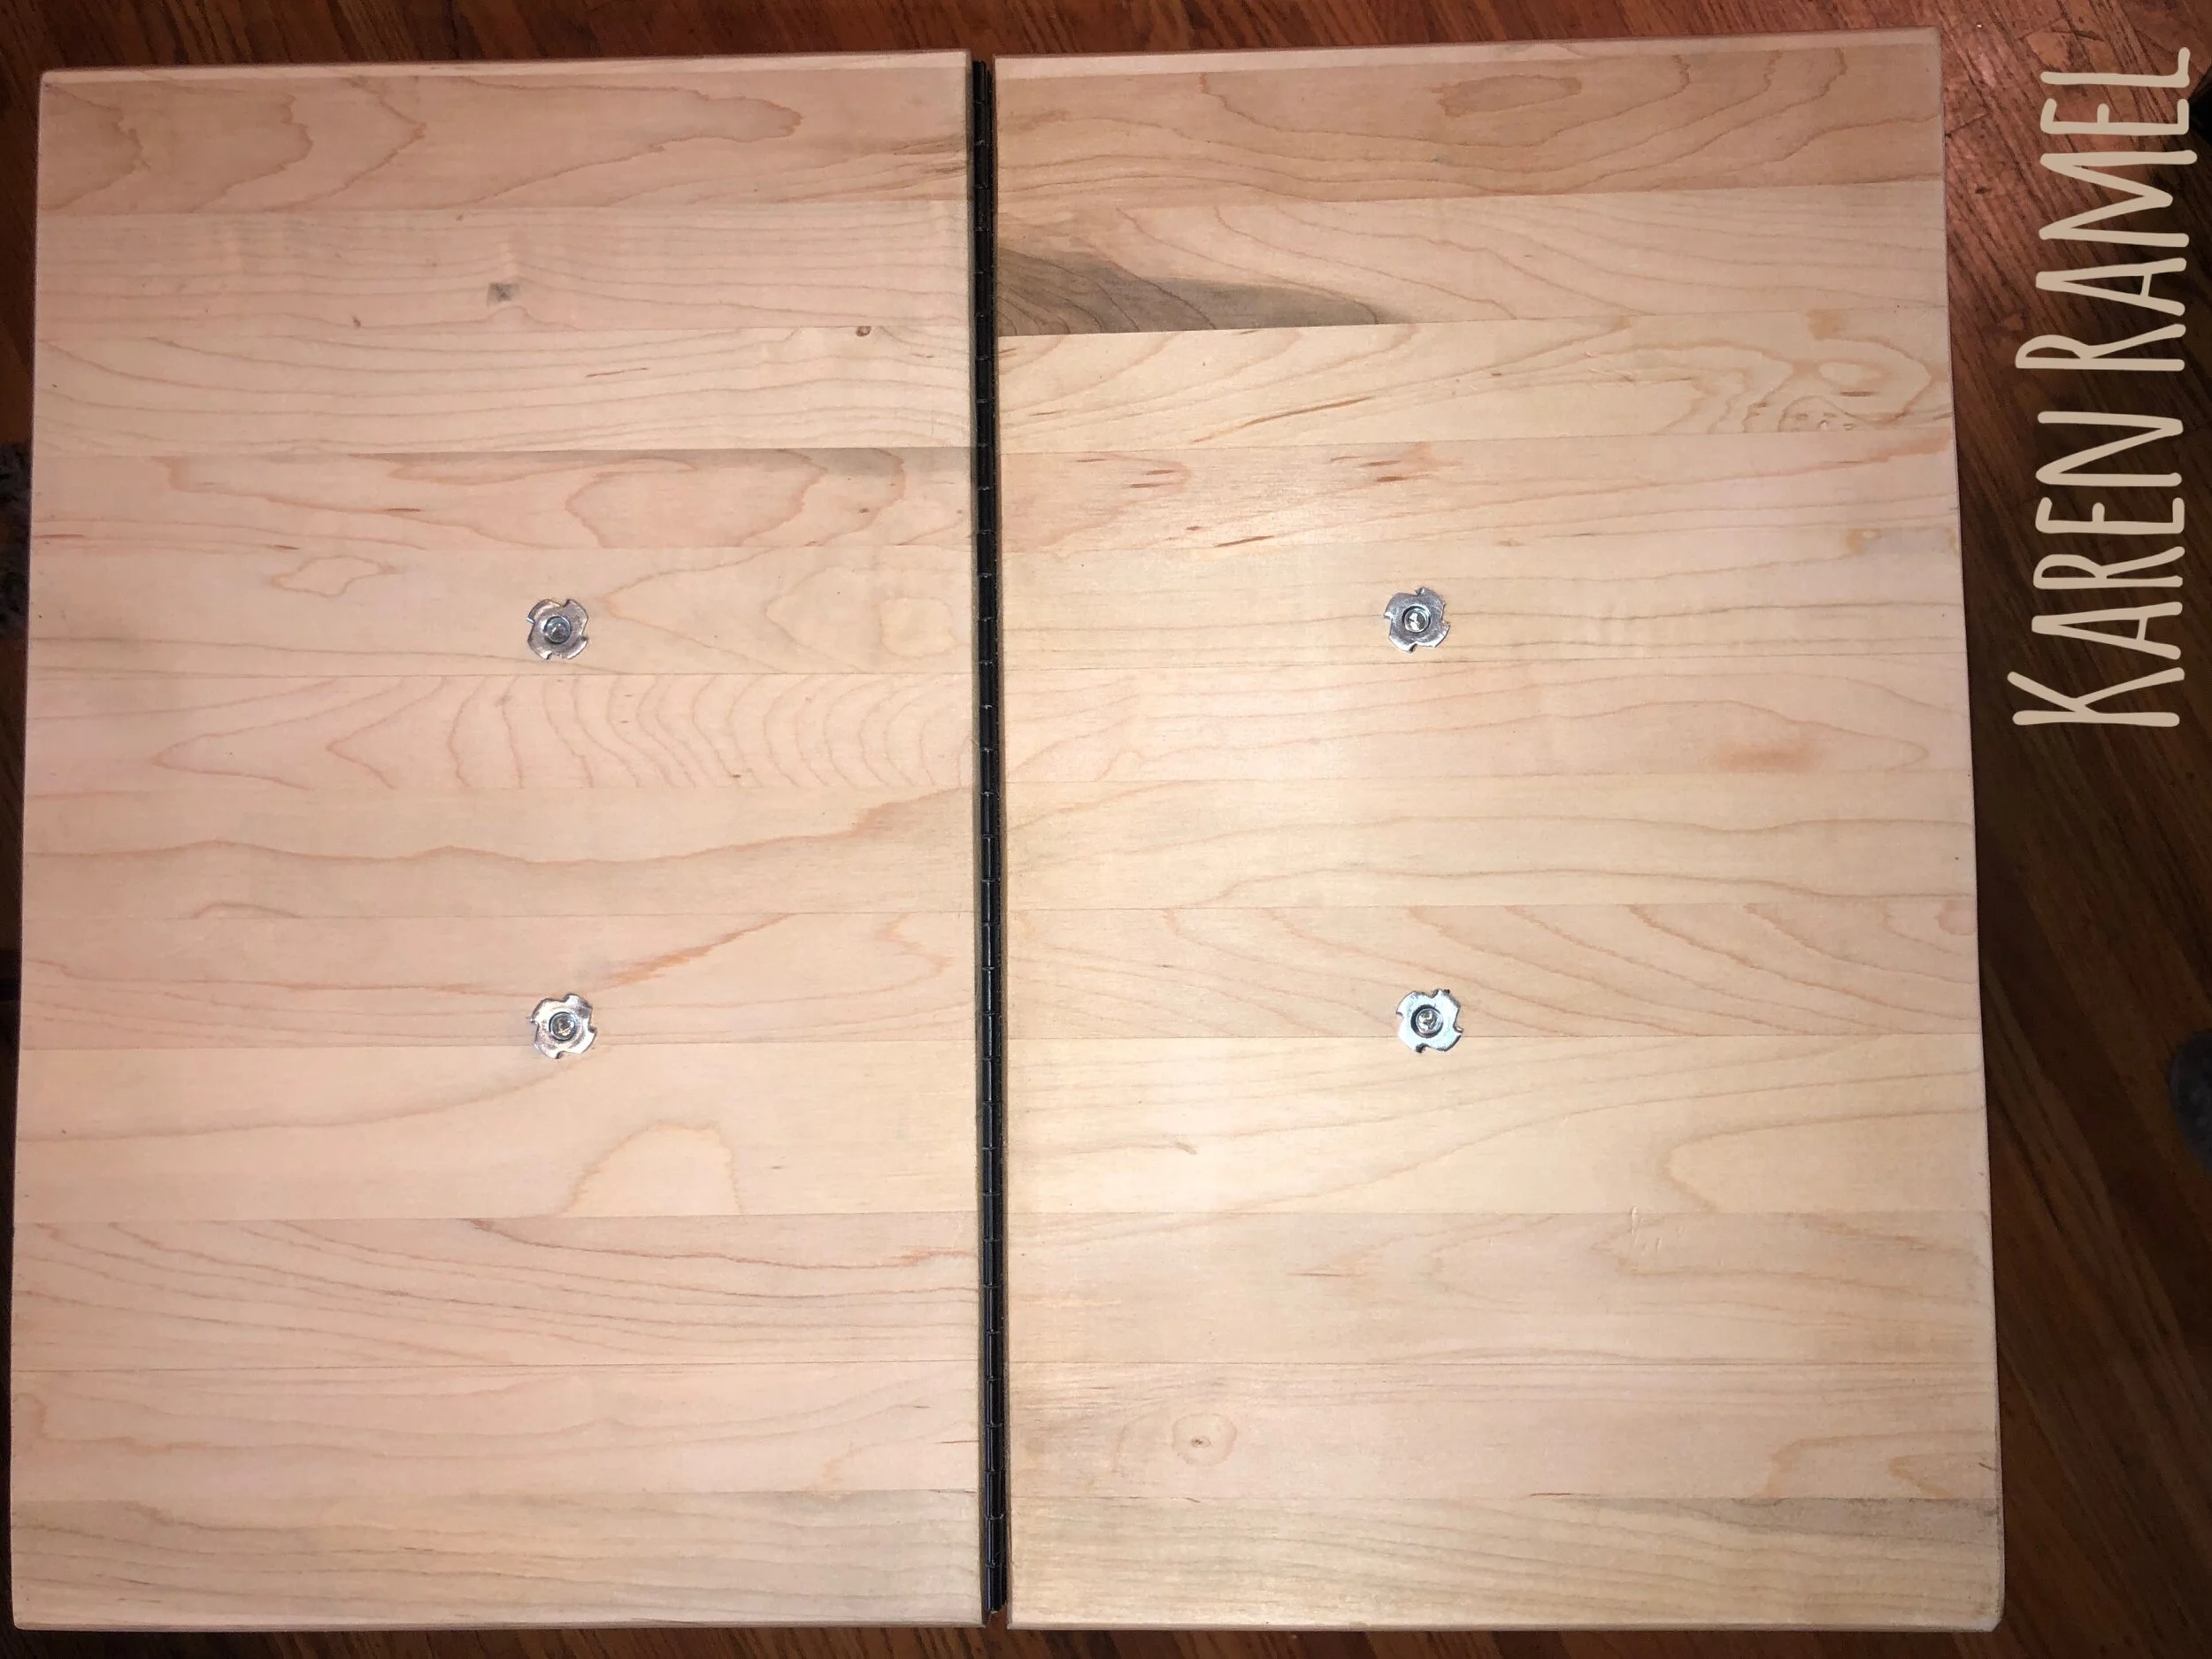
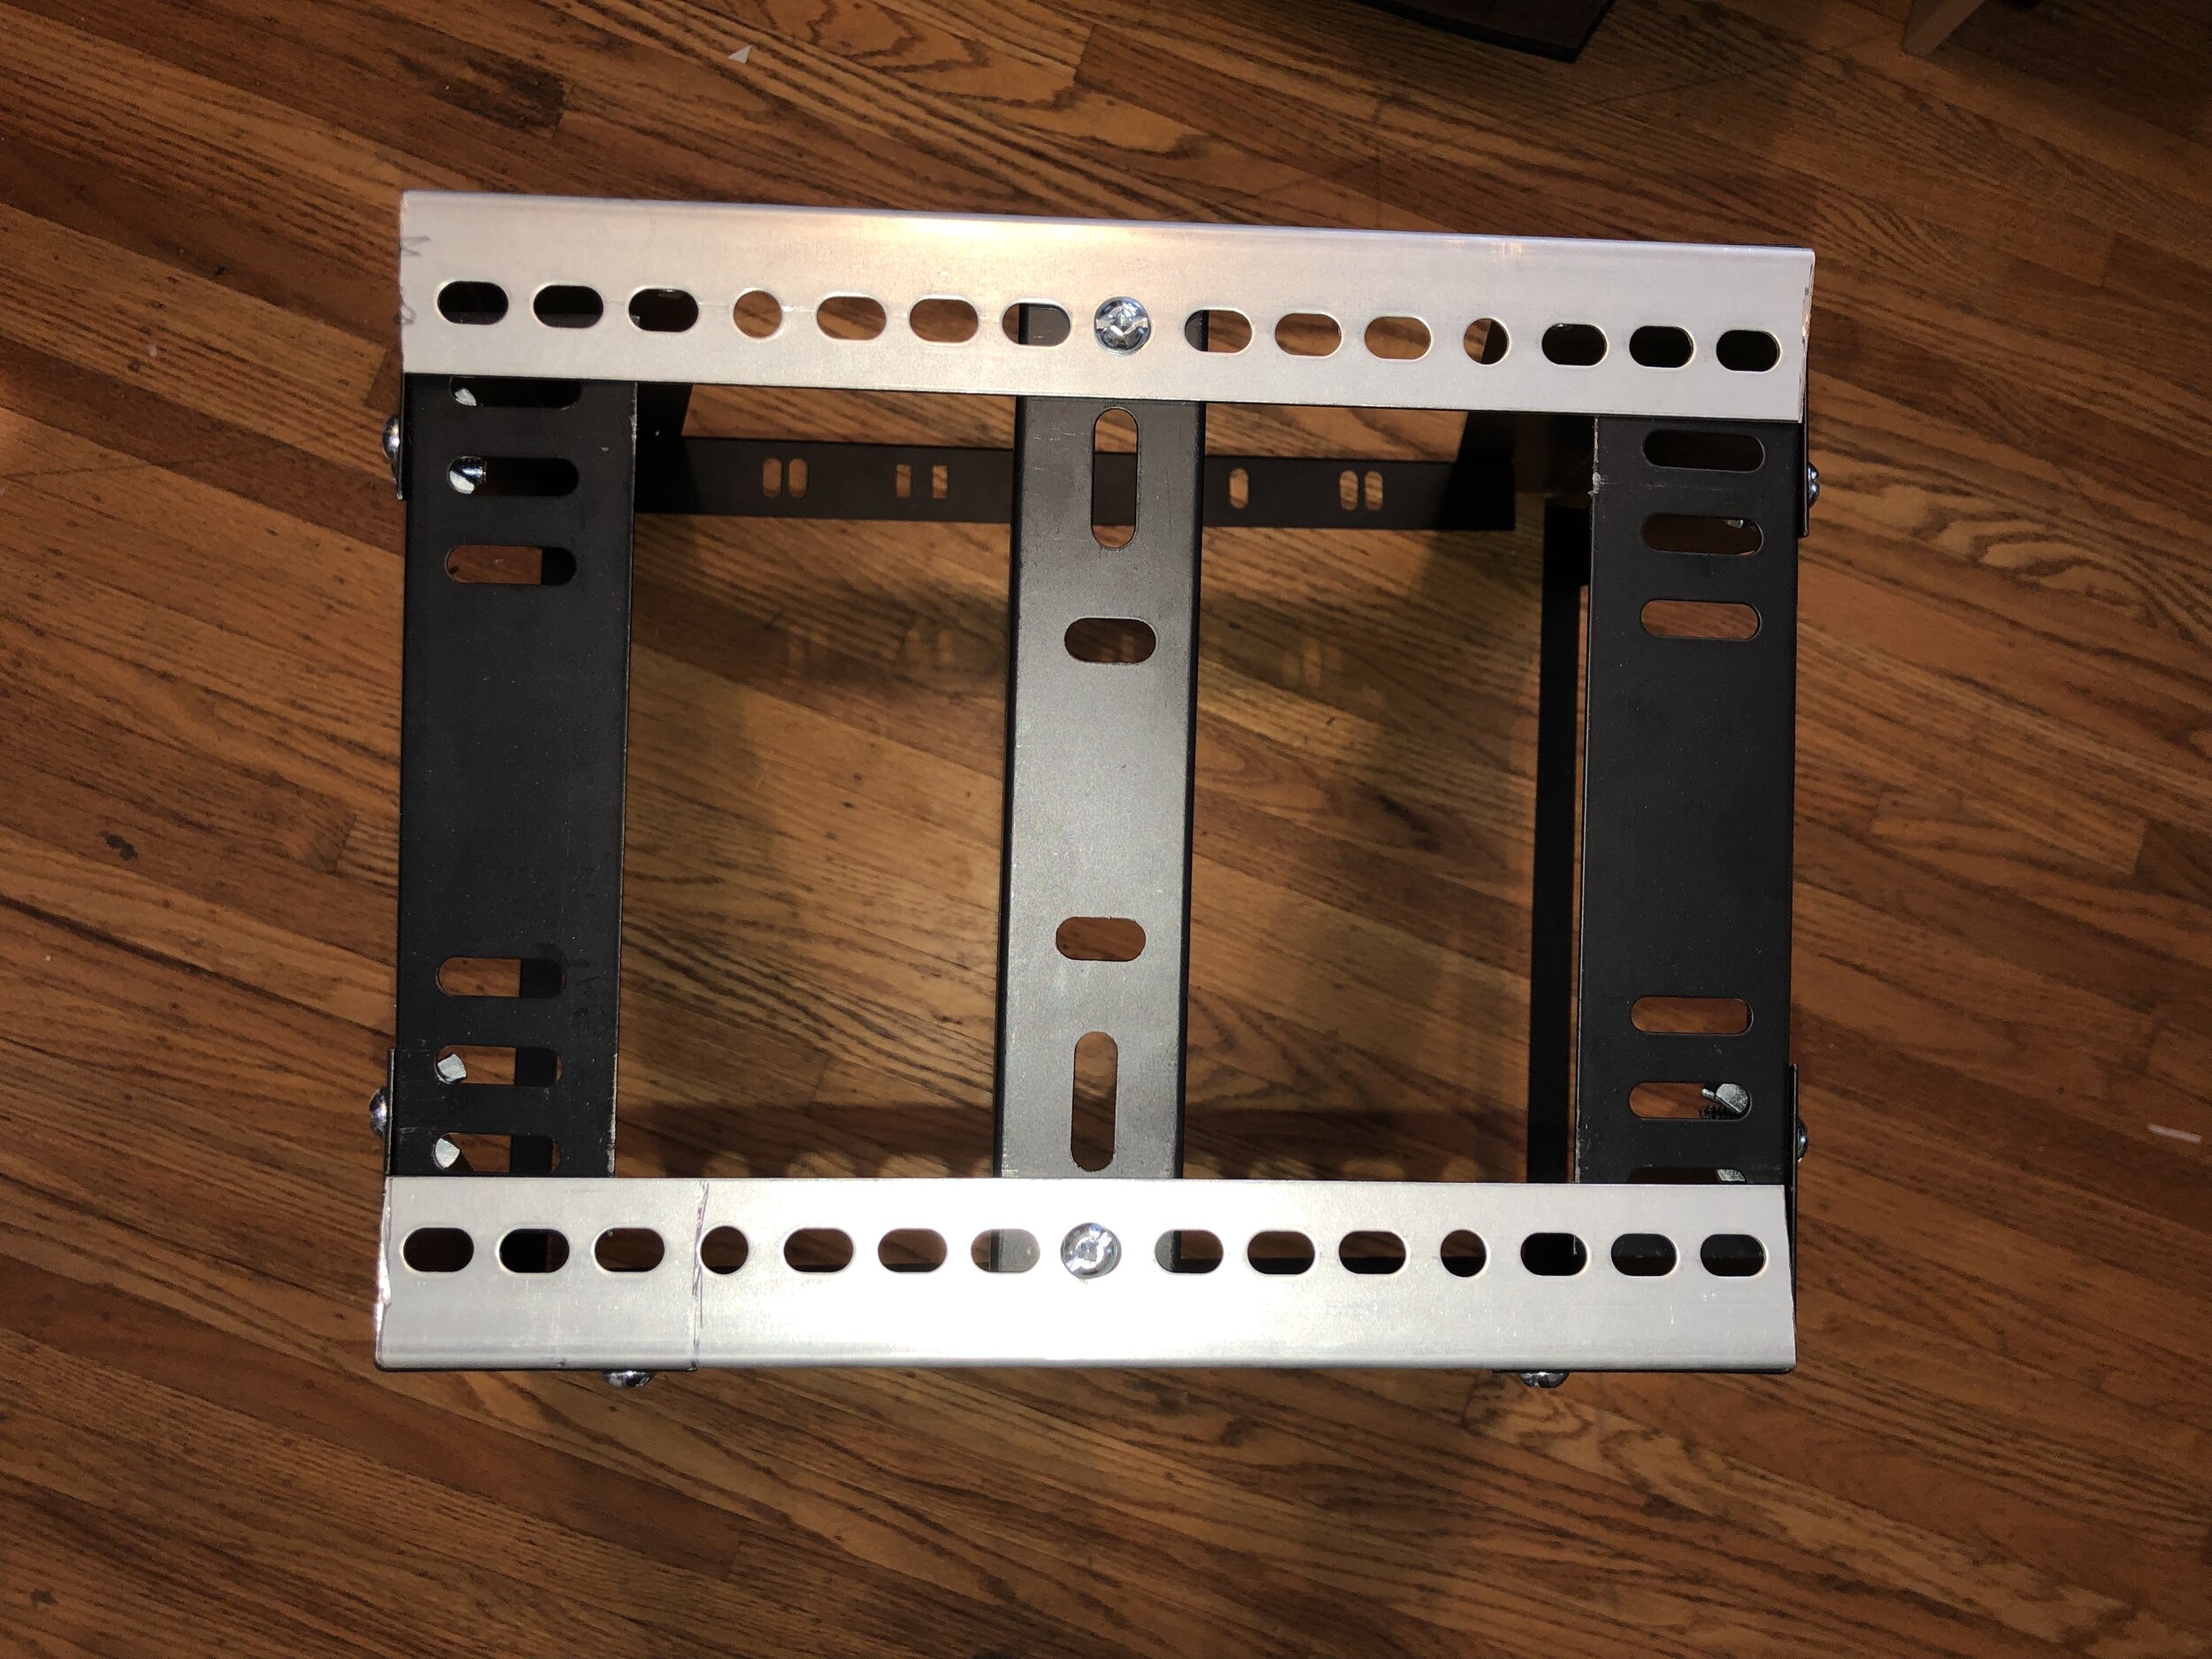
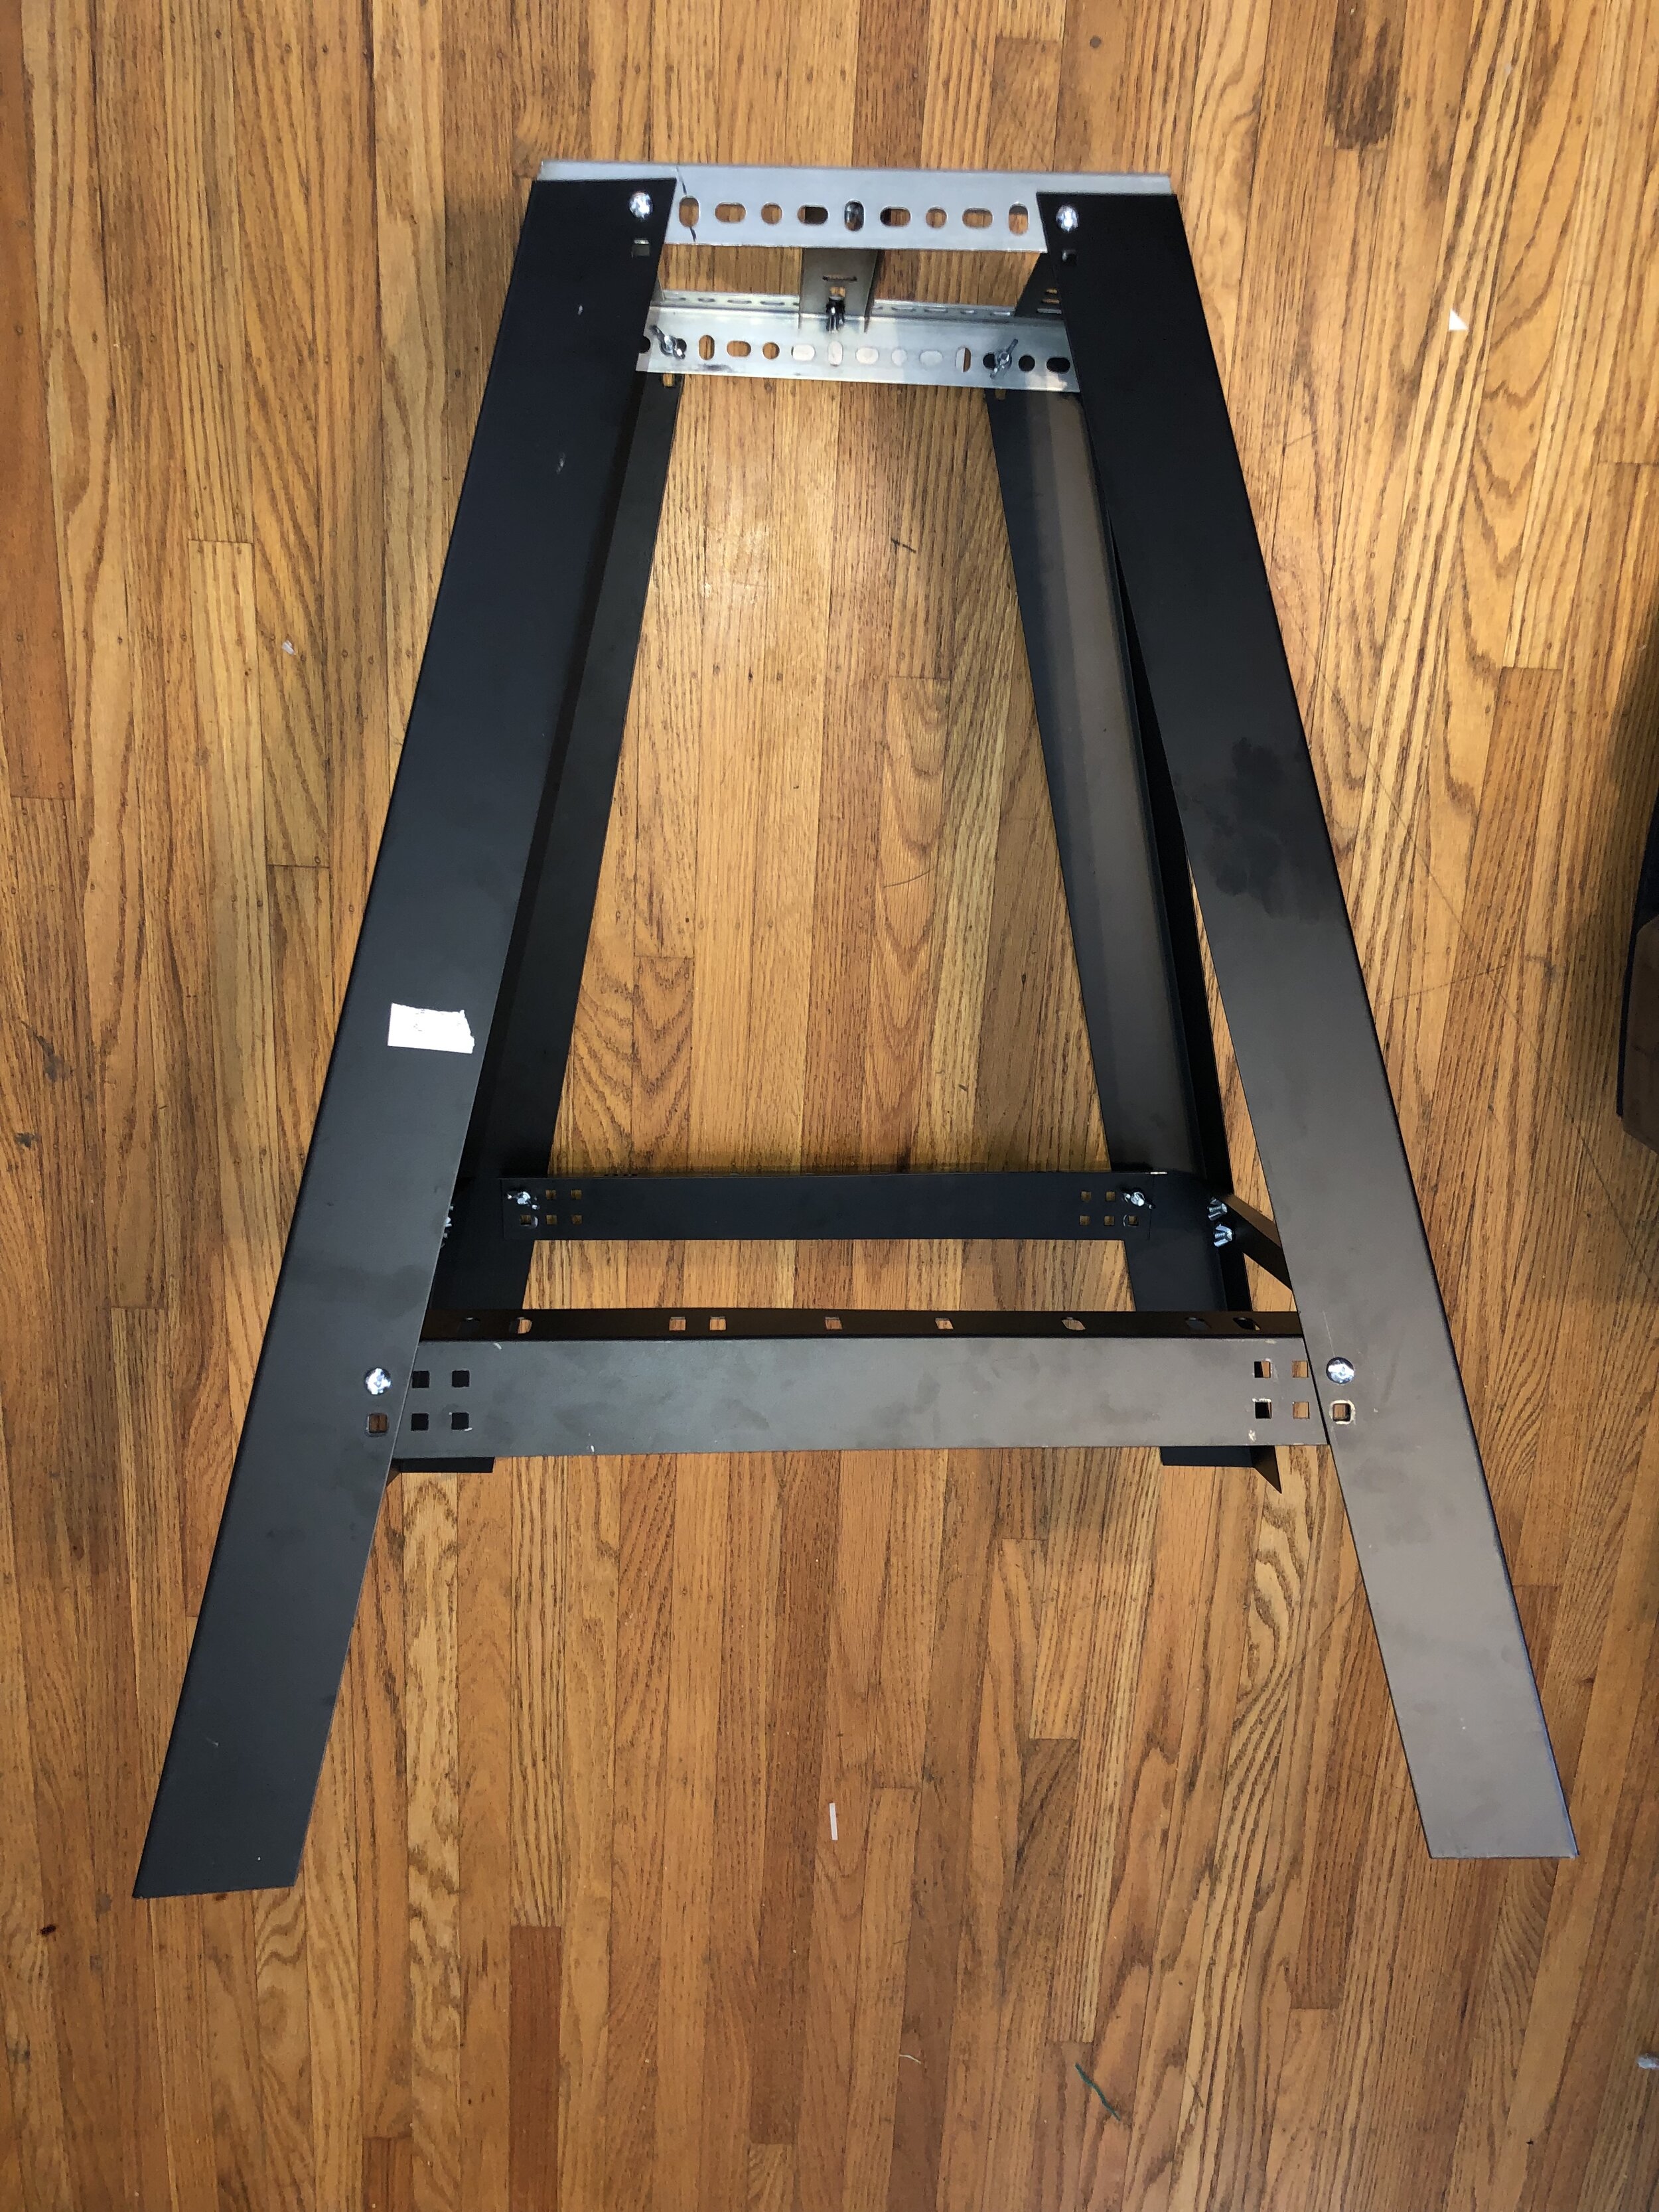
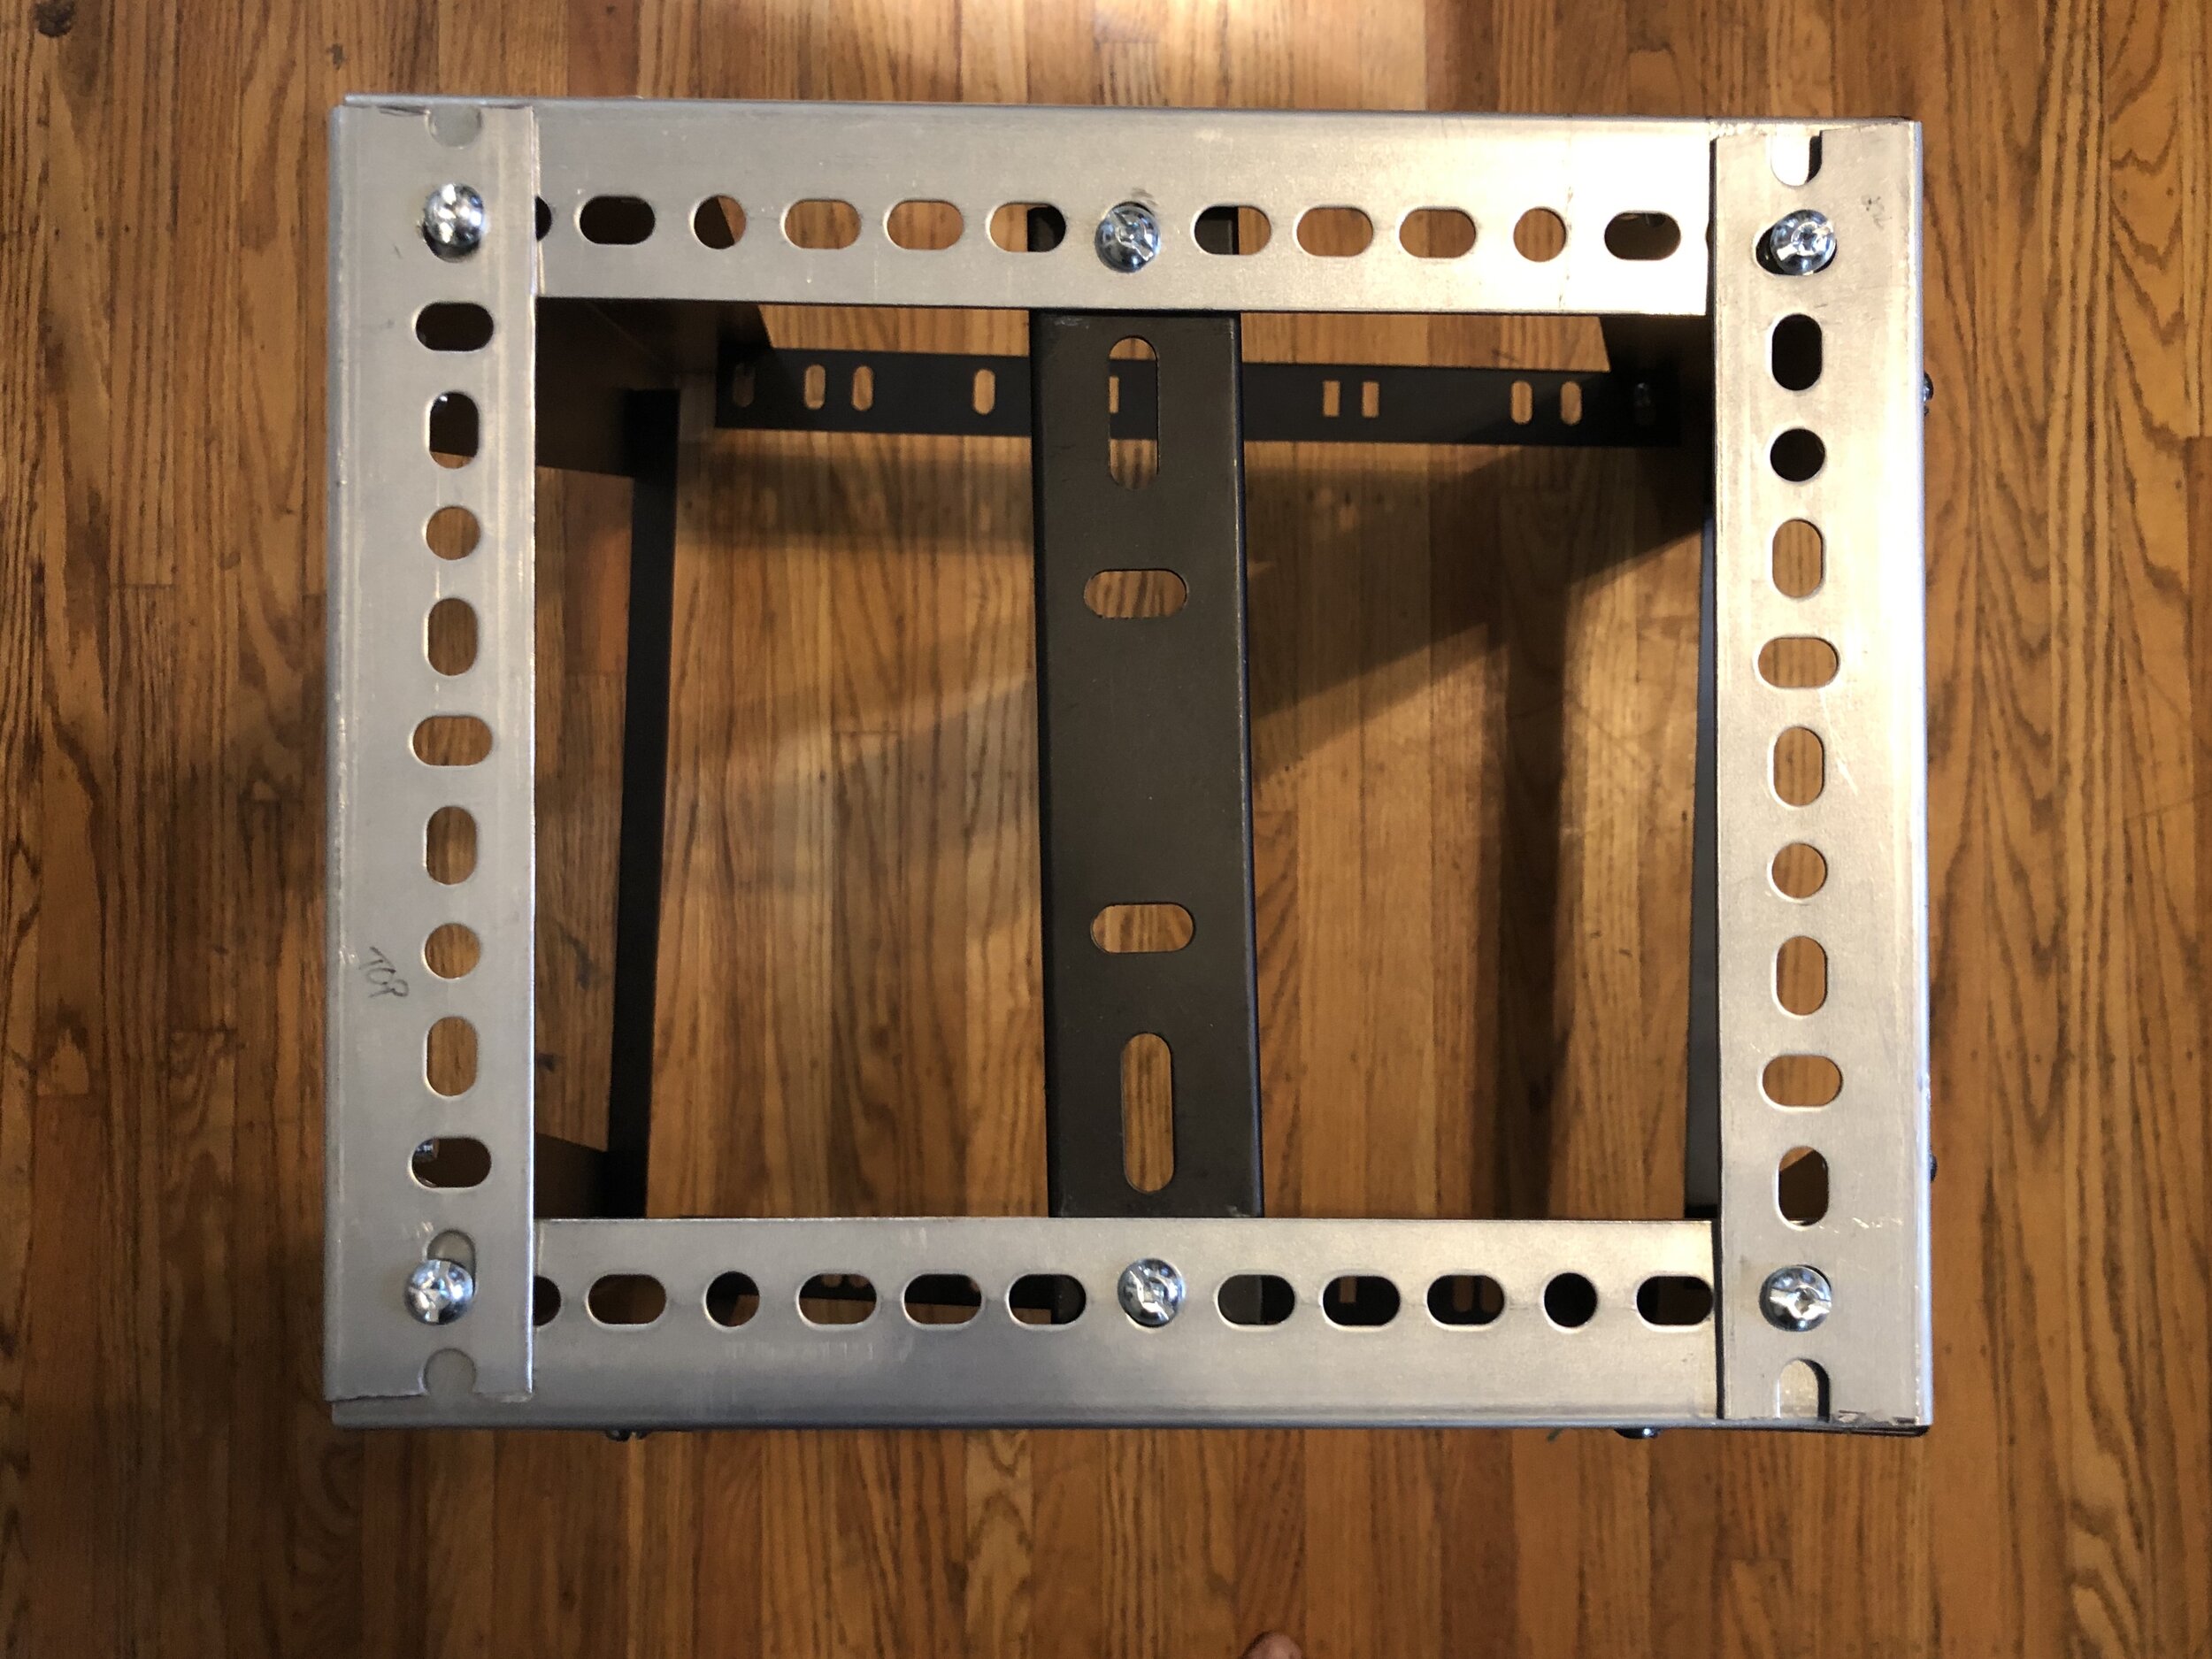
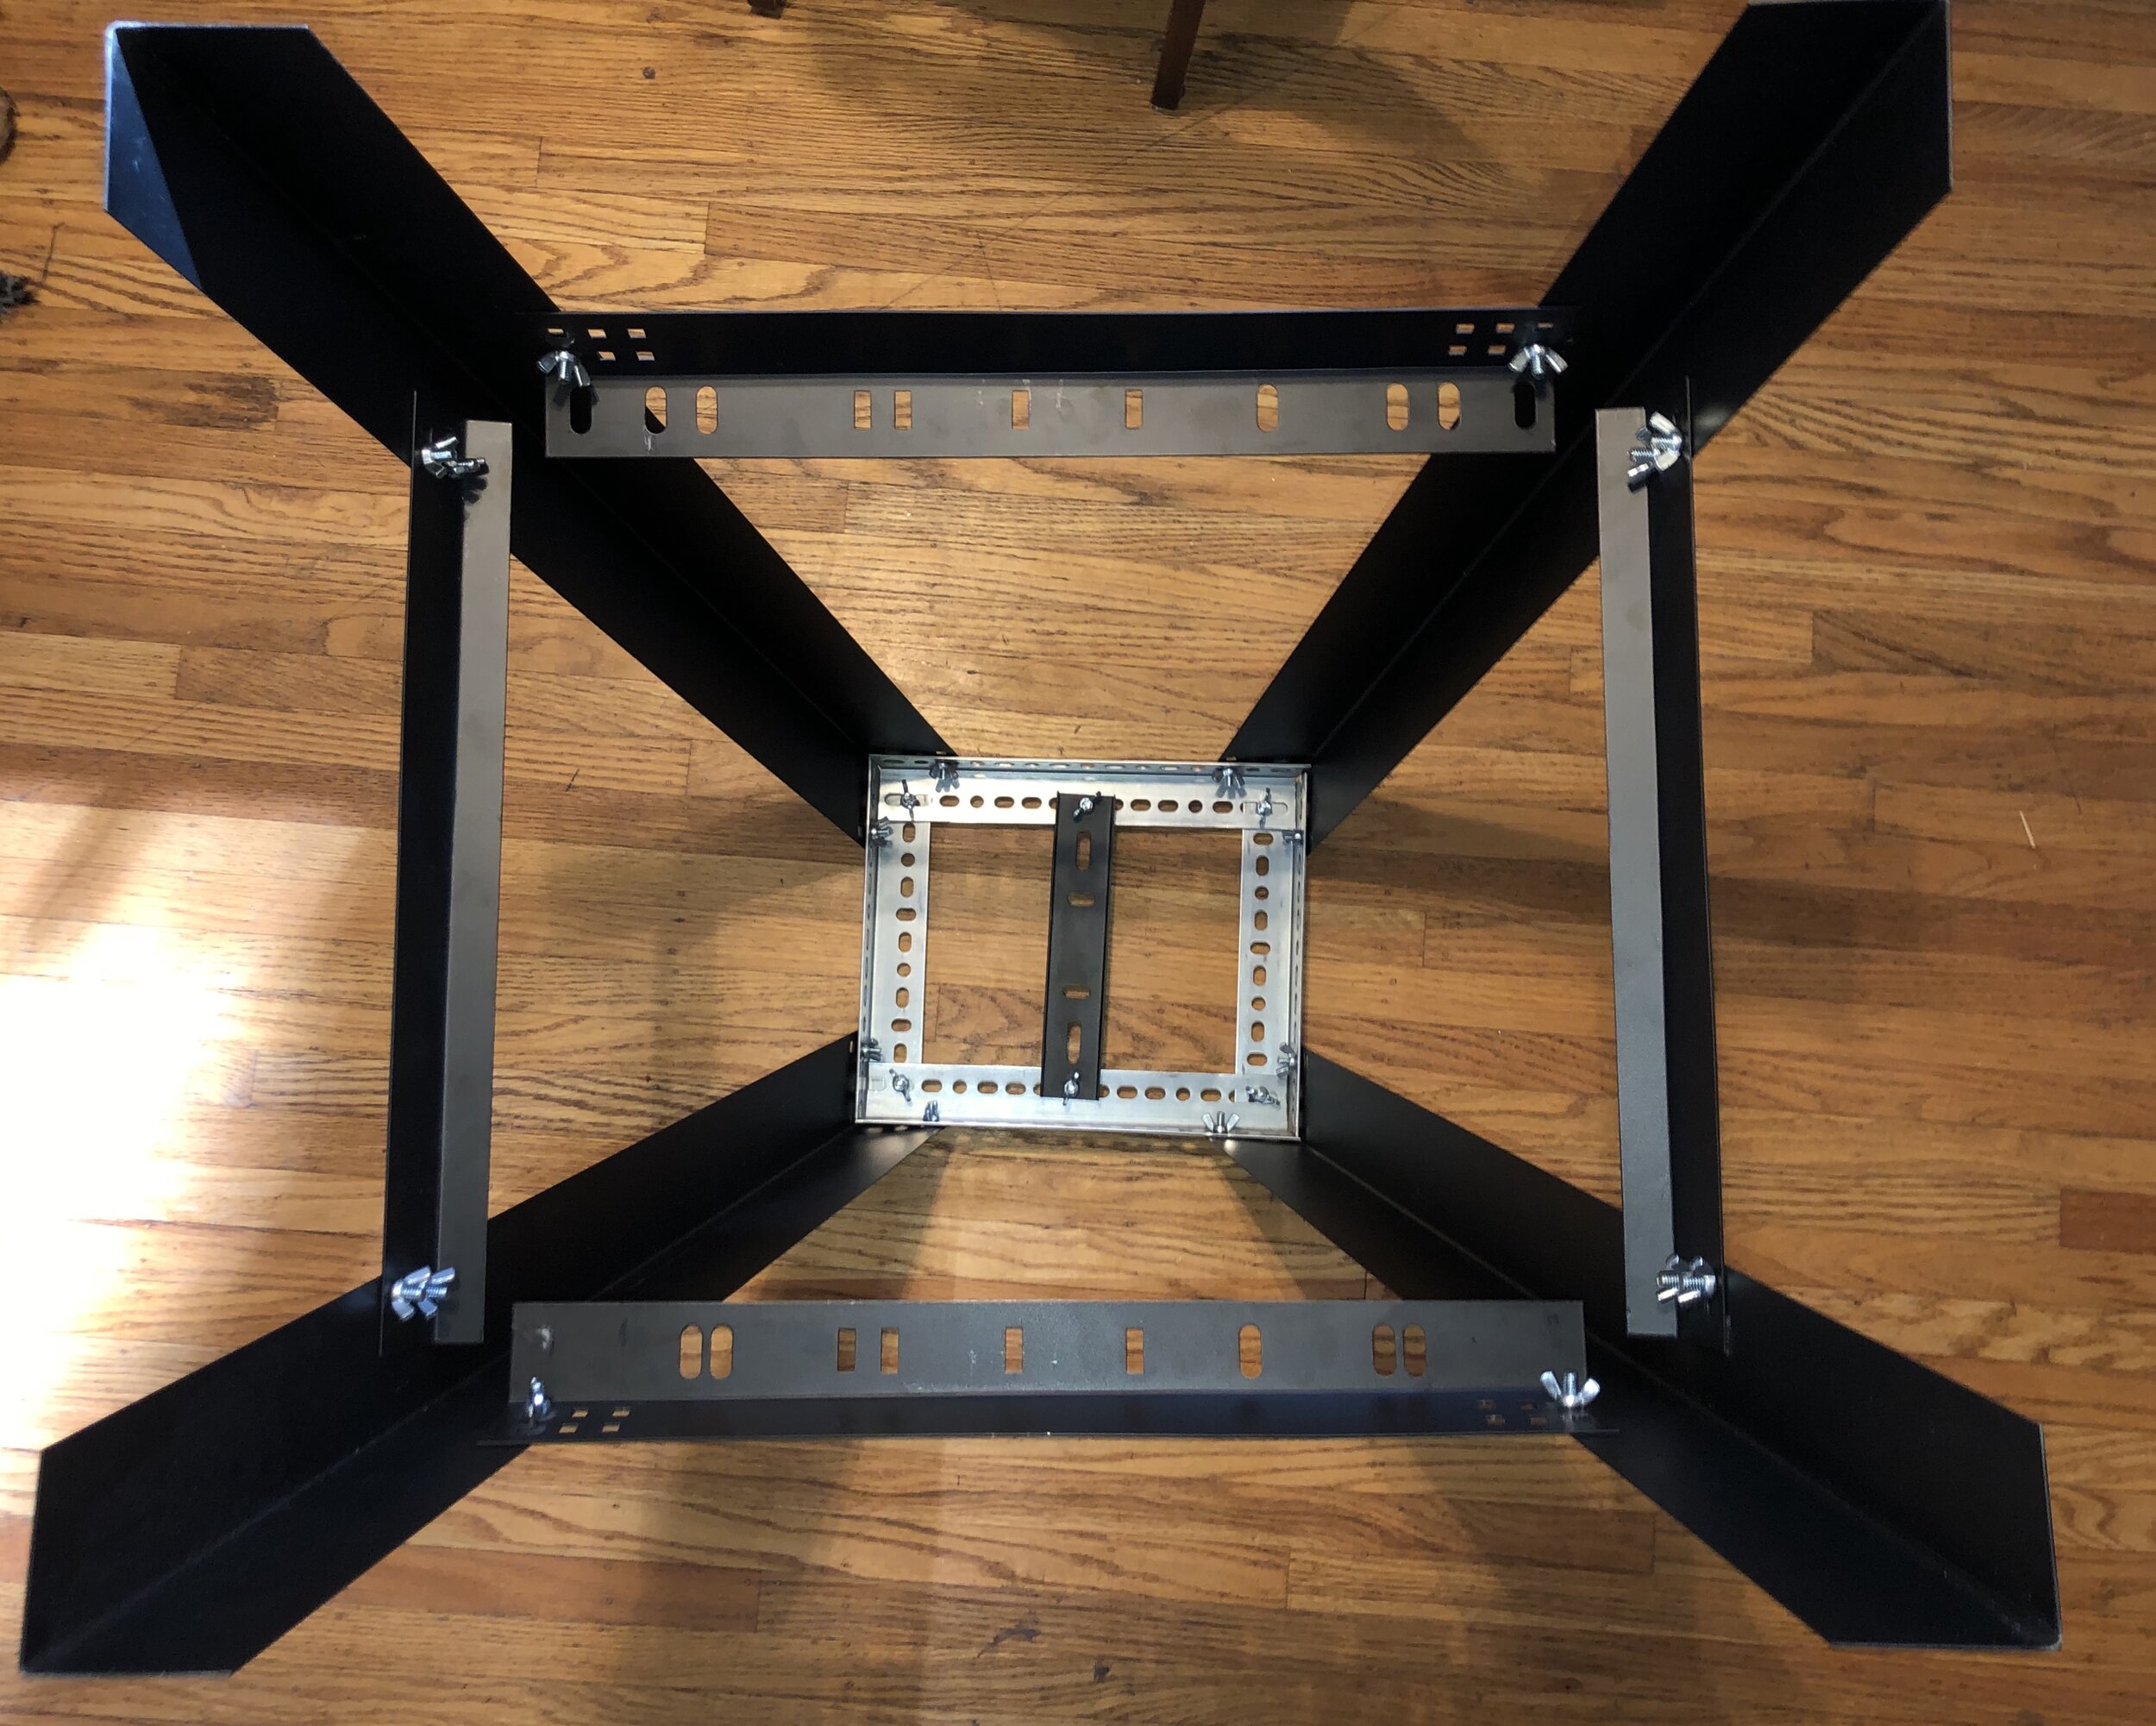
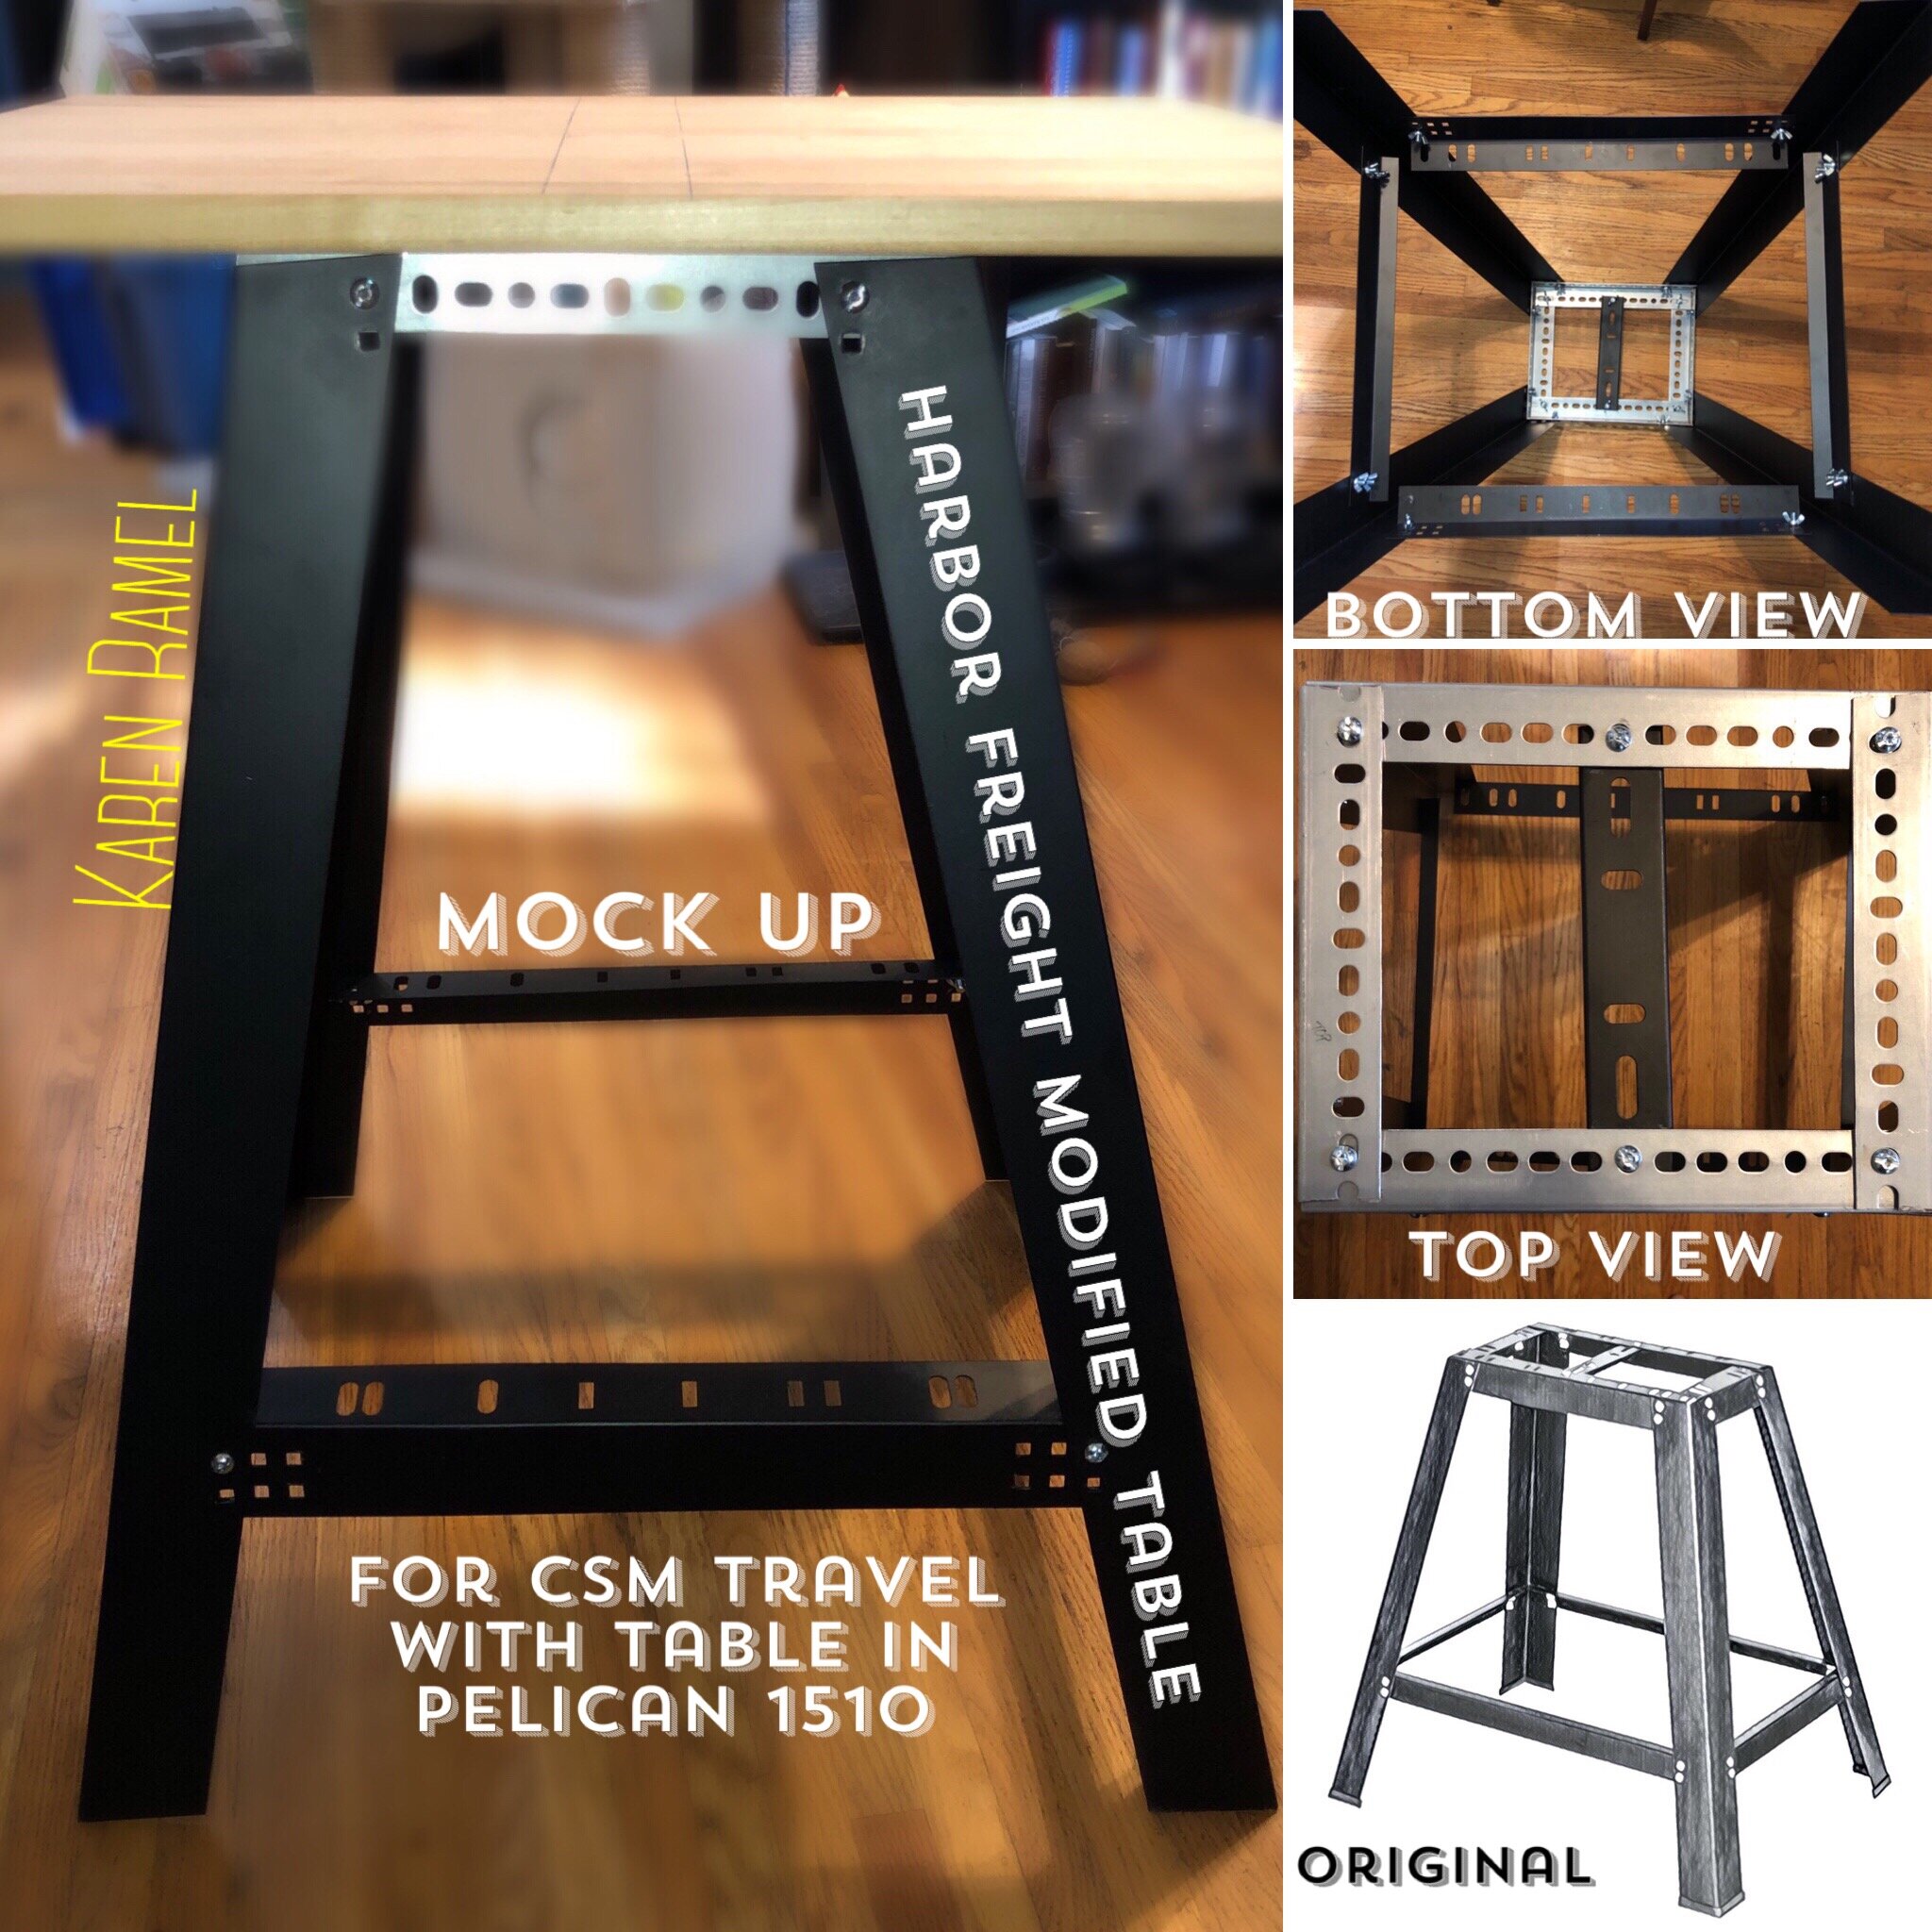
Photos of the modifications and timeline steps

I never seem to have one thing on the go so forgive me for jumping around.

Ok back at it - I am in lust with the idea of having a table which can be assembled and stored in a secure case also holding my machine. Having this for car travel events would be ideal but being so would allow for future airplane travel event destinations as well.


REGARDING FOAM

Foam is NOT CHEAP - but if you purchase non-pluck (non-pre-cut into cubes) foam it should last with extensive wear and tear if you protect the foam from oil contact.

The only person who really spoke about foam when I was seeking info suggested 1” thick layers purchased by the Foam Mattress shop - after having done this I realized that perhaps I’d prefer some thicker layers than what I’d ordered. Darn. Using foam one has to decide how to best align the parts within the case in a 3D layout. One has to decide whether to glue layers together or to leave the multiple foam layers like a puzzle. I would strongly caution against an extensive and confusing series of foam layers as this makes putting all back inside more difficult if flying - the harder it is for airport staff to return items the less likely they will be returned safely to the case - I’ve heard stories. :(


REGARDING CASES

A couple months ago I found a great deal for a larger 1650 Pelican online so I bought it (then upgraded the latches and wheels), and then I ordered two styles of special foam for it from a foam mattress shop. I didn’t finish customizing the foam to the case as I wanted to keep my options open (room for a second machine sometime in the future?!)

Ok so about the brand of cases I have and want to plan this for….

(I went with these because I was wrongly told this case will 100% cover the contents if something should happen when using the case and flying)

**Before we go any further I have had confirmation from Pelican itself that their guarantee ONLY covers the cost of the case - not the contents - so be SURE not to over pack a smaller case with too much weight!

**One can easily purchase a similar, secure case from a store like Harbor Freight at a much lower cost**

PELICAN CASES (more info on this website)
The Pelican 1510 Interior dimensions (LxWxD) 19.75"x11"x7.60" (50.2 x 27.9 x 19.3 cm)
The Pelican 1650 Interior dimensions (LxWxD) 28.57"x17.52"x10.65" (72.6 x 44.5 x 27.1 cm)

Looking at costs the new Pelican case 1510 was quoted at CAD$207.


REGARDING TABLES

The table I was using that the time - the popular adjustable height Ridgid table frame ‘travel table’, has a very wide table frame that can’t be reduced in size. See BLOG ENTRY ON THESE TABLES HERE. When in stock this table frame, a “Ridgid Flip Top Portable Work Support Stand” can be purchase from many sources including Home Depot, Amazon and eBay.

Ridgid table frame dimensions: (Height x Width x Depth) 7.50” x 21.70” x 30.60’. Weighs 24.29lbs (as per Home Depot).

So then I broke down what I wanted and how I could make this happen.

I noted that the wonderful Lamb Tuttle (correctly referred to as the Lamb LT-150 which is bundled with a beautiful reinforced metal table). Sadly the table alone was outside of my budget, quoted at $410 USD (plus shipping/customs).

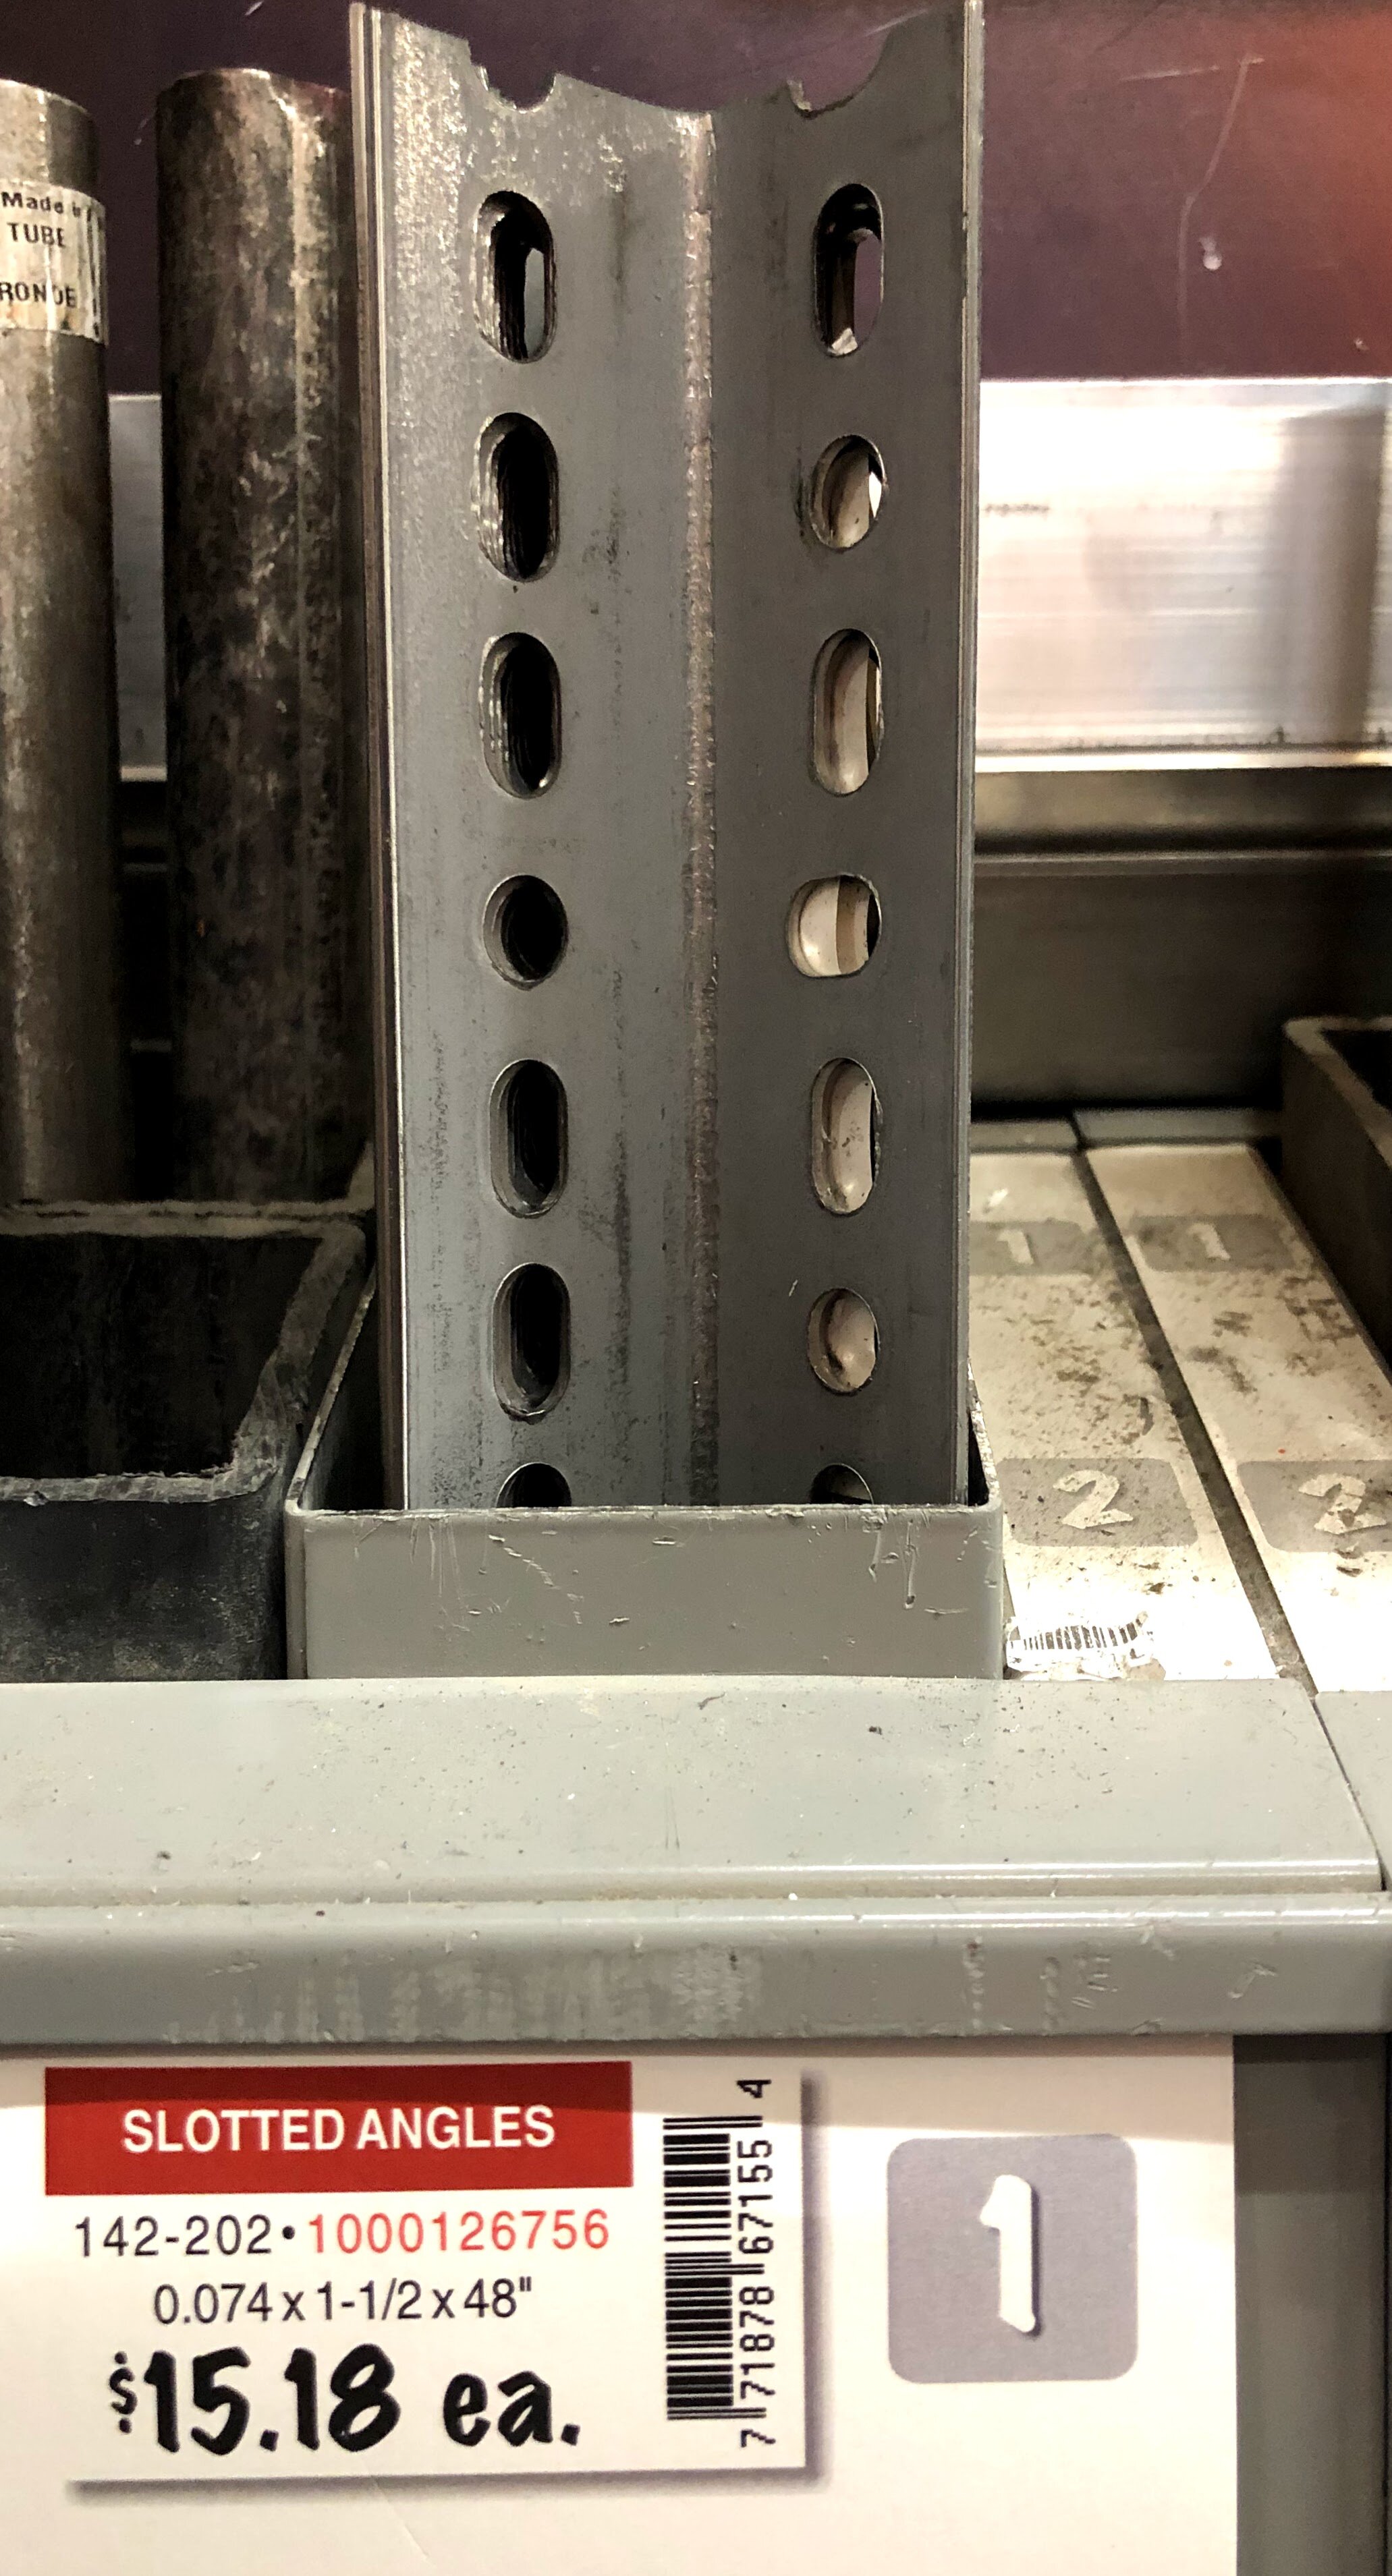
I also noted that the build for a table like this doesn’t appear difficult so I gave thought to making one perhaps completely from hardware supplies. Unfortunately for the cost for one metal leg I could instead buy a similar mostly finished similar design table from Harbor Freight in the States - they don’t have Canada shipping. Weekend adventuring yay! From home to the store it’s slightly over a 2 hour round trip drive if done in one visit. Harbor Freight sells this table for USD$35 with an additional 20% off coupon.

While planning our trip I continued to do my homework - I fell in love with the (Universal CSM Table) “NZAK Multi Machine Stand” offered by Jacquie Grant of Sock World however it lists at $349 CAD (plus shipping/customs). It is VERY lightweight. I need to win the lottery.

Ok back to the idea of the Harbor Freight table - the idea of a metal, easy-to-assemble style of table has been bouncing around in my head for a couple months.

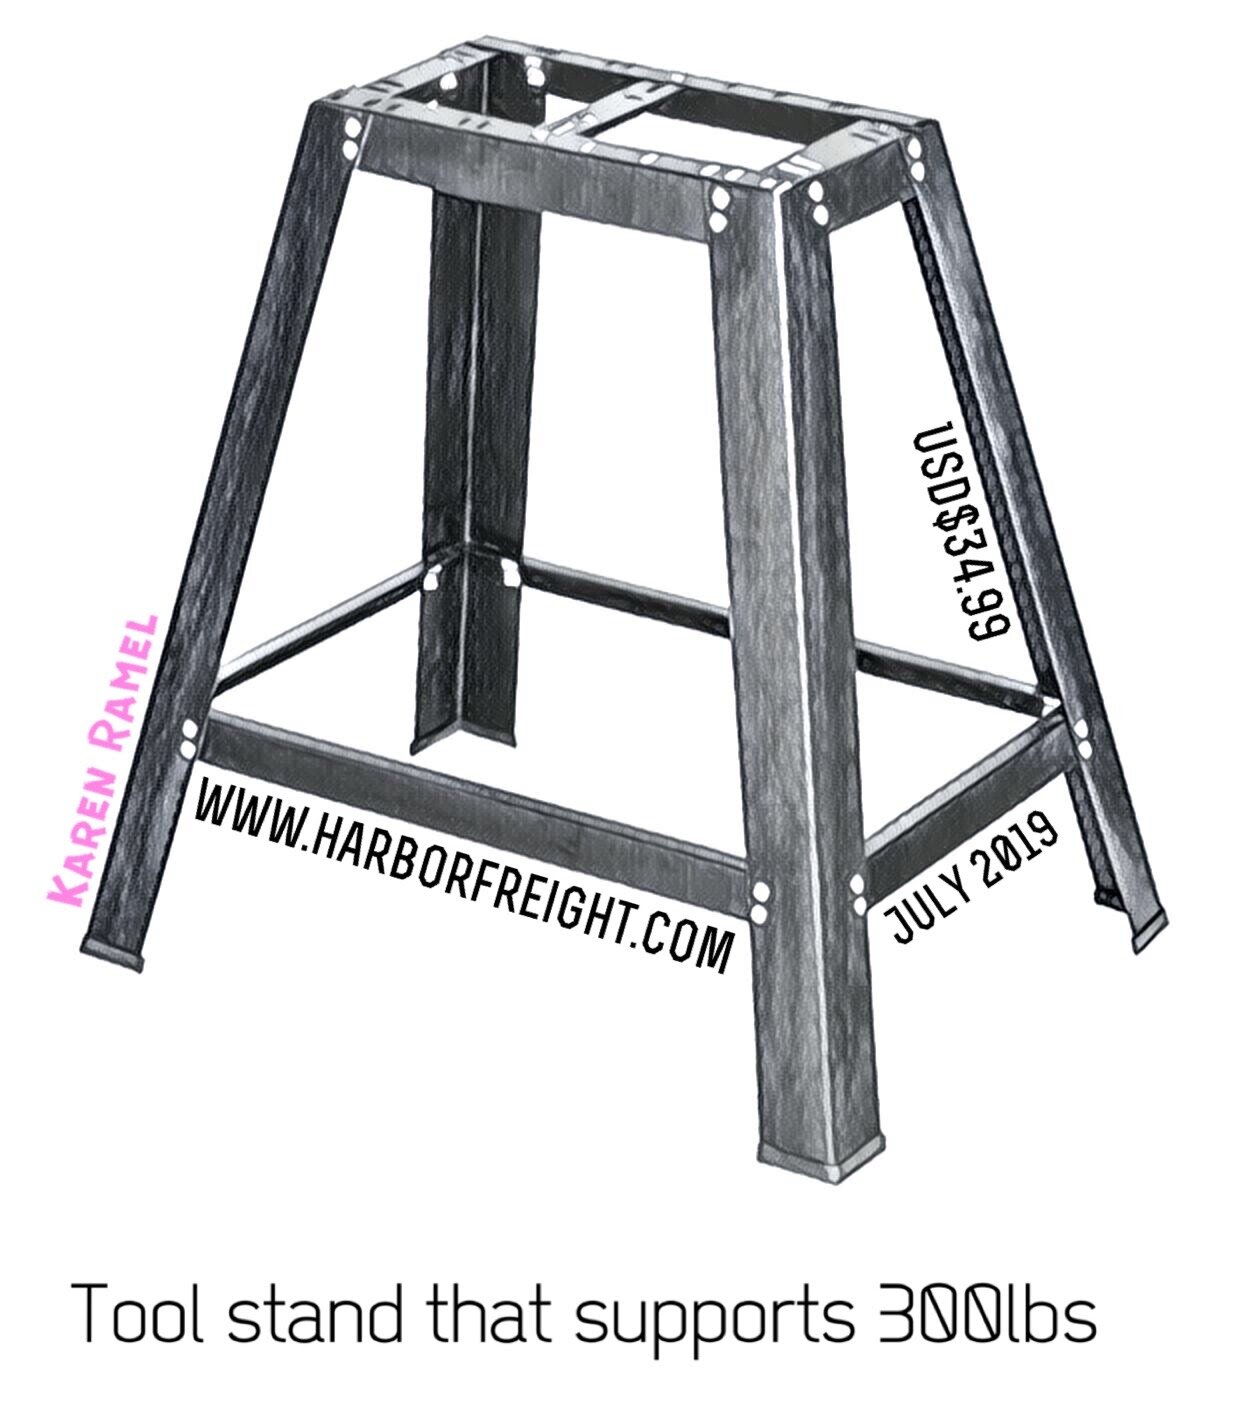
Alas I discovered the American retail store “Harbor Freight”. They are a tool focused multi-location shop that does not ship to Canada. However after viewing their “29’ Heavy Duty Tool Stand” for USD$34.99 my boyfriend and I decided to make a romantic overnight trip on the weekend. When we drove the 2.5 hours to get to the nearest location (Bellingham, Washington), they had one on display and one unopened package on the shelf. (We had called ahead - they’d said they had 5 in stock). Their website even offered a 20% off coupon shown at the cashier. SCORE!

FANTASTIC!

We even picked up a totally useful Folding Platform Truck for USD#39.99

We had such a lovely time in Washington - I had my first Olive Garden visit - we walked around a near a large park with nature trails - we shopped at Trader Joes - AND we went to Bellisfair mall where we discovered a store called TORRID. We got my honey a new pair of kicking runners and three wonderful dress shirts at JC Penny.

Once we were back on home soil we stopped at home depot again and upgraded from the imperial screws used to metric to be able to also use wingnuts instead of the regular connectors that came with the table.

I am now eagerly awaiting the Pelican 1510 case that I ordered.

FOLLOW-UP: The table is complete and as amazing as hoped.With the wooden top I found the table to weigh 15-20lbs - sadly more than hoped. Assembling this table takes approximately 20 minutes however considering all I am still very pleased.

Also on INSTAGRAM - REF1,


SEE ALL BLOG ENTRIES ON THE BLOG INDEX PAGE | Follow us on a variety of social sites see TAPLINK | Interested in Circular Sock Machines? See the CSM START Menu first page. | Seek something specific? Checkout the Index page.


2018 Oct 3 - Ridgid FlipTop Adjustable Tables

IMG_5524.jpg

The original event table

I bought a wonderful table at the Spokane Crank In (Sep 20-23/18) but didn’t like the cut holes, the large base under the table top or the way the hook was anchored to the table. BUT Yes its a great table but I am picky - nothing against the seller or anything.

One can use this table to travel via plane using a secure case like a PELICAN CASE however note that the table top and width of the legs restrict you to what size case you can use. Also note if you over pack by weight and it causes the case to fail - you are on the hook for the damaged contents - not the case seller.

For all of my created and re-worked tables and more see here one can also see the gallery below.

For more info on supplies I like see here.

Also on INSTAGRAM


44237740025.jpg

The UPGRADED table

Not all tables suit all persons. Not all setups make sense to all people.

I have two wooden table tops, one for everyday use and the second smaller size designed to be compact enough to fit into a future pelican airplane travel case with dismantled legs. Unlike the Erlbacher Gearheart Table with its tilting underside wood mount, this table top is now flat and perfect to pack away. There is nothing wrong with the Erlbacher table - I am just picky. :)

Things I modified for my own use:
-made table able to go lower by shortened vertical T-bar stem by 2”
-installed black end cap which doesn’t interfere with dismantling table
-removed tilt option by uninstalling flat grey plastic “Ridgid FlipTop” and cut off its two metal frame end mounts - patching as needed with KwikWeld adding “K”
-removed screw hook installed into a small piece of wood (for previous single tension mount) kept metal eyelet in T-bar stem and replaced nuts with wing-nuts. -installed second metal eyelet on T-bar stem beneath current. -Drilled four holes into wood and installed T-nuts (two used as anchors for T-bar stem tension mounts, two used with longer eyelets to secure wood table top to frame from the bottom)
-Drilled two holes near leg extension where stem intersects legs as base reinforcing stabilization when table is much higher to be used with bigger/longer tension mounts to the table. -Reinforced the table underside with metal flashing to protect wood from machine clamps. -painted the table top teal and the underside and edges black. -Installed a T-nut for removable ball/cone holder near machine. *I chose 2.5” metal eyelets to screw table to legs to reduce table top clutter.

You *could* use the table with one tension mount by why not make it extra secure and balanced with two?

I share only to share not to insinuate or state that this is the only option out there. I sit in front of the table with the machine off to the right.

This is simply what I did for myself and I *love it* after all why not be surrounded by useful and pretty things?

Below is the gallery of ALL photos of upgrades I’ve done to this table setup. Clicking on an image to view larger.

You too can make yourself a wonderful csm table by picking up a board for the table and the legs from your hardware store or eBay ‪”Flip Top Portable Work Support”

Also on REF1, REF2,

Essential hardware to connect your table top to your frame and the tension component (turnbuckle) to the table frame and table top itself.


reinforce your wood table clamp area

Whenever using a wood table top it’s a good idea to reinforce the underside where the clamps will attach. This reduces wood wear and tear. I’ve used thin metal sheets that I drill holes into. The sheet is glued and screwed onto the underside of the clamped area of the wood table top. Be sure to place screws ideally outside of where the machine would clamp.


How to I WOULD upgrade a Erlbacher Gearheart Table
(if I were asked AGAIN…)

40469501613_04296c70db_o.jpg

This table uses the *exact same* legs as the hardware store/amazon/eBay available “Ridgid FlipTop” table.

Why modify it? (There is nothing “wrong” with this table but if it can be better so why not?)

Removing the large wood mount increases table real estate, we don’t use the tilt ability so nothing lost (other than moving table in two pieces over one), and doing this makes the table top easier to transport truly flat. For more info on modifications see the other rigid fliptop table post or see this INSTAGRAM POST

This is a great table foundation offering height adjustment not otherwise available out there.

Also on INSTAGRAM - REF1, REF2,


hang_heel_forks.jpg

Keep you CSM table balanced by hanging your heel weights on a removable metal hanger under your table. Easy access!

Also on INSTAGRAM


ADDING A SHELF TO YOUR TABLE

tableupgrade_shelf.jpg

Inspired some of the other CSM tables out there, this shelf can be completely disassembled.

Also on INSTAGRAM


UPGRADING THE TABLE TOP

This photo below is of the most recent paint - this table has been painted teal before and is now this color. I used a product called “Unicorn Spit” in a custom hand done technique to match the new handle upgraded by Dave Lord of Chambord CSM. Also posted on INSTAGRAM

custom-homemade-painted-circular-sock-knitting-machine-table-top_46575654714_o.jpg

See many other topics or tables by category on the quick lookup page INDEX


Another seller of these table legs:


SEE ALL BLOG ENTRIES ON THE BLOG INDEX PAGE | Follow us on a variety of social sites see TAPLINK | Interested in Circular Sock Machines? See the CSM START Menu first page. | Seek something specific? Checkout the Index page.


2018 Aug 21 - CSM Travel Storage Stand

Each of the photos can be viewed bigger if clicked

When I had this idea as it appears above in the images, it was inspired by the need to travel locally by bus with my machine and to ensure upon arrival that I can still use my machine - even if the local tables are too thick to mount the machine to their tables. Video summary of this cool idea.

This project began with the inspiration of a hardware store wood ‘crate’ which had the holes cut into each side as a handle. Basically I removed all the ineffective slats and up-cycled those handle pieces, replacing all other sides with wood I then purchased.

Featuring:
-an inner vertical shelf (reinforced with a sheet of metal) to clamp and protect the machine within
-a top horizontal surface to clamp the machine onto for use on the stand, anywhere (without buckle weights)
-without the machine clamped to the top surface, the left and right clasps open to allow the top to completely flip up and open on a horizontal hinge on the back of the stand (an extra unecessary feature it was later decided however it is nice to be able to check the machine easily if needed while clamped on the inner vertical shelf).
-rubberized strips were applied the bottom of the stand for secure use on any surface

FUTURE IDEAS:
-design a new version of the stand so that the buckle and buckle weights can be used on the stand with the machine while not unbalancing it.

INSTAGRAM: REF1,


SEE ALL BLOG ENTRIES ON THE BLOG INDEX PAGE | Follow us on a variety of social sites see TAPLINK | Interested in Circular Sock Machines? See the CSM START Menu first page. | Seek something specific? Checkout the Index page.