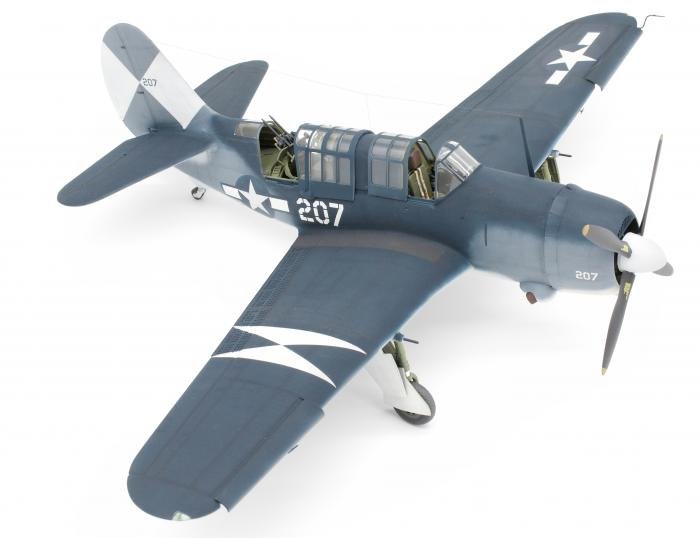
Peter Fearon completes his out-of-the-box construction of Infinity Models’ newly tooled 1/32 Curtiss SB2C-4 Helldiver.
So demanding were requirements set by the United States Navy (USN) that the design of the SB2C Helldiver – the second Curtiss aircraft to carry this name – was beset with problems. The prototype first flew in December 1940, but so many modifications were deemed necessary that the SB2C-1 didn’t enter combat until late 1943. Among its major faults, it was underpowered and demonstrated poor longitudinal stability, resulting from an under-length fuselage – a compromise to fit on to aircraft carrier elevators. Poor flight characteristics and difficult serviceability resulted in various unflattering nicknames, of which ‘The Beast’ is the most printable.
Things improved with the SB2C-3’s introduction in early 1944, utilising the R-2600-20 Twin Cyclone engine (producing 1,900hp) and a Curtiss four-bladed propeller. When the C-4 followed later that year, fully perforated dive flaps were standardised, improving stability and finally matching the design to expectations. Unfortunately, by that point, the concept of the dive-bomber was obsolete in light of the evolving role of fighter-bomber operations.
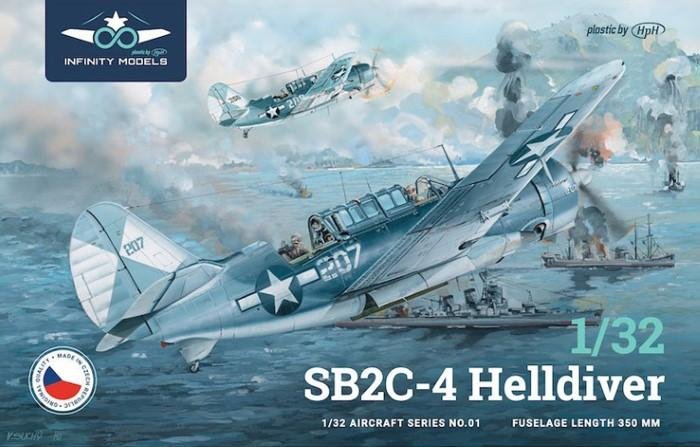
| SB2C-4 Helldiver | |
|---|---|
| By: | Infinity Models |
| Stock Code: | INF 3201 |
| Scale: | 1/32 |
| Price: | £89.99 |
| Available from: | Tiger Hobbies |
A first for Infinity
The advent of Infinity Models’ 1/32 Helldiver kit in late 2021 was interesting in two respects. Firstly, it’s the first injection-moulded representation of the type in this scale. Bearing in mind the rival Douglas Dauntless has been replicated in 1/32 since 1978 and Trumpeter’s kit is currently available in at least two variants, it’s amazing how long it’s taken for anyone to kit ‘The Beast’ in the same scale. Secondly, the release comes not from one of the mainstream manufacturers, but as a limited-run release from Czech firm Infinity Models. Essentially, this is a side-arm of HpH, which has been producing large-scale resin models and kits for more than 30 years. It had originally produced a resin Helldiver, but has now moved focus to injection-moulded kits under the Infinity label. On opening the very full box, more than 300 parts were revealed, spread across nine runners.
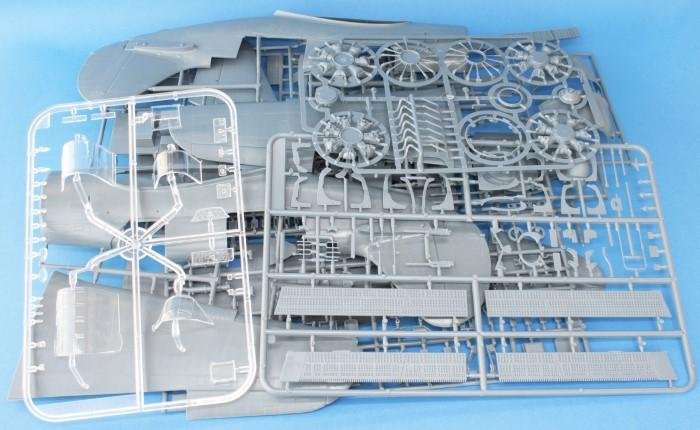
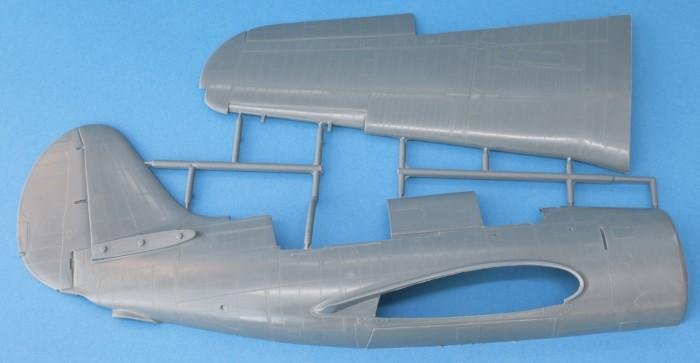
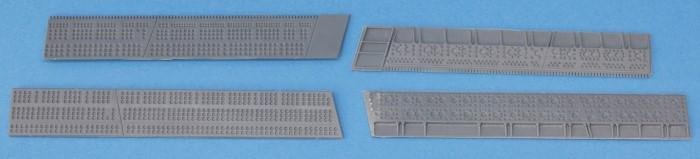
Above: This kit is complex, comprising more than 300 parts – attachment points were thick and the moulding was not particularly clean so neatening was required.
There was also a small PE fret and another representing the ‘fabric’ seatbelts. Close inspection showed attractive surface detail, a mixture of engraved and some raised features, which appeared effective. On the other hand, the overall standard of moulding was mediocre. Prominent seams were evident on virtually every part, and detail was not as sharp as found on most modern mainstream kits. There are no fewer than seven aftermarket upgrade sets by Infinity available for this kit, all sold separately. Using them all would be expensive and result in a very lengthy build, so this model was completed from the box, with just some minor ‘DIY’ embellishments.
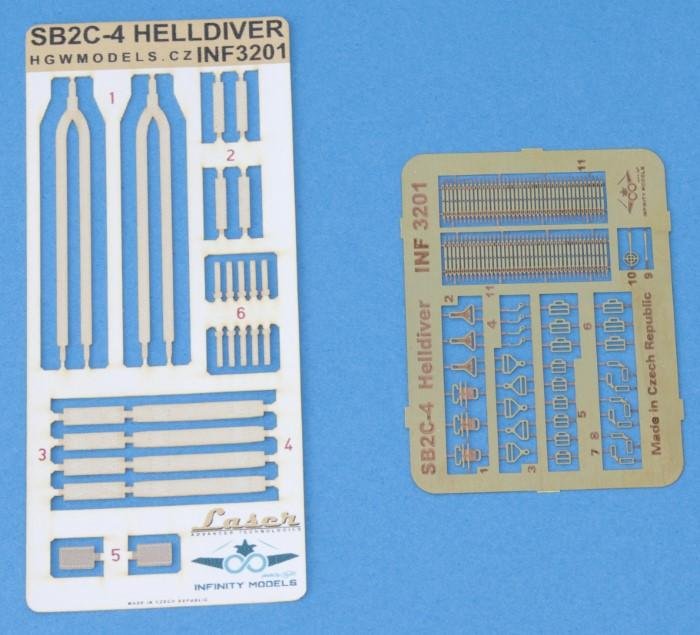
Above: The fabric-effect seatbelts and PE fittings were pleasing.
Above: Surface detail appeared attractive, mostly being engraved – larger items demonstrated the attachment points, which would need sawing carefully.
And so to (much) work…
The instruction booklet appeared to be of good quality and had construction beginning with the front and rear interior sections. It was immediately obvious considerable neatening would be required before any meaningful assembly could begin, and a considerable number of parts were involved. Many hours were necessary and IPMS (UK)-branded seam-removing tools were employed, being ideal for this work. Fuselage halves were well moulded and detailed but had no alignment pins – common in short-run kits. There were several floor and bulkhead parts to be fixed before any painting was attempted or any small detail parts fitted. Variable fit meant some were almost perfect and others required reshaping and clamping. This was a job best done in stages, attaching one or two parts at a time, allowing plenty of curing time and constantly test-fitting the fuselage after adding each new piece. An extra step taken was the inclusion of three large tabs, made from scrap plastic and shaped to the interior curves. Once all was in position, the halves were taped together to check the overall fit, which proved satisfactory. At this point, the model’s imposing size became apparent!
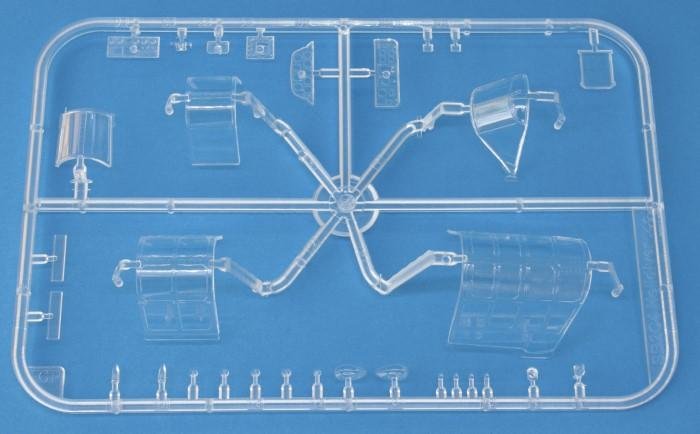
Above: The transparent parts were slightly thick with rather heavy frame lines. However, they were cleanly moulded and very clear.
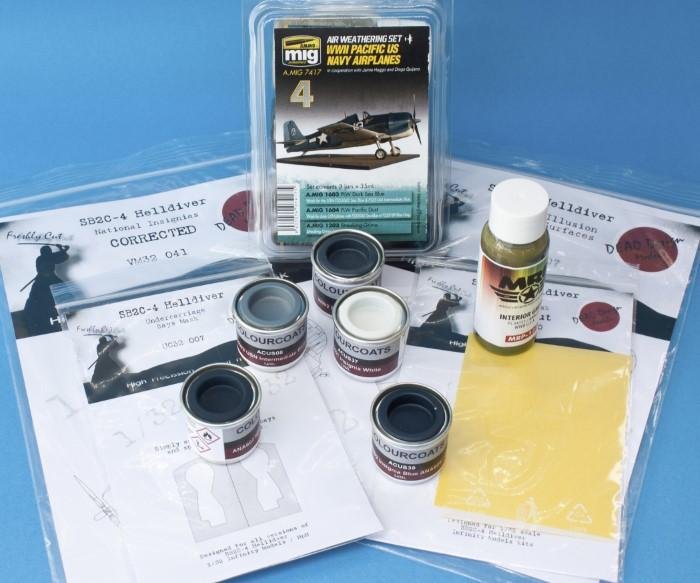
Above: The ‘supporting cast’ of complementary products comprised Dead Design masks, Colourcoats and Mr. Paint hues plus and an AMMO-MIG weathering set.
Cockpit modifications
Constructing and detailing the fore and aft interiors could then continue. There was a lot to add and the extensive glazing means much of the work can be seen, so time and effort spent at this stage was well rewarded. An additional cockpit upgrade set is available, but the kit represents this area quite well. Points to note begin with the instrument panel. This is a transparent item with a grey plastic backing; dials are represented on a decal that is to be put on the latter with the clear panel placed on top. Two problems quickly became evident; first, the transparent item has the glass discs for the dials moulded with it, so painting would require each to be masked.
Secondly, the dials on the decal didn’t exactly align with the apertures on the panel itself. The ‘glass’ covers on the panel were hence reamed with a small drill and needle file. The whole panel was then thinned on a sanding sheet to reduce the depth of the instrument recesses, and the part then painted as normal. The decal with the dial detail was separated into smaller subjects and these were added in stages to the backing panel, ensuring correct alignment by dry-fitting the front every time. This and the rear panel were then attached, with the glass faces represented with a touch of Humbrol Clearfix. This procedure was also used on smaller panels in the aft cockpit.
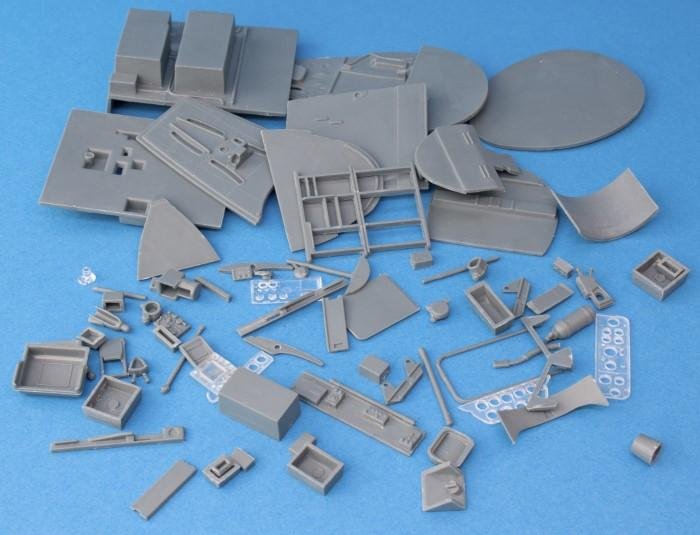
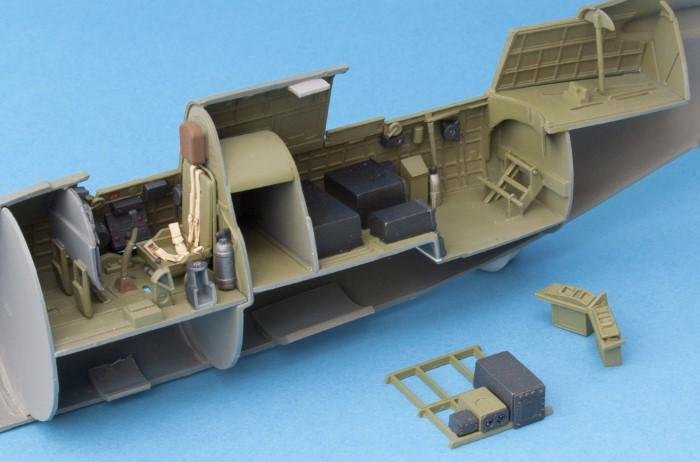
Above: A large number of parts were included for the interior. Note that the transparent instrument panels have already been modified.
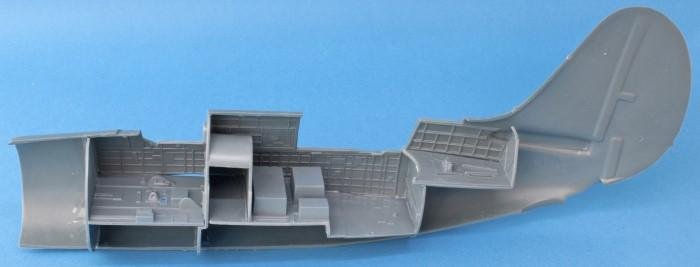
Above: Once fitted, the various bulkheads and firewalls made for a very strong fuselage – useful for the extra work to follow.
A good level of detail
Once the various bulkheads were in position and the individual cockpit components identified and neatened, everything was given a coat of Halfords Grey Plastic Primer. Replicating FS 34151 Interior Green, Mr. Paint’s MRP-131 was used – this is an acrylic lacquer that can be airbrushed straight from the bottle. It went on very well, with even coverage and adhesion; note, it took slightly longer to dry than standard acrylics, but gave a very resilient finish. The only downside was heavy vapour during spraying, requiring plenty of ventilation and wearing a respirator/mask.
Fitting pre-painted interior parts was a long task, not helped by a general lack of firm locating points; however, the instructions were generally clear about where everything should go. There were quite a few data panels represented by decals, which looked acceptable but needed close trimming to remove extensive carrier film. A very pleasing feature were the 'fabric-effect' seatbelts, with PE brass buckles, for both the pilot's and gunner's seats. So many large-scale kits seem to ignore such restraints, and it was a pleasant change to see the job done properly.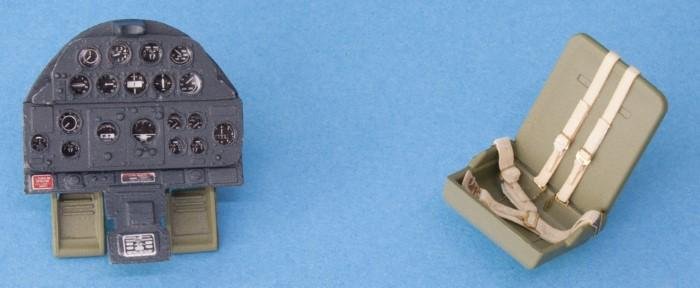
Above: Detailing work began with the pilot’s seat and instrument panel; the latter required modification but appeared quite effective afterwards.
Above: The forward and aft cockpit detailing in position. Some appear rather clunky by modern standards but are acceptable on the finished model.
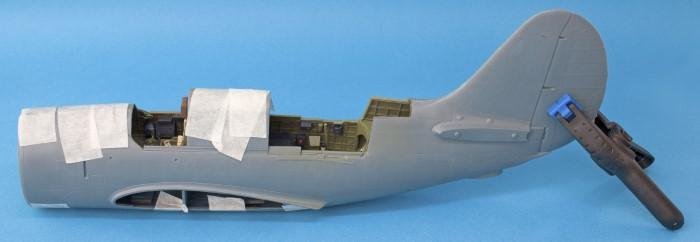
Above: Large fuselage halves were glued together in two stages, starting with the tail. Parts mated well but the seam alignment was less impressive.
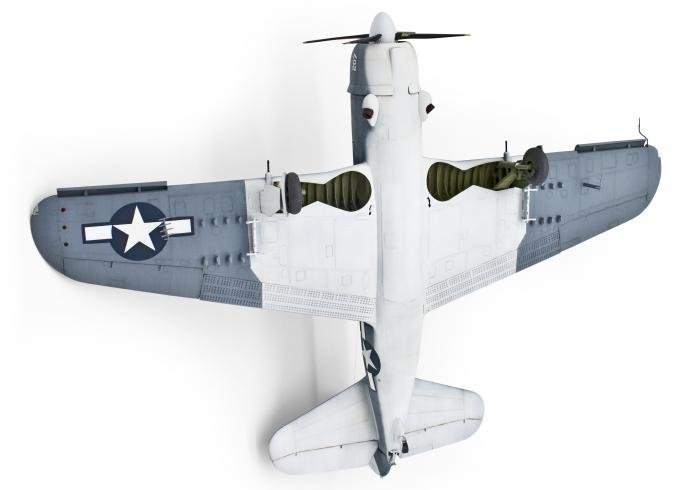
Infinity’s instructions have the rear gunner’s seat, guns and mounting ring assembled and attached much later but it was far better to do this work at this stage. This is because the rear cockpit is very crowded with various equipment – unless it is all positioned carefully, there won't be room for the seat and guns to be inserted, so constant checking is necessary. As it was, the aft end of the bracket holding the ammunition boxes (Part G16) needed shortening by approximately 3mm to allow sufficient clearance for the ring to be inserted easily. The gun rail (F23) has distinctive lightening holes moulded solid, but their position was indicated to make opening them quite easy and hence improve their appearance.
An important modification is required on D52, which mounts the guns to the rail. If this is fitted as per the instructions, the weapons will sit too high in the cockpit. The part has two vertical rods moulded next to each other, with the rear one longer than the front – the former needs to be cut away. The remaining example is attached to Part D60 and then to the gun ring. This makes the armaments sit lower and largely solves the problem. A PE gunsight was provided but the barrels needed opening to improve accuracy.
Fuselage halves were then mated. Fit was generally good with no gaps, but alignment was not perfect and the join lines were very prominent, requiring a lot of attention to remove without losing surface detail. Fillers of choice were Milliput for the larger areas and Holts Cataloy Knifing Putty for smaller blemishes and any fine scratches. The wing spar (Part I10) is best added after the halves are assembled rather than before as the instructions recommend, so it is easier to achieve proper alignment. The instructions show the spar being attached to the rear face of the pilot's bulkhead, but it should be on the front or the wings won't fit properly.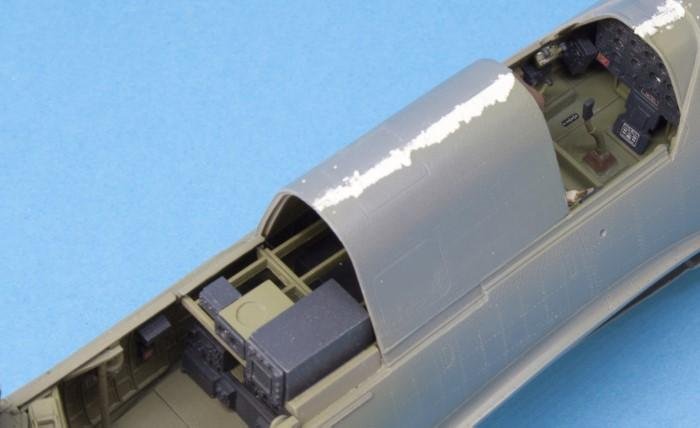
Above: Basic but sufficient interior detail is apparent here, as is the filler along the poorly aligned fuselage seams, which took time to repair.
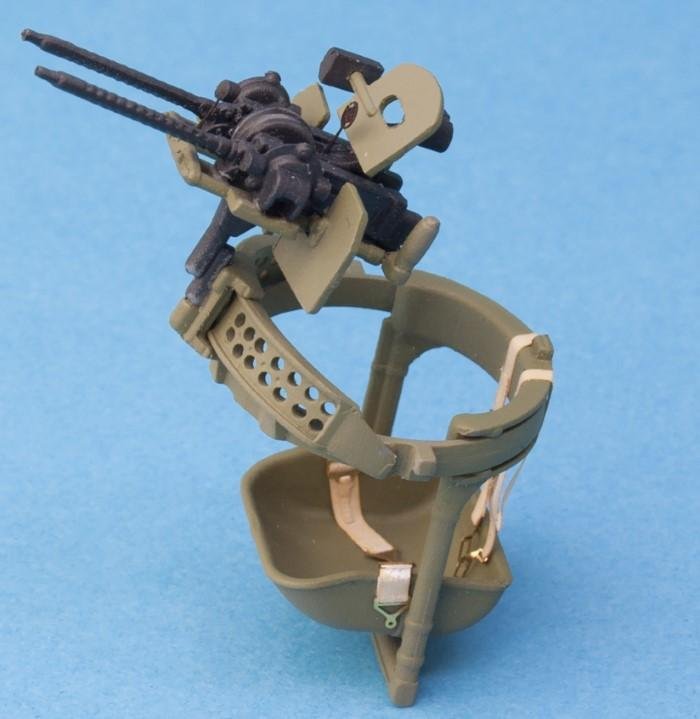
Above: The gunner’s seat and gun ring look good and assemble well.
Engine trouble
The powerplant and cowling were completed next. Components for the latter were well-moulded, thin and captured the complex shape. Prominent join seams needed removing and a touch of filler was required around the edges of the front intake, but the finished item was attractive. Cooling gills were moulded in the open position but both in-flight and parked photos showed this was often the case, so it wasn’t a problem.
Engine components appeared rather basic at first glance but once they were neatened, the level of detail was reasonable. Assembly proved to be an interesting experience... There are five stages identified in the instructions, and the first four went perfectly – cylinder blocks, push-rods and crankcase cover all went together easily, then all 14 fuel induction pipes slotted into position neatly. The completed unit was starting to look good and all that remained was to fit the four-part exhaust manifold. It did not fit at all, not even remotely. Significant cutting, sanding and general reshaping cured the problem, taking a long time. It would be worth considering leaving the exhaust components off altogether – even through the open cowling gills, they are not really visible on the completed model, and it would save a lot of work.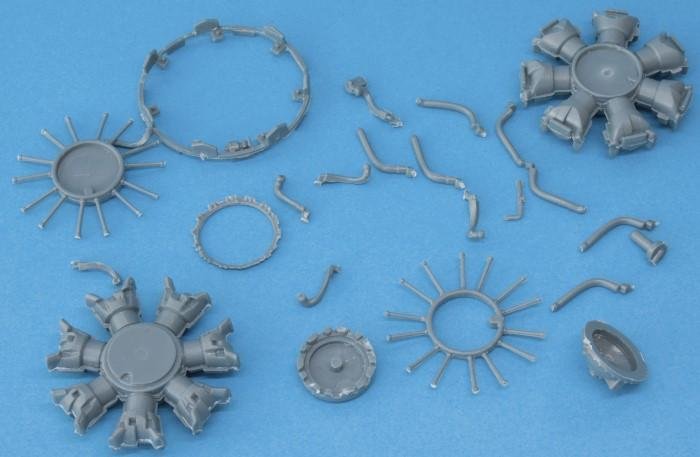
Above: Initially appearing basic, engine components didn’t look bad once neatened and sections assembled… but issues came later.
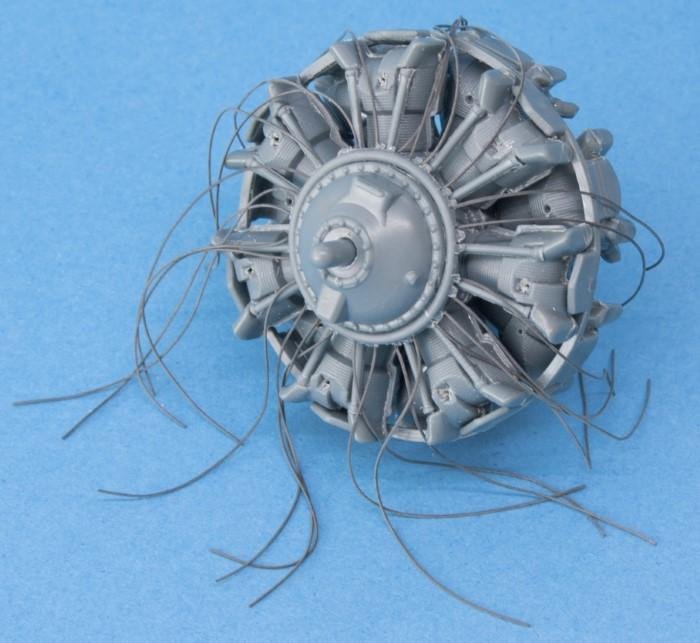
Above: Further detailing for the spark plug cabling was added to with rubber.
No ignition leads are included, so these were represented with fine strands of round-section rubber. Individual lengths were first attached to the collector ring (Part E7) and then run into pre-drilled holes in the front and rear of each cylinder, where the spark plugs would have been – as shown in online reference photos. Little of the engine is visible on the completed model, so this fiddly work is hardly necessary.
The completed engine was primed with Vallejo Model Air 71.097 Grey Primer (www.creativemodels.co.uk), then coated with 71.065 Steel. A thin coat of AK Interactive AK083 Engine Grime and a light rub of AK086 Dark Steel Pigment muted the tone. Then, fuel pipes received 70.995 German Grey, the crankcase cover Revell 43 Matt Medium Grey, and the exhaust a custom mix of red oxide and satin black. A little AK085 Track Rust Pigment was applied, then the completed engine was attached to the fuselage without issue, but the cowling had a prominent join line that needed serious filling.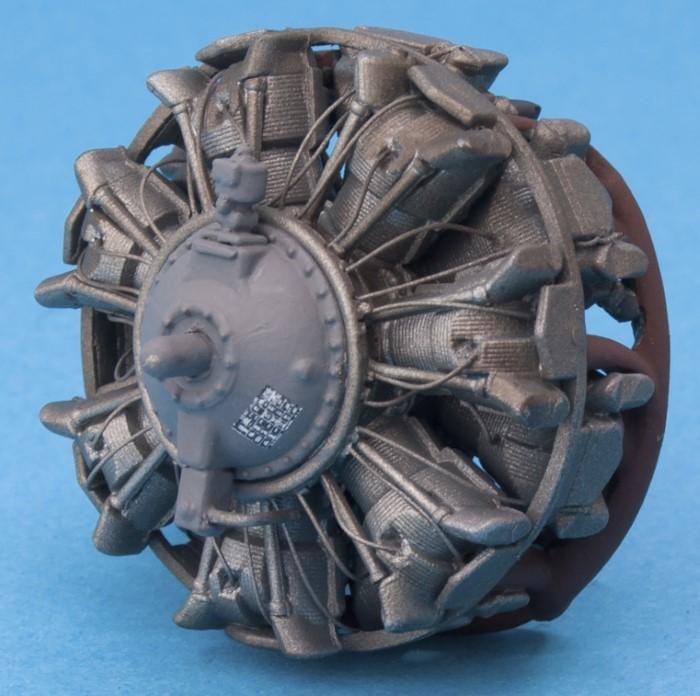
Above: Fitting the exhaust manifold (rear) was difficult yet was barely visible.
On a wing and a prayer
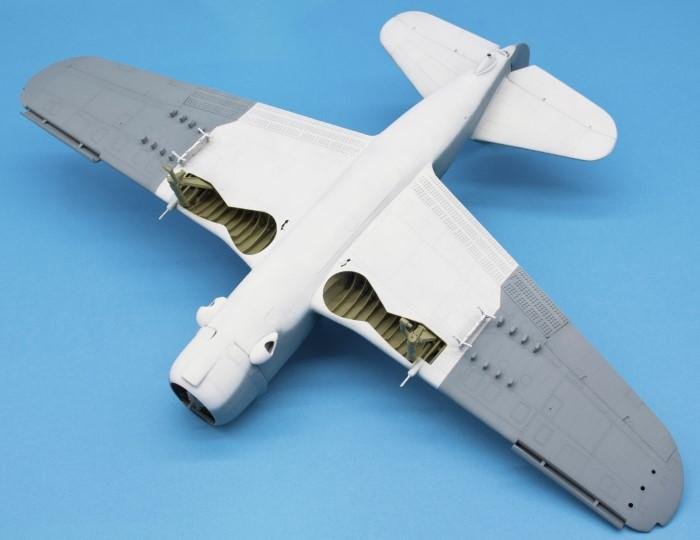
Wing assembly proved to be a major chore and was lengthy. The instructed sequence is rather unusual, with the upper halves being attached to the fuselage first, ribbing in the undercarriage bays next, then finally the lower elements attached… in theory. In practice, it proved less straightforward. Things started well, as the upper halves mated neatly with the fuselage after gentle reshaping. However, problems became evident at this point. Dry-fitting the lower halves showed alignment issues with the upper surfaces, plus fit with the fuselage was poor at the root leading edge despite being good along most of the chord. In addition, rib detail visible on the the upper wing through the undercarriage bays didn't match with the corresponding detail on the spar. If one side aligned correctly, the other side did not.
Realistically, the best solution is to split the spar centrally and insert a 2mm plastic card lengthener. Here, the spar was too firmly attached to be removed easily, so misalignment had to be accepted. The lower wing halves were attached to the upper and the large gap at the leading edge root filled and sanded. Rib detail in the undercarriage bays should have been added beforehand, but correct alignment took priority.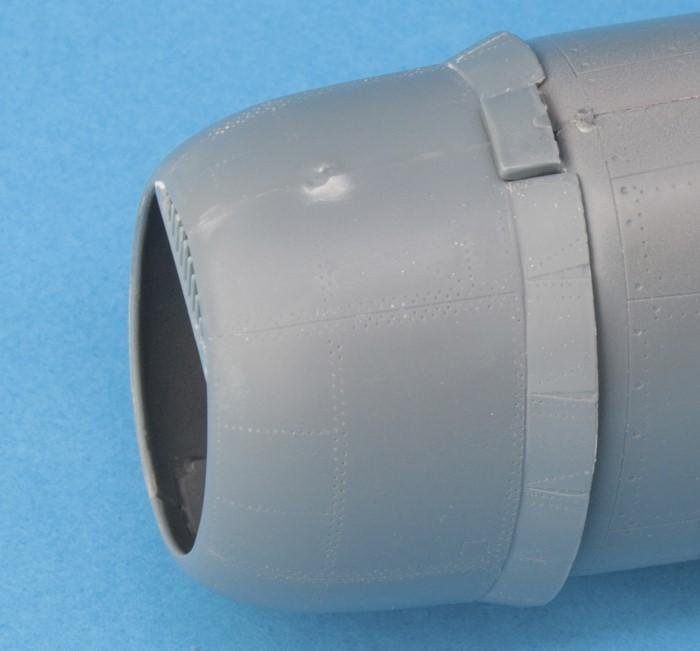
Above: The cowling left a lot to be desired when combined with the fuselage.
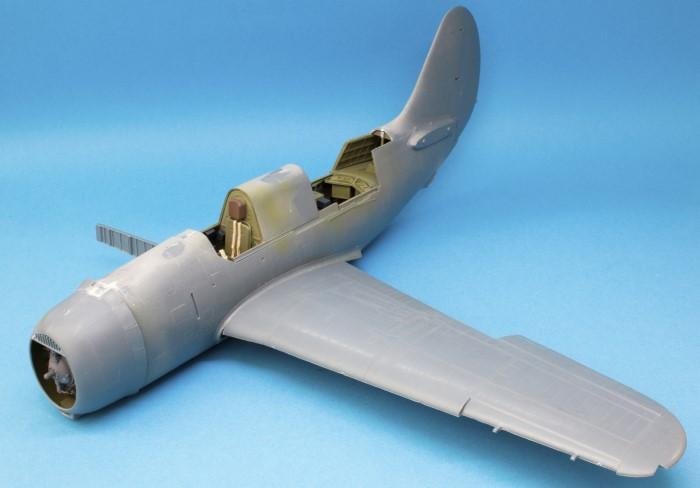
Above: Construction of the wings and undercarriage proved a protracted and difficult process – poor root fit is evident with just one upper section added.
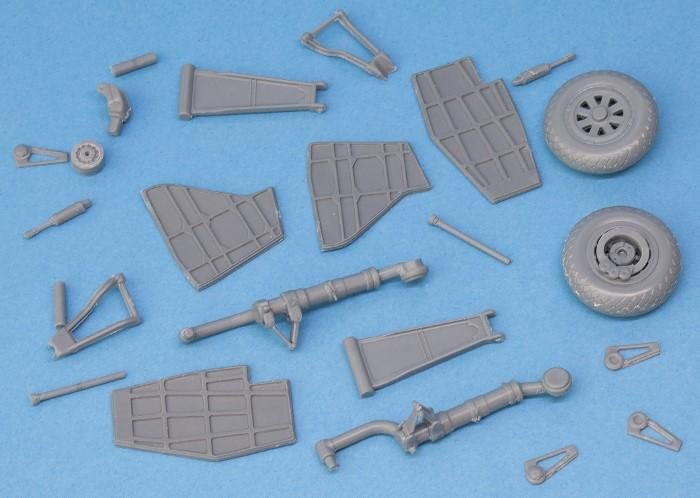
Above: Undercarriage components required neatening, but captured the appearance of the real item. Fitting it all was a challenging matter...
Above: The plastic dive flaps were just about adequate – but note that PE alternatives are available. Here, the ends have been chamfered to fit the wing root.
Patience pays with the wheel bays
There were 14 ribs to be added to each bay; considerable cutting, sanding, reshaping and filling was required and the task seemed almost endless, but the finished area did appear effective. It was at this point the main undercarriage units were added. This was earlier than suggested and contrary to normal practice for most modellers. Reasoning was the wheel bays contained no obvious point of attachment for the mainwheel struts – this is a very heavy model, so having a weak undercarriage join was not a good idea.
Individual components were identified, neatened and appeared acceptable, but the mainwheels weren’t convincing so investing in a replacement resin set may be a worthy choice. Fitting the undercarriage was a complex process, not helped by vague instructions and poor fit. A diagram of the completed unit would have saved time and effort, because the engineering does actually work once it’s deciphered. A lot of dry-fitting and pre-thinking would be recommended strongly.
Work on the wings was still not complete; bomb racks and rocket-launching points needed adding and appropriate holes had to be drilled individually. Locations are clear and the instructions recommend a 1mm bit but 1.5mm ensured better fit. Dive flaps were fitted next, and again there were some issues; their complex perforation pattern was a distinctive SB2C-4 feature, replacing the simpler arrangement found on earlier Helldivers. A PE set is available separately (INF3201+ Landing flaps) – it was disappointing these were not included in the standard kit, considering its already high cost. The basic plastic parts in the kit are just about adequate, but trimming and reshaping was necessary to get them to fit, particularly at the wing root. Tailplanes were then added and the basic airframe was almost complete.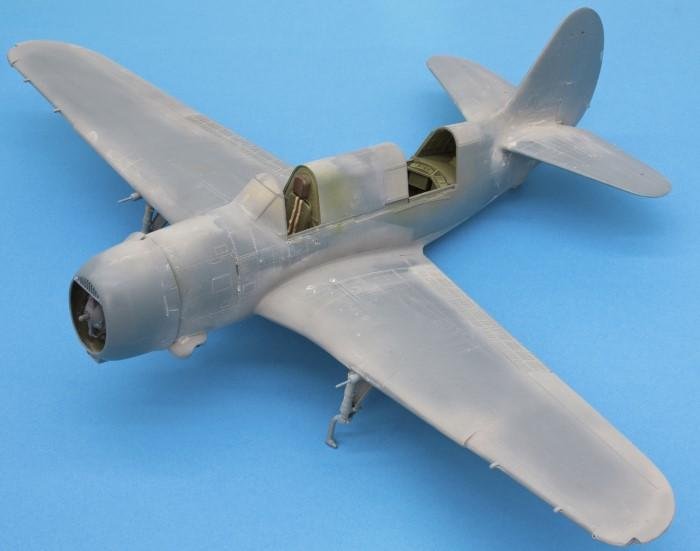
Above: With the airframe largely completed, the amount of priming, filling and re-profiling required to reach this stage was evident.
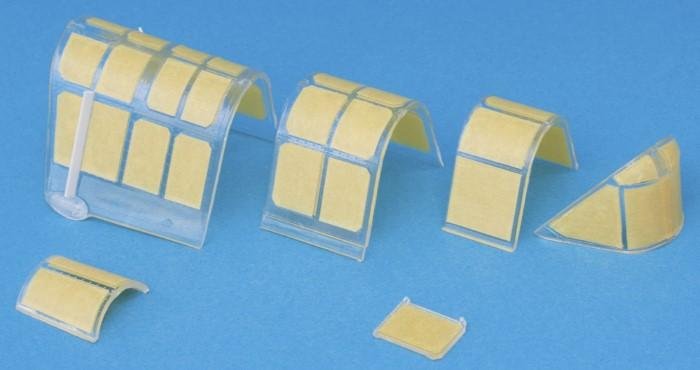
Above: Dead Design’s canopy masking set was used at this point. It was well produced with clear instructions and worked well.
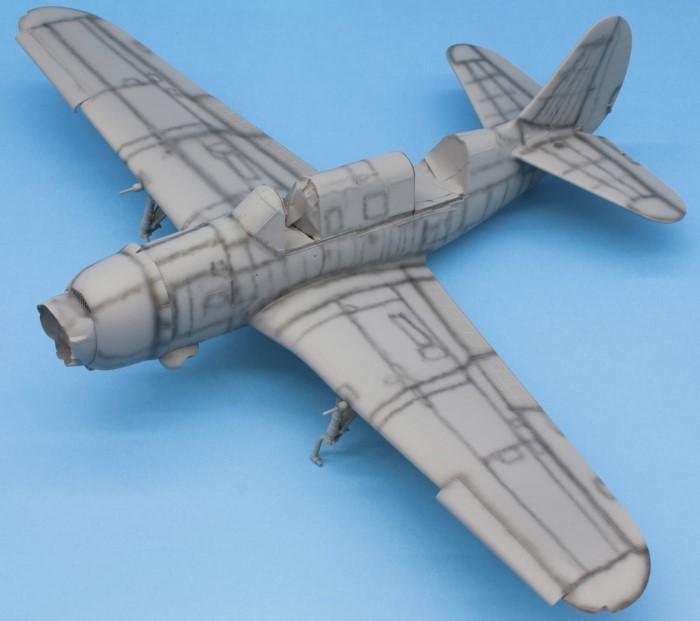
Above: Priming - and pre-shading of the panel lines - preceded application of the final camouflage.
Painless painting
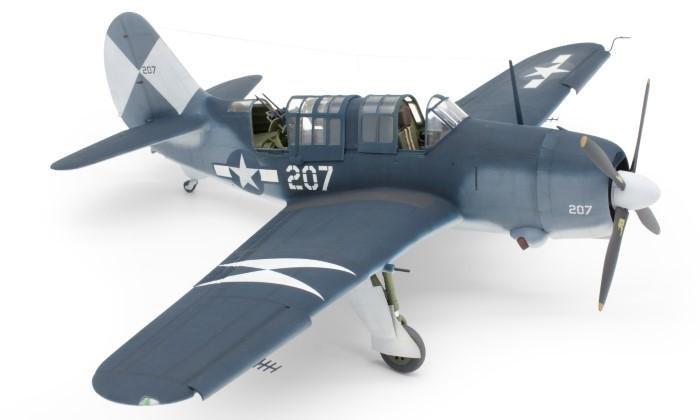
The various cockpit transparencies were painted at this stage, as several had to be fitted before the main scheme was applied. Although well-moulded and clear, the parts were slightly thick. The hard work of setting frame lines was eased greatly by Dead Design’s VM32-020 Canopy Mask , which provides covers for the inside and outside of each component and worked very well. Another set, UC32-007, catered for the undercarriage bays and also proved most useful, while not used on this project was the firm’s SM32-007 Optical Illusion Control Surfaces pack. The transparencies fitted well, with the exception of the windscreen, which took time and care. Fitting the armoured glass panel (Part C7) is best left until the windscreen is fitted and filled, as is the gunsight. Compared with the various challenges posed by its construction, painting the model was reasonably straightforward. The kit offers two alternative marking schemes: an overall Semi-Gloss Blue machine from VB-12, or an aircraft in the earlier three-tone scheme from VB-83; the latter was chosen here.
An overall coat of Halfords primer revealed numerous blemishes; once these were sorted, the surfaces were rubbed with a soft polishing cloth. Dark grey pre-shading was applied to the panel lines, then Colourcoats’ ACUS37 (www.sovereignhobbies.co.uk) was sprayed on to the undersides, ACUS08 Intermediate Blue on vertical surfaces, and ACUS33 Non-Spectacular Sea blue on the model’s upper fuselage, wings and the tailplane. Cellulose thinners were used (in a 3:2 ratio) and the enamel paints performed well, giving strong coverage with no clogging. In this large scale, soft demarcations could be achieved with minimal masking – in fact, care had to be taken to avoid an overly neat appearance as reference photos indicated an uneven coverage.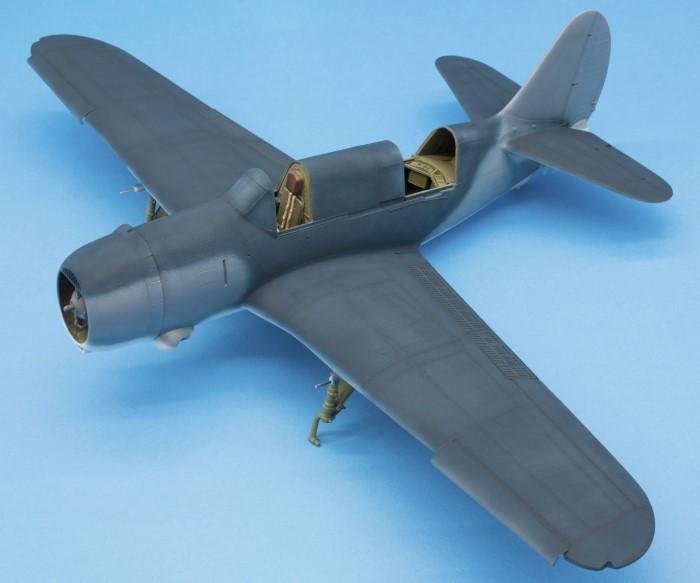
Above: The two-tone upper surface pattern could be applied with little masking – Colourcoats paints performed admirably.
Above: Dead Design’s undercarriage bay masks proved useful when painting the underside.
Tricky markings
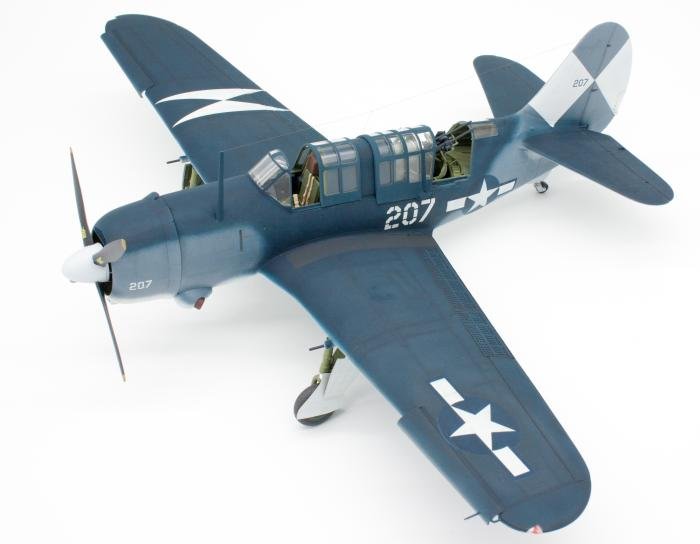
If the basic painting was straightforward, applying the markings was more time-consuming. Dead Design’s VM32-041 provided for the national markings and serial numbers, even correcting a stencilling error on Infinity’s decal sheet, presenting correct numerals. However, it contains no masks for the diamond-shaped group markings on the starboard wing and the tailfin. These needed careful measuring and masking to get right, and were painted before the numerals and ‘stars and bars’. The masks worked well, but care was taken to extend the covered area beyond the stencils to guard against any overspray. Finally, it was time for the national markings, with white areas sprayed first and ACUS39 Insignia Blue applied last. The decal sheet provided extensive data stencils but these could almost all be omitted as they were invariably painted over in service. On the later overall semi-gloss blue variants, the stencilling remained clear, so hours of careful positioning would be required for anyone choosing this scheme.
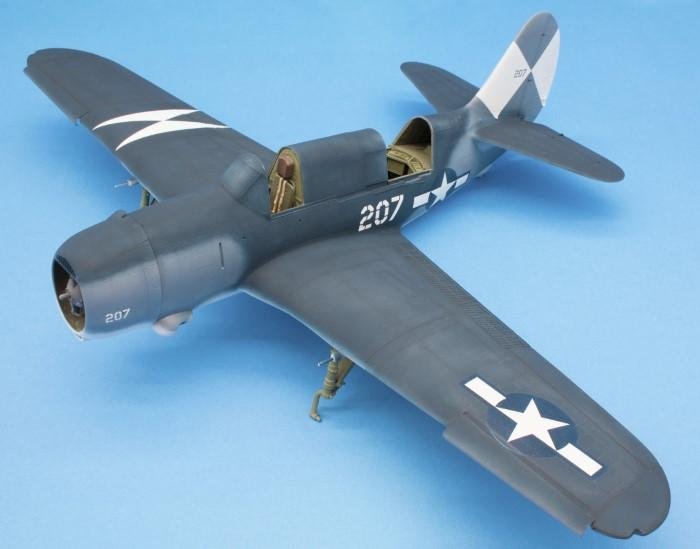
Above: The full set of markings completed. The diamond-shaped carrier group markings required DIY masking, careful cutting and measurement.
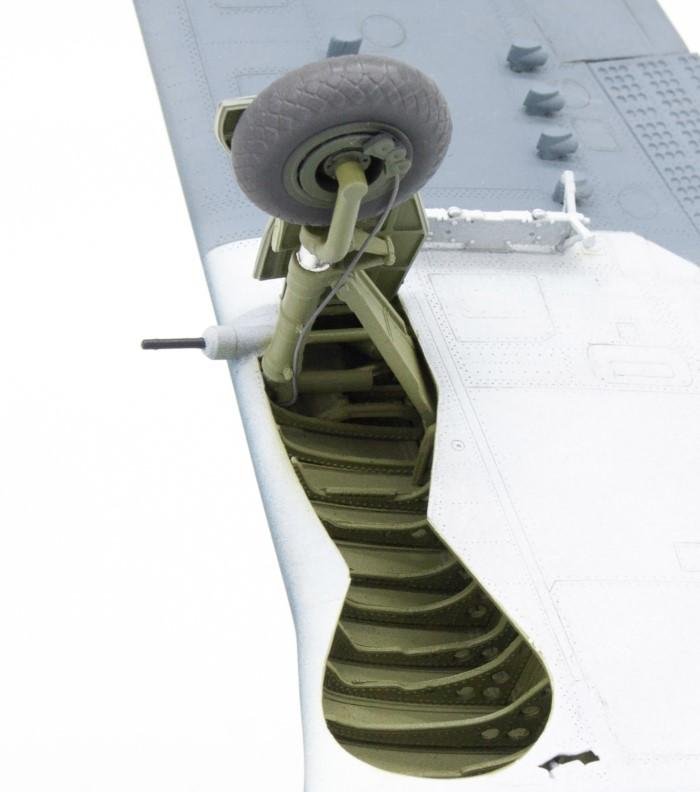
Above: The completed undercarriage and bays look quite effective, belying the amount of work required.
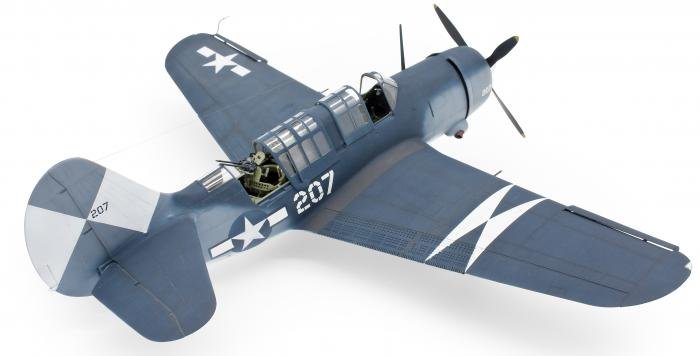
There at last – final assembly
Now it was time for the final assembly. Wheels and undercarriage doors were added – care was needed to align these correctly and references photos were essential. Next came the propeller and main transparencies. Wingtip lights needed pre-colouring before they were fitted, so a 1.5mm hole was drilled then paint added to give the impression of a tinted bulb. A final overall coat of Johnson’s Klear floor treatment (mixed equally with distilled water) was applied and the model was finished. So at last we have a 1/32 representation of ‘The Beast’ and thanks are due to Infinity Models. The various complementary products used in this build all performed well and aided successful completion. It’s also true that shortcuts could have sped the build considerably, such as avoiding the extra engine detailing and using the kit’s decals instead of painting on the markings. However, it’s still not a kit for everyone – it requires experience, time, and considerable love for the subject matter. A deficiency in any one of these areas will most likely result in frustration and an uncompleted project. On the other hand, the very fact that the kit is such a challenge will make it attractive to modellers wishing to show off their skills, and a well-completed model is always eye-catching.
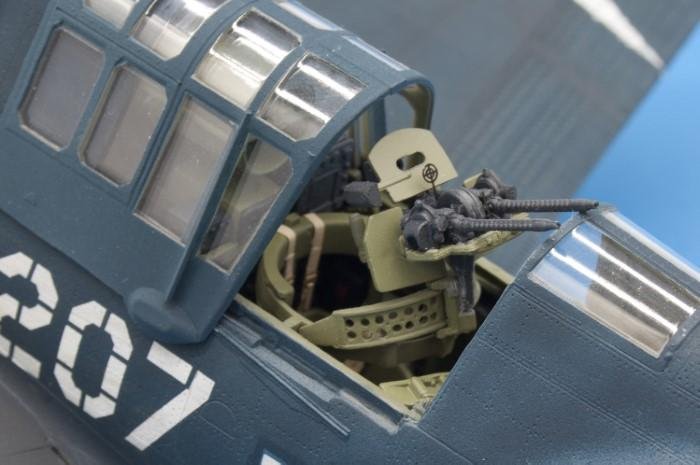
Above: Detail in the gunner's station was pleasing, though hidden somewhat once the weapons and mount were fitted – PE ammunition was omitted.
SETTING STARS
Dead Design Model’s aftermarket paint masks gave good results but needed careful use…
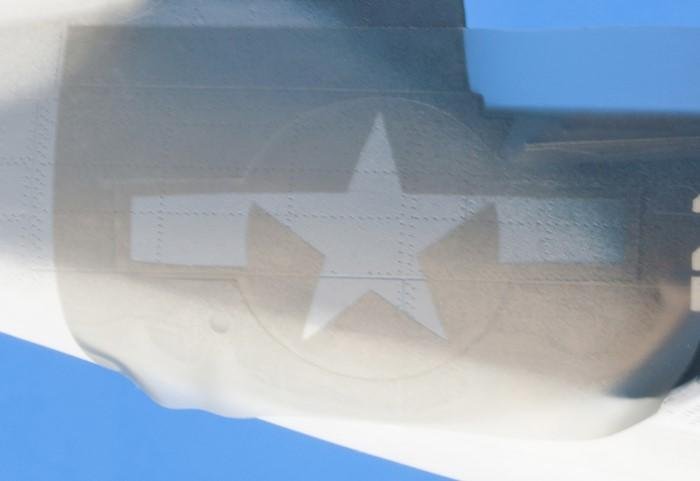
Above: The mask for the white areas was applied first – it was distorted easily by the fuselage’s curves.
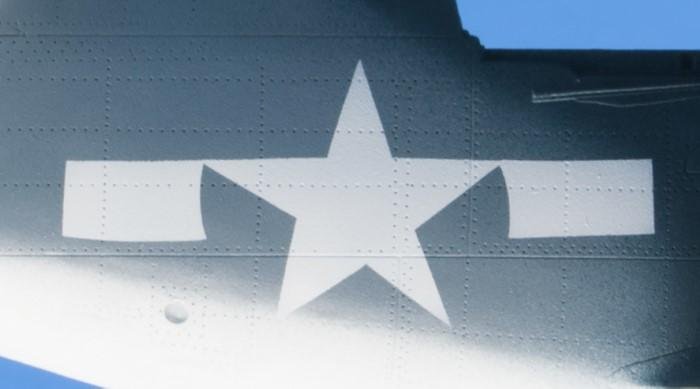
Above: Despite careful application, some distortion was evident when the mask was removed.
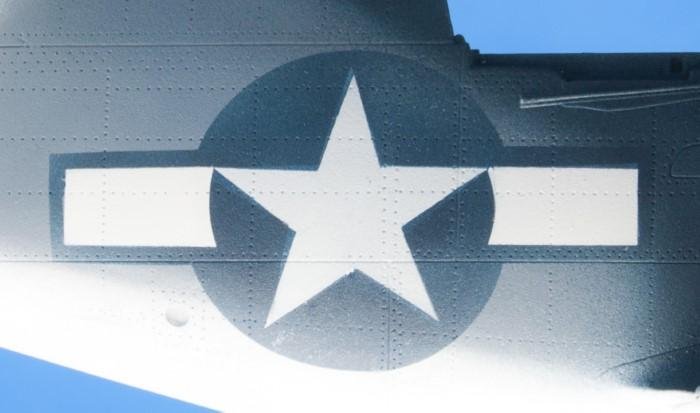
Above: Most issues were corrected when the insignia blue was sprayed, needing just minor neatening.
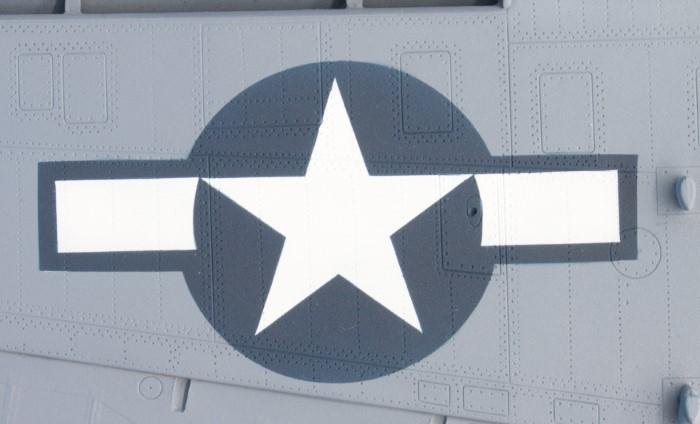
Above: Wing insignia were easier to apply and gave very good results without any extra work.