Seko Twindose 35 Series Inst.. - UK
Seko Twindose 35 Series Inst.. - UK
Seko Twindose 35 Series Inst.. - UK

You also want an ePaper? Increase the reach of your titles
YUMPU automatically turns print PDFs into web optimized ePapers that Google loves.
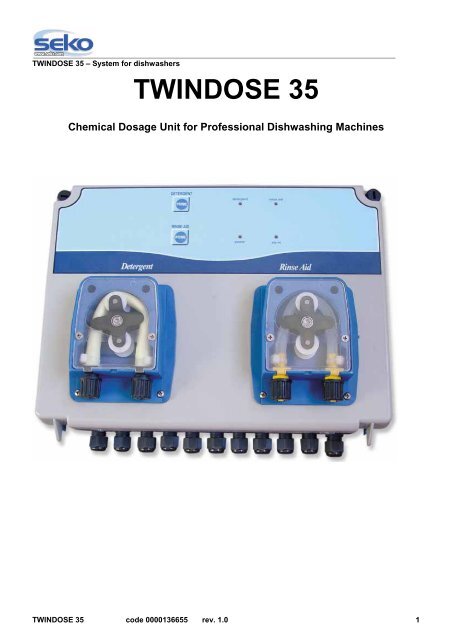
TWINDOSE <strong>35</strong> – System for dishwashers<br />
TWINDOSE <strong>35</strong><br />
Chemical Dosage Unit for Professional Dishwashing Machines<br />
TWINDOSE <strong>35</strong> code 0000136655 rev. 1.0 1
TWINDOSE <strong>35</strong> – System for dishwashers<br />
CONTENTS<br />
1 FIRST OF ALL 4<br />
1.1 WELCOME 4<br />
1.2 PACK CONTENTS 4<br />
1.3 TECHNICAL CHARACTERISTICS 5<br />
1.4 WARNINGS 5<br />
1.5 MATERIALS REQUIRED FOR INSTALLATION 5<br />
2 INSTALLATION 6<br />
2.1 INSTALLING THE SYSTEM 6<br />
2.2 DESCRIPTION OF THE FRONT PANEL 7<br />
2.2.1 Keys on the Front Panel 7<br />
2.2.2 LEDs on the Front Panel 7<br />
2.3 CIRCUIT DIAGRAM 8<br />
2.4 ELECTRICAL CONNECTIONS 9<br />
2.4.1 Fixed power supply and dishwashers with 2 solenoid valves (loading and rinsing) (Enclosure A) 9<br />
2.4.2 Fixed power supplies and dishwashers with 1 solenoid valve (Enclosure B) 10<br />
2.4.3 Power Supply from the Load and Rinse signals (Enclosure C) 10<br />
2.4.4 Electrical connection for the 3-pole conductometric sensor 11<br />
2.4.5 Electrical connection for the level sensor (optional) 11<br />
2.5 PLUMBING CONNECTIONS 12<br />
2.5.1 Plumbing connections for the detergent pump 12<br />
2.5.2 Plumbing connections for the rinse aid pump 13<br />
2.5.3 Plumbing connections for the sanitizer pump (only on 3-pump systems) 14<br />
2.6 INSTALLING THE CONDUCTOMETRIC SENSOR IN THE TANK 15<br />
3 DESCRIPTION AND SETTINGS FOR THE POTENTIOMETER DIP-SWITCHES &<br />
JUMPERS 16<br />
3.1 DESCRIPTION AND SETTINGS FOR THE DIP-SWITCHES 16<br />
3.2 DESCRIPTION AND SETTINGS FOR THE POTENTIOMETERS 17<br />
3.2.1 Potentiometer POT1: RINSE SPEED/TIME (Rinse Aid Pump: Speed / Time) 17<br />
3.2.2 Potentiometer POT2 (SANIT SPEED) 17<br />
3.2.3 Potentiometer POT3 (DETER RECHARGE/SET POINT) 17<br />
3.2.4 Potentiometer POT4 (OFA TIME) 18<br />
3.2.5 Potentiometer POT5 (DETER INIT CHARGE) 18<br />
3.3 DESCRIPTION AND SETTINGS FOR THE JUMPERS 19<br />
3.3.1 How to set the buzzer to the required volume 19<br />
3.3.2 Voltage setting range for the input signals 19<br />
4 PRIMING AND DE-LIMING MODE 19<br />
4.1 PRIMING 19<br />
4.2 DE-LIMING (DELIMING OF DISHWASHERS) 19<br />
5 SETTING AND OPERATION 20<br />
5.1 DETERGENT DOSING 20<br />
5.1.1 Dosing the detergent in conductometer mode (PROBE) 20<br />
5.1.2 Setting the concentration of detergent (SET POINT) 21<br />
5.1.3 Dosing the detergent in timer mode 22<br />
5.2 RINSE AID DOSING 22<br />
5.2.1 Dosing the rinse aid in by setting the volume (RINSE SPEED) 22<br />
5.2.2 Dosing the rinse aid by setting the timer (RINSE TIME) 22<br />
5.3 SANITIZER DOSING (ONLY 3-PUMP VERSIONS) 23<br />
TWINDOSE <strong>35</strong> code 0000136655 rev. 1.0 2
TWINDOSE <strong>35</strong> – System for dishwashers<br />
6 OPERATING MODE 24<br />
6.1 PRIORITY OF INPUT SIGNALS 24<br />
6.2 SINGLE TANK DISHWASHING MACHINES (DOOR) – PROBE DOSING 25<br />
6.3 SINGLE TANK DISHWASHING MACHINES (DOOR) – PROBELESS DOSING 28<br />
6.4 CONVEYOR DISHWASHING MACHINES – PROBE DOSING 30<br />
6.5 CONVEYOR DISHWASHING MACHINES – PROBELESS DOSING 33<br />
7 LED DISPLAY <strong>35</strong><br />
7.1 LED DISPLAY DURING OPERATION <strong>35</strong><br />
7.1.1 Stand-by display <strong>35</strong><br />
7.1.2 Display during priming <strong>35</strong><br />
7.1.3 Display during dosing <strong>35</strong><br />
7.1.4 Display during DE-LIMING (de-liming of the dishwashing machine) 36<br />
7.2 ALARM LED DISPLAY 36<br />
7.2.1 Motor fault alarm (contact your local dealer) 36<br />
7.2.2 OFA1 Over Feed Alarm for excess dosing of detergent without the pumps cutting out 36<br />
7.2.3 OFA2 Over Feed Alarm for excess dosing of detergent with the pumps cutting out 36<br />
7.2.4 Level alarm without the detergent pump cutting out 37<br />
7.2.5 Level alarm without the rinse aid pump cutting out 37<br />
7.2.6 Level alarm without the sanitizer pump cutting out 37<br />
7.2.7 Level alarm wit the detergent pump cutting out 37<br />
7.2.8 Level alarm with the rinse aid pump cutting out 37<br />
7.2.9 Level alarm with the sanitizer pump cutting out 37<br />
8 MAINTENANCE AND ACCESSORIES 38<br />
8.1 MAINTENANCE 38<br />
8.1.1 Routine Inspection 38<br />
8.1.2 Replacement of peristaltic hoses for the dosing pump 38<br />
8.2 ACCESSORIES 38<br />
9 TROUBLESHOOTING 39<br />
9.1 THE POWER SUPPLY LED DOES NOT COME ON 39<br />
9.2 ONE OR MORE PUMPS ARE NOT RUNNING 39<br />
9.3 EXCESS DETERGENT 39<br />
9.4 TOO LITTLE DETERGENT 39<br />
9.5 EXCESS RINSE AID OR SANITIZER 39<br />
9.6 TOO LITTLE RINSE AID OR SANITIZER 39<br />
9.7 THE PUMP IS RUNNING TOO SLOWLY 39<br />
9.8 LOSS OF PRIMING ON THE DOSING PUMP 39<br />
9.9 ERROR MESSAGES VIA THE LED’s ON THE FRONT PANEL 39<br />
10 ENCLOSURE 40<br />
10.1 ENCLOSURE A “Fixed power supplies and dishwashers with 2 solenoid valves”<br />
40<br />
10.2 ENCLOSURE B “Fixed power supplies and dishwashers with 1 solenoid valve” 41<br />
10.3 ENCLOSURE C “Power Supply from the Load and Rinse signals” 42<br />
10.4 ENCLOSURE D “Summary of Alarms” 43<br />
11 HOW TO CONTACT SEKO 44<br />
TWINDOSE <strong>35</strong> code 0000136655 rev. 1.0 3
TWINDOSE <strong>35</strong> – System for dishwashers<br />
1 FIRST OF ALL<br />
1.1 WELCOME<br />
TWINDOSE <strong>35</strong> is a microprocessor dosing system that has a LED display and that uses potentiometer and DIPswitch<br />
settings.<br />
This unit embodies SEKO’s advanced technology and combines easy installation with a wide range of functions.<br />
TWINDOSE <strong>35</strong> has been designed to be used with all types of dishwashing machines (single tank and conveyor).<br />
The range available includes a series of models that are able to suit all the client’s needs.<br />
The concentration of the detergent solution is detected and kept unchanged by means of a conductometric sensor<br />
(to be installed inside the dishwasher) or by a timer control. Any shortage of the detergent dosed is picked up by<br />
the system’s OFA alarm function, which measures the detergent dosing time and, once the set time has expired, it<br />
warns the end user of the required concentration not having been reached by means of an buzzer. The rinse aid is<br />
dosed by means of a peristaltic pump, with either the pump rotation speed or the dosing time being set. The<br />
sanitizer (DLL or LLL versions only) is dosed by a peristaltic pump on which the speed is set. All settings are done<br />
using the keys on the front panel and potentiometers and DIP-switches that are clearly visible on the circuit.<br />
This manual contains instructions for configuring the TWINDOSE <strong>35</strong> to allow you to make use of all the advantages<br />
offered by the simplest and most versatile dosing system on the market.<br />
Please read this manual carefully, paying particular attention to the warnings and cautions related to<br />
the installation procedures. Always apply the necessary safety procedures, including the use of adequate<br />
personal protective equipment for your face, eyes, hands, and clothing.<br />
1.2 PACK CONTENTS<br />
Before starting work, make sure that the pack contains the following:<br />
• Box complete with peristaltic pumps.<br />
• Foot filter (2) (3 for DLL and LLL versions)<br />
• Detergent injector (1)<br />
• Injection coupling with non-return valve (Rinse aid dosing) (1)<br />
• Sanitizer injector (1)*<br />
• T connector for rinse aid injector (1)<br />
• Fixing bracket with screws and wall plugs (1)<br />
• Conductometric sensor (1)<br />
• Conductometric sensor installation kit (1)<br />
• Jumpers (2)<br />
* Only on 3-pump versions<br />
TWINDOSE <strong>35</strong> code 0000136655 rev. 1.0 4
TWINDOSE <strong>35</strong> – System for dishwashers<br />
1.3 TECHNICAL CHARACTERISTICS<br />
• Power Supply: 80 - 265 Vac (24 Vac using additional optional module) 50/60 Hz<br />
• Signal voltage range that can be selected using Jumpers: 20 - 265 Vac or 150 - 265 Vac<br />
• Consumption: 20 W<br />
• Fuses: 200mA DELAY<br />
• Detergent pump capacity: 1,3 - 12,50 lit/h<br />
• Rinse aid pump capacity: 0,25 - 2,50 lit/h at 3 bar<br />
• Sanitizer pump capacity: 0,25 – 2,5 lit/h at 3 bar<br />
• Maximum operating conductivity: 10 mS (5 mS default)<br />
• System Protection Rating: IP 65<br />
• Weight: 3,5 kg<br />
• Dimensions: Version LL • LLL W 285 x H 220 x D 110<br />
Version DL • DLL W 360 x H 220 x D 110<br />
1.4 WARNINGS<br />
Make sure that the pressure at the rinse aid injection point is not higher than 3 bar.<br />
Check that the suction hoses are inserted in the jelly cans for the correct products.<br />
Use a multimeter to check all the electrical connections on the TWINDOSE <strong>35</strong>. Applying the incorrect<br />
voltage could permanently damage the equipment and such damage is not covered by the guarantee. Do<br />
not connect to power supplies subject to widely fluctuating voltages and/or peak currents. When forming<br />
any electrical connections, refer to the wiring diagram in this manual.<br />
Check the voltage on the main power supply and make sure that it is between 80 and 265 Vac.<br />
WARNING: TWINDOSE <strong>35</strong> provides high voltage at the transformer connection. Always switch off the<br />
power supply before doing any maintenance work on the equipment.<br />
WARNING: During installation and when forming electrical connections, disconnect all power supplies<br />
to the dishwasher.<br />
Failure to respect the standards laid down in this manual could harm people or property, and either<br />
compromise the way the equipment operates or damage it.<br />
1.5 MATERIALS REQUIRED FOR INSTALLATION<br />
• Two-pole cable: 2x1 - H-05 RNF for the external power supply<br />
• Two-pole cable: 2x1- H-05 RNF for the signal and conductometric sensor connection.<br />
• Suction and discharge hoses in Crystal PVC for the detergent pump.<br />
• Suction hose in Crystal PVC for the rinse aid suction pump.<br />
• Discharge hose in polythene for the rinse aid delivery pump.<br />
• Suction hose in Crystal PVC for the sanitizer suction pump (only on 3-pump systems).<br />
• Discharge hose in polythene for the sanitizer delivery pump (only on 3-pump systems).<br />
TWINDOSE <strong>35</strong> code 0000136655 rev. 1.0 5
TWINDOSE <strong>35</strong> – System for dishwashers<br />
2 INSTALLATION<br />
Attach the equipment to a wall near the dishwashing machine, using the wall anchors supplied in the pack. It is<br />
best to keep the equipment at a height that is within 1,5 m of the level of the liquid to be sucked up.<br />
Before proceeding with installation, observe all applicable legal prescriptions related to electrical and plumbing<br />
connections to make sure that the system is installed safety and correctly. Refer to the wiring diagram for the<br />
dishwashing machine when forming electrical connections.<br />
WARNING: Do not fit the equipment in the way of steam outlets as this could cause a short circuit,<br />
resulting in permanent damage to the equipment.<br />
<strong>Inst</strong>alling the TWINDOSE <strong>35</strong> near the steam vents from the dishwasher may cause the TWINDOSE <strong>35</strong><br />
circuit to overheat, which could cause damage or result in difficulty with the way the equipment operates.<br />
2.1 INSTALLING THE SYSTEM<br />
• Find a suitable position for installing the TWINDOSE <strong>35</strong>.<br />
• Use the brackets and fixings supplied for installation.<br />
• Using the bracket as a drilling template, mark out the position of the holes.<br />
• Use a drill to make the holes in the wall.<br />
• Put the wall plugs in the holes.<br />
• Fix the brackets in position (flat side against the wall with the holes at the bottom), using the screws provided.<br />
• Insert the bracket you have just fixed to the wall into its seating in the back of the TWINDOSE <strong>35</strong> (Fig. 1).<br />
• To open the TWINDOSE <strong>35</strong>, unscrew the upper screws on the front cover by ¼ turn, and hold the cover until it<br />
is fully open.<br />
Fig. 1<br />
TWINDOSE <strong>35</strong> code 0000136655 rev. 1.0 6
TWINDOSE <strong>35</strong> – System for dishwashers<br />
2.2 DESCRIPTION OF THE FRONT PANEL<br />
1 3*<br />
C D E*<br />
2<br />
A<br />
B<br />
2.2.1 Keys on the Front Panel<br />
1 DETERGENT PRIME: Key used to prime the detergent pump.<br />
2 RINSE AID PRIME: Key used to prime the rinse aid pump.<br />
3 *SANITIZER PRIME: Key used to prime the sanitizer pump.<br />
* Only on 3-pump versions<br />
2.2.2 LEDs on the Front Panel<br />
A Power: Power supply LED, green, permanently on or flashing (see Chap. 7)<br />
B Alarm: Alarm LED, red, permanently on or flashing (see Chap. 7)<br />
C Detergent: Detergent pump LED, green, permanently on or flashing<br />
(see Chap. 7)<br />
D Rinse aid: Rinse aid pump LED, green, permanently on or flashing<br />
(see Chap. 7)<br />
E *Sanitizer: Sanitizer pump LED, green, permanently on or flashing<br />
(see Chap. 7)<br />
* Only on 3-pump versions<br />
TWINDOSE <strong>35</strong> code 0000136655 rev. 1.0 7
TWINDOSE <strong>35</strong> – System for dishwashers<br />
2.3 CIRCUIT DIAGRAM<br />
1 2 3 4 5 6 7 8 9 10 11 12 13<br />
AC<br />
OUT<br />
DET<br />
AC<br />
OUT<br />
RINSE<br />
AC<br />
OUT<br />
SANI<br />
1 2 3 4 5<br />
AC MAINS AC MAINS<br />
DETERGENT RINSE<br />
CHARGE<br />
SIGNAL<br />
6 7 8<br />
RINSE<br />
9 10<br />
WASH<br />
SIGNAL SIGNAL<br />
14 15 16<br />
11 12<br />
ALARM<br />
OUT<br />
13 14 15 16 17 18 19 20 21 22 23 24<br />
DETER RINSE SANIT TEMP COND PROBE<br />
INPUT SIGNAL PROBE<br />
LOW-HIGH<br />
HIGH-LOW<br />
LOW-HIGH<br />
HIGH-LOW<br />
20 21 22<br />
LOW-HIGH<br />
HIGH-LOW<br />
17 18 19<br />
DC OUT DET<br />
DC OUT RINSE<br />
DC OUT SANI<br />
23<br />
+7.5V<br />
-7.5V<br />
+5V<br />
DOOR<br />
PROBELESS<br />
COND PROBE<br />
RINSE SPEED<br />
SANI W/DET<br />
RINSE LIM OFF<br />
LEV STOP OFF<br />
CONVEYOR<br />
PROBE<br />
IND PROBE<br />
RINSE TIME<br />
SANI W/RINSE<br />
RINSE LIM ON<br />
LEV STOP ON<br />
POT 1<br />
RINSE<br />
SPEED<br />
TIME<br />
POT 2<br />
SANIT<br />
SPEDD<br />
HIGH<br />
AUDIO<br />
LOW<br />
DETER<br />
RECHARGE OFA<br />
SETPOINT TIME<br />
POT 3<br />
POT 4<br />
24<br />
POT 5<br />
DETER<br />
INIT CHRG<br />
25<br />
26 27 28 29 30<br />
Fig. 3<br />
1 AC MAINS DETERGENT: entry fuse 16 Sanitizer AC motor output<br />
2 AC MAINS DETERGENT: detergent signal input 17 Detergent DC motor output<br />
3 AC MAINS RINSE: rinse aid signal input 18 Rinse aid DC motor output<br />
4 AC MAINS RINSE: entry fuse 19 Sanitizer DC motor output<br />
5 CHARGE SIGNAL: charge signal input 20<br />
Voltage range selection jumper for charge signal<br />
input<br />
6 RINSE SIGNAL: rinse signal input 21<br />
Voltage range selection jumper for rinse signal<br />
input<br />
7 WASH SIGNAL: wash signal input 22<br />
Voltage range selection jumper for wash signal<br />
input<br />
8 Alarm relay output 23<br />
Input from optional module for 24 Vac power<br />
supply.<br />
9 Detergent level signal input 24 Buzzer volume selector<br />
10 Rinse aid level signal input 25 DIP-switch for programming the system<br />
11 Sanitizer level signal input 26<br />
POT1: Rinse pump speed / rinse pump dosing<br />
time<br />
12 Temperature probe connector 27 POT2: Sanitizer pump speed<br />
13 Conductometric sensor connector 28<br />
POT3: Detergent pump reset time / Conductivity<br />
set point setting<br />
14 Detergent AC motor output 29 POT4: OFA time setting<br />
15 Rinse aid AC motor output 30 POT5: Initial detergent pump charge time<br />
TWINDOSE <strong>35</strong> code 0000136655 rev. 1.0 8
TWINDOSE <strong>35</strong> – System for dishwashers<br />
2.4 ELECTRICAL CONNECTIONS<br />
WARNING: TWINDOSE <strong>35</strong> provides high voltage at the transformer connection. Always switch off the<br />
power supply before doing any maintenance work on the equipment.<br />
Use a multimeter to check all the electrical connections on the TWINDOSE <strong>35</strong>. Applying the incorrect<br />
voltage could permanently damage the equipment and such damage is not covered by the guarantee.<br />
Do not connect to power supplies subject to widely fluctuating voltages and/or peak currents. When<br />
forming any electrical connections, refer to the wiring diagram in this manual. All wiring must be carried<br />
out in compliance with local regulations for electrical connections.<br />
2.4.1 Fixed power supply and dishwashers with 2 solenoid valves (loading and rinsing) (ENCLOSURE A).<br />
• Check the voltage on the main power supply and make sure that it is the same as that shown on the<br />
TWINDOSE <strong>35</strong>’s data plate.<br />
• Disconnect the dishwasher from the electrical power supply.<br />
• Check the voltage on the charge and rinse solenoid valves on the dishwasher and insert the relevant jumpers<br />
JP1 and JP2 in the HIGH (150 – 265 Vac) or LOW (20 – 265 Vac) positions, depending on whether you are<br />
using 220 Vac or 24 Vac solenoid valves.<br />
• Connect the main power supply wires to terminals 3 and 4 (AC MAINS RINSE)<br />
• Connect the 1 st charge signal wires to terminals 5 and 6 (CHARGE SIGNAL) on the circuit board.<br />
• Connect the rinse signal wires to terminals 7 and 8 (RINSE SIGNAL) on the circuit board.<br />
• If you want to use the system with the conductometric sensor, connect the wires for the washing pump<br />
contactor coil to terminals 9 and 10 (WASH SIGNAL) on the circuit board.<br />
When doing this, check the voltage on the washing pump contactor coil and insert Jumper JP3 in the HIGH<br />
(150 – 265 Vac) or LOW (20 – 265 Vac) position, depending on whether it is a 220 Vac or 24 Vac coil.<br />
• When using the rinse aid pump in timer mode for single tank dishwashers, it is advisable to connect terminals 7<br />
and 8 electrically to the coil on the dishwashers’ washing pump contactor coil. In this case rinse aid will be<br />
dosed to the boiler during the washing stage for use in the next rinse cycle.<br />
TWINDOSE <strong>35</strong> is fitted with a switching feeder that allows it to be powered using voltages of between<br />
80 and 265 Vac.<br />
When connecting up the conductometric sensor, refer to paragraph 2.6 and enclosure A, at the end of<br />
this manual.<br />
TWINDOSE <strong>35</strong> code 0000136655 rev. 1.0 9
TWINDOSE <strong>35</strong> – System for dishwashers<br />
2.4.2 Fixed power supplies and dishwashers with 1 solenoid valve (ENCLOSURE B)<br />
• Check the voltage on the main power supply and make sure that it is the same as that shown on the<br />
TWINDOSE <strong>35</strong>’s data plate.<br />
• Disconnect the dishwasher from the electrical power supply.<br />
• Check the voltage on the dishwasher’s rinse solenoid valve and insert Jumper JP2 in the HIGH (150 – 265 Vac)<br />
or LOW (20 – 265 Vac) position, depending on whether you are using a 220 Vac or 24 Vac solenoid valve.<br />
• Connect the main power supply cables to terminals 3 and 4 (AC MAINS RINSE)<br />
• Connect the rinse signal wires to terminals 7 and 8 (RINSE SIGNAL) on the circuit board.<br />
• If you want to use the system with the conductometric sensor, connect the wires for the washing pump<br />
contactor coil to terminals 9 and 10 (WASH SIGNAL) on the circuit board.<br />
When doing this, check the voltage on the dishwasher’s washing pump contactor coil and insert Jumper JP3 in<br />
the HIGH (150 – 265 Vac) or LOW (20 – 265 Vac) position, depending on whether it is a 220 Vac or 24 Vac coil.<br />
• When using the rinse aid pump in timer mode for single tank dishwashers, it is advisable to connect terminals 7<br />
and 8 electrically to the dishwashers’ washing pump contactor coil. In this case rinse aid will be dosed to the<br />
boiler during the washing stage for use in the next rinse cycle.<br />
TWINDOSE <strong>35</strong> is fitted with a switching feeder that allows it to be powered using voltages of between<br />
80 and 265 Vac.<br />
When connecting up the conductometric sensor, refer to paragraph 2.6 and enclosure B, at the end of<br />
this manual.<br />
2.4.3 Power Supply from the Load and Rinse signals (ENCLOSURE C)<br />
• Check the voltage on the charge and rinse solenoid valves and make sure that it is the same as that shown on<br />
the TWINDOSE <strong>35</strong>’s data plate.<br />
• Disconnect the dishwasher from the electrical power supply.<br />
• Check the voltage on the charge and rinse solenoid valves on the dishwasher and insert the relevant jumpers<br />
JP1 and JP2 in the HIGH (150 – 265 Vac) or LOW (20 – 265 Vac) positions, depending on whether you are<br />
using 220 Vac or 24 Vac solenoid valves.<br />
• Connect the rinse solenoid valve to terminal 3-4 (AC MAINS RINSE) on the circuit board.<br />
• Connect the charge solenoid valve where fitted to terminal 1-2 (AC MAINS DETERGENT) on the circuit board.<br />
• Form a bridge between terminals 3-4 and terminals 7-8.<br />
• Form a bridge between terminals 1-2 and terminals 5-6.<br />
• If you want to use the system with the conductometric sensor, connect the wires for the dishwasher’s washing<br />
pump contactor coil to terminals 9 and 10 (WASH SIGNAL) on the circuit board.<br />
When doing this, check the voltage on the dishwasher’s washing pump contactor coil and insert Jumper JP3 in<br />
the HIGH (150 – 265 Vac) or LOW (20 – 265 Vac) position, depending on whether it is a 220 Vac or 24 Vac coil.<br />
TWINDOSE <strong>35</strong> code 0000136655 rev. 1.0 10
TWINDOSE <strong>35</strong> – System for dishwashers<br />
2.4.4 Electrical connection for the 3-pole conductometric sensor<br />
Connect the wires for the probe to the (COND PROBE) terminals 21, 22, and 24, with the colouring as<br />
follows: (See paragraph 2.6 and Enclosures).<br />
• Blue on terminal 21<br />
• Brown on terminal 22<br />
• Yellow-Green on terminal 24.<br />
For instructions on fitting the conductometric sensor, see paragraph 2.6 and ENCLOSURES.<br />
For best results we recommend using a copper trefoil wire of 20 AWG or less, for the probe connection. Do not<br />
lay the cable near high voltage electrical lines.<br />
2.4.5 Electrical connection for the level sensor (optional)<br />
Connect the detergent level probe wires to the DETER INPUT SIGNAL 13-14 terminal on the circuit board.<br />
Connect the rinse aid level probe wires to the RINSE INPUT SIGNAL 15-16 terminal on the circuit board.<br />
Connect the sanitizer* level probe wires to the SANIT INPUT SIGNAL 17-18 terminal on the circuit board.<br />
* Only on 3-pump versions<br />
TWINDOSE <strong>35</strong> code 0000136655 rev. 1.0 11
TWINDOSE <strong>35</strong> – System for dishwashers<br />
2.5 PLUMBING CONNECTIONS<br />
2.5.1 Plumbing connections for the detergent pump<br />
To install the detergent pump, proceed as follows:<br />
Suction<br />
• Insert the suction hose into the flat side of the stainless steel weight.<br />
• Insert the hose sticking out of the countersunk part of the stainless steel weight into the foot filter.<br />
• Secure the pipe by pushing the weight against the filter and rotating it until it matches perfectly (Figure 5).<br />
• Cut a sufficient length of detergent suction hose to reach the detergent pump.<br />
• Put the suction hose into the ring nut.<br />
• Insert the hose into the suction side of the detergent pump.<br />
• Tighten the fixing ring nut by hand on the suction side of the detergent pump.<br />
Stainless steel weight<br />
Fig. 5<br />
Suction hose<br />
Foot filter<br />
Delivery<br />
• Fit the delivery hose on the delivery side of the detergent pump, after inserting it into the relevant ring nut.<br />
• Cut a sufficient length of detergent delivery hose to reach the point at which it is injected into the tank.<br />
• Fix the other end of the delivery hose to the injection coupling after having inserted it in the relevant ring nut.<br />
• Make a 10 mm diameter hole in the vertical side of the tank, just above the water level, and fit the injection<br />
coupling as shown in the drawing (Figure 6).<br />
• Tighten the fixing ring nut on the injection coupling and the pump by hand.<br />
Fig. 6<br />
1 TANK SIDE<br />
2 INJECTION COUPLING<br />
3 DELIVERY HOSE<br />
4 GASKET<br />
5 WASHER<br />
6 NUT<br />
7 WATER LEVEL<br />
Always use the foot filter and make sure it reaches the bottom of the tank. Clean out any residue<br />
regularly.<br />
TWINDOSE <strong>35</strong> code 0000136655 rev. 1.0 12
TWINDOSE <strong>35</strong> – System for dishwashers<br />
2.5.2 Plumbing connections for the rinse aid pump<br />
To install the rinse aid pump, proceed as follows:<br />
Suction<br />
• Insert the suction hose into the flat side of the stainless steel weight.<br />
• Insert the hose sticking out of the countersunk part of the stainless steel weight into the foot filter.<br />
• Secure the pipe by pushing the weight against the filter and rotating it until it matches perfectly (Figure 7).<br />
• Cut a sufficient length of rinse aid suction hose to reach the rinse aid pump.<br />
• Put the suction hose into the ring nut.<br />
• Insert the hose into the suction side of the rinse aid pump.<br />
• Tighten the fixing ring nut by hand on the suction side of the rinse aid pump.<br />
Stainless steel weight<br />
Fig. 7<br />
Suction hose<br />
Delivery<br />
• Insert the delivery hose into the fixing ring nut on the non-return valve.<br />
• Fix the hose to the non-return valve.<br />
• Cut a sufficient length of delivery hose to connect it between the delivery side of the rinse aid pump (right) and the<br />
non-return valve.<br />
• <strong>Inst</strong>all the non-return valve between the rinse solenoid valve and the boiler, using the specific provision made on<br />
the boiler, or the T coupling included in the pack. (Fig. 8)<br />
• Tighten the ring nuts on the non-return valve and the pump by hand.<br />
Delivery hose<br />
Foot filter<br />
T connector<br />
Non-return valve<br />
Fig. 8*<br />
Metallic clumps<br />
* <strong>Inst</strong>allation using a plastic T connector is recommended.<br />
Always use the foot filter and make sure it reaches the bottom of the tank. Clean out any residue<br />
regularly.<br />
TWINDOSE <strong>35</strong> code 0000136655 rev. 1.0 13
TWINDOSE <strong>35</strong> – System for dishwashers<br />
2.5.3 Plumbing connections for the sanitizer pump (only on 3-pump systems).<br />
To install the sanitizer pump, proceed as follows:<br />
Suction<br />
• Insert the suction hose into the flat side of the stainless steel weight.<br />
• Insert the hose sticking out of the countersunk part of the stainless steel weight into the foot filter.<br />
• Secure the pipe by pushing the weight against the filter and rotating it until it matches perfectly (Figure 9).<br />
• Cut a sufficient length of sanitizer suction hose to reach the sanitizer pump.<br />
• Put the suction hose into the ring nut.<br />
• Insert the hose into the suction side of the sanitizer pump.<br />
• Tighten the fixing ring nut by hand on the suction side of the sanitizer pump.<br />
Stainless steel weight<br />
Fig. 9<br />
Suction hose<br />
Foot filter<br />
Delivery<br />
• Insert the delivery hose into the fixing ring nut on the injection valve.<br />
• Fix the hose to the injection valve.<br />
• Cut a sufficient length of delivery hose to connect it between the delivery side of the sanitizer pump (right) and the<br />
injection valve.<br />
• Tighten the ring nuts on the injection valve and the pump by hand.<br />
Fig. 10<br />
Always use the foot filter and make sure it reaches the bottom of the tank. Clean out any residue<br />
regularly.<br />
TWINDOSE <strong>35</strong> code 0000136655 rev. 1.0 14
TWINDOSE <strong>35</strong> – System for dishwashers<br />
2.6 INSTALLING THE CONDUCTOMETRIC SENSOR IN THE TANK<br />
The probe detects the concentration of detergent. Correct positioning of the probe is essential for adequately<br />
checking of the concentration of detergent. Always use the new probe supplied with the TWINDOSE <strong>35</strong>. The<br />
probe must be positioned where it is constantly immersed in the solution in the washing tank, in a position in which<br />
there is an adequate flow of the solution, and near the point at which the product enters.<br />
• <strong>Inst</strong>all the probe in the washing tank, below the water level.<br />
• If you are not able to find an existing hole, it may be advisable to use a 22.2 mm cutter or punch.<br />
• Always install the probe:<br />
o Far from the point at which the water enters the tank.<br />
o Near the circulation pump intake.<br />
o Far from corners, heating elements, or the bottom of the tank.<br />
• Remove the probe fixing nut.<br />
• Remove a rubber gasket and the plastic washer.<br />
• Insert the probe with the rubber gasket into the hole from the inside of the dishwasher tank.<br />
• Fit the rubber gasket and the washer.<br />
• Put on the nut and tighten it using a spanner if necessary.<br />
• Wire up the probe using a wire (not supplied) applying the colour coding and using the Faston clip and cap<br />
supplied, as shown in the instructions given in the diagram below.<br />
• Connect the wires from the terminals on the probe to terminals 21,22, and 24 on circuit board, connecting the<br />
colours as indicated in the figure and in enclosures A, B, and C.<br />
• For best results we recommend using a copper trefoil wire of 18 AWG for the probe connection. Do not lay the<br />
cable near high voltage AC lines.<br />
DISHWASHER SIDE<br />
WATER LEVEL<br />
FIXING NUT<br />
PROBE<br />
WASHER<br />
RUBBER GASKETS<br />
HOW TO CONNECT UP THE CONDUCTIVITY PROBE<br />
COME COLLEGARE LA SONDA CODUTTIVA<br />
FIT THE PROBE INSIDE THE TANK BEFORE FITTING THE CAP OVER THE FASTON CLIPS<br />
MONTARE LA SONDA IN VASCA PRIMA DI INSERIRE IL CAPPUCCIO SUI FASTON<br />
BLUE<br />
YELLOW-GREEN<br />
GIALLO/VERDE<br />
BROWN MARRONE<br />
BLUE<br />
YELLOW-<br />
GIALLO/VERDE<br />
GREEN<br />
BROWN MARRONE<br />
BLUE<br />
YELLOW-<br />
GIALLO/VERDE<br />
GREEN<br />
MARRONE BROWN<br />
WIRE NOT<br />
SUPPLIEDT<br />
YELLOW-GREEN<br />
GIALLO/VERDE<br />
MARRONE BROWN<br />
BLU BLUE<br />
21 22 23 24<br />
COND PROBE<br />
WARNING: ATTENZIONE!!! FORM ESEGUIRE THE CONNECTION IL COLLEGAMNETO AS SHOWN IN SECONDO THE DIAGRAM FIGURA<br />
To replace the probe, cut the wire immediately before the male Faston clip.<br />
TWINDOSE <strong>35</strong> code 0000136655 rev. 1.0 15
TWINDOSE <strong>35</strong> – System for dishwashers<br />
3 DESCRIPTION AND SETTINGS FOR THE POTENTIOMETER DIP-SWITCHES &<br />
JUMPERS<br />
3.1 DESCRIPTION OF THE DIP-SWITCHES<br />
CAL. OFF<br />
CAL. ON<br />
DIP<br />
Switch<br />
1<br />
2<br />
3<br />
4<br />
5<br />
6<br />
7<br />
8<br />
ON/OFF<br />
ON<br />
OFF<br />
ON<br />
OFF<br />
ON<br />
OFF<br />
ON<br />
OFF<br />
ON<br />
OFF<br />
ON<br />
OFF<br />
ON<br />
OFF<br />
ON<br />
OFF<br />
OFF<br />
Setting<br />
System set for conveyor dishwasher (CONVEYOR)<br />
System set for single-tank dishwasher (DOOR)<br />
Operation with conductometric sensor<br />
Operation without conductometric sensor (timer mode)<br />
System with inductive probe<br />
System with conductive probe.<br />
Rinse aid pump in timer mode<br />
Rinse aid pump is speed mode<br />
Probe calibration ON<br />
Probe calibration OFF<br />
Sanitizer pump activated along with the rinse aid pump.<br />
Sanitizer pump activated along with the detergent pump.<br />
Rinse aid pump limitation activated - under all conditions the rinse aid pump will dose for a<br />
maximum of 15 seconds.<br />
Rinse aid pump limitation deactivated - the pump will dose for the entire time set in the washing<br />
program.<br />
Cut-out level alarm enabling - when a level signal is received, the system cuts out dosing by all the<br />
pumps.<br />
Cut-out level alarm disabling- when a level signal is received an alarm LED will simply switch on,<br />
but the pumps will not be stopped.<br />
To prime the detergent pump, press the “DETERGENT PRIME” key<br />
To prime the rinse aid pump, press the “RINSE-AID PRIME” key<br />
To prime the sanitizer pump, press the “SANITIZER PRIME” key<br />
ON<br />
TWINDOSE <strong>35</strong> code 0000136655 rev. 1.0 16
TWINDOSE <strong>35</strong> – System for dishwashers<br />
3.2 DESCRIPTION OF THE POTENTIOMETERS<br />
3.2.1 Potentiometer POT1: RINSE SPEED/TIME (Rinse Aid Pump: Speed / Time)<br />
3.2.2<br />
0 sec** 255 sec**<br />
10%* 100%*<br />
POT1 is a multi-function potentiometer that is used to regulate dosage by the rinse aid pump.<br />
• If RINSE SPEED* mode has been selected using DIP-switch 4, potentiometer POT1 will regulate the pump’s<br />
dosage flow rate between 10 and 100%.<br />
• If RINSE TIME** mode has been selected using DIP-switch 4, potentiometer POT1 will regulate the pump’s<br />
dosage time, between 0 and 255 seconds.<br />
* If volumetric dosage mode has been selected (speed regulation)<br />
** If the timer dosage mode has been selected.<br />
3.2.2 Potentiometer POT2 (SANIT SPEED)<br />
10% 100%<br />
Potentiometer POT2 is used to regulate sanitizer pump dosing, by adjusting the flow rate between 10 and 100%.<br />
3.2.3 Potentiometer POT3 (DETER RECHARGE/SET POINT)<br />
0 sec** 255 sec**<br />
10%* 100%*<br />
POT3 is a multi-function potentiometer that is used to set dosage by the detergent pump.<br />
• Where DIP-switch 2 (PROBELESS / PROBE) has been used to select dosage in conductometric sensor<br />
(PROBE)* mode, potentiometer POT3 will set the set point for the required detergent concentration.<br />
• Where DIP-switch 2 (PROBE / PROBELESS) has been used to select dosage in timer** mode, potentiometer<br />
POT3 will regulate the detergent pump’s dosage time during rinsing, between 0 and 255 seconds.<br />
* If the conductometric sensor dosage mode has been selected.<br />
** If the timer dosage mode has been selected.<br />
TWINDOSE <strong>35</strong> code 0000136655 rev. 1.0 17
TWINDOSE <strong>35</strong> – System for dishwashers<br />
3.2.4 Potentiometer POT4 (OFA TIME)<br />
1s.<br />
Disabled<br />
255 sec<br />
The OFA alarm is activated when the detergent concentration in the tank does not reach the set point within the<br />
time set using the POT4 (OFA TIME) potentiometer.<br />
As soon as detergent dosage begins, TWINDOSE <strong>35</strong> doses in conductometric mode (with probe) for the OFA time<br />
set using the POT4 (OFA TIME) potentiometer. Once this period of time has expired, if the detergent pump is still<br />
running the system goes into an OFA1 alarm phase:<br />
• The alarm LED flashes.<br />
• The buzzer sounds intermittently.<br />
• During this initial phase the pumps do not cut out.<br />
This alarm status ends if the detergent pump stops before the second OFA time (OFA2) has expired.<br />
If the detergent pump continues dosing for a further OFA interval, the device enters a second OFA phase, known<br />
as OFA2.<br />
During this alarm phase (OFA2):<br />
• The buzzer sounds continuously.<br />
• The LED stays lit permanently.<br />
• The detergent pump stops.<br />
PLEASE NOTE: The detergent pump will not start up again. To reset proper functioning, eliminate the<br />
cause of the alarm and then switch the system off and on again.<br />
The OFA time can be set using the POT4 (OFA TIME) trimmer, for a period of between 1 second and 255<br />
seconds.<br />
To disable the OFA alarm, turn the POT4 (OFA TIME) trimmer all the way to the left.<br />
3.2.5 Potentiometer POT5 (DETER INIT CHARGE)<br />
1sec<br />
255 sec<br />
This potentiometer manages the dosing time for the detergent pump during the first charging phase, and it is<br />
activated when TWINDOSE <strong>35</strong> receives a signal on the CHARGE SIGNAL terminal.<br />
The time setting can vary between 1 and 255 seconds.<br />
TWINDOSE <strong>35</strong> code 0000136655 rev. 1.0 18
TWINDOSE <strong>35</strong> – System for dishwashers<br />
3.3 DESCRIPTION AND SETTINGS FOR THE JUMPERS<br />
3.3.1 How to set the buzzer to the required volume<br />
The buzzer volume can be set using jumper JP4 (N° 24 on page 5) to HIGH or LOW volume, or it can be disabled.<br />
• Select HIGH for loud volume.<br />
• Select LOW for quiet volume.<br />
• Remove the jumper to exclude the buzzer.<br />
3.3.2 Voltage range setting for the input signals<br />
TWINDOSE <strong>35</strong> is fitted with 3 jumpers that are used to select the voltage range that is accepted by the terminals<br />
used for the signals from the dishwasher’s CHARGE SIGNAL (First Charge Signal), RINSE SIGNAL, and WASH<br />
SIGNAL.<br />
These jumpers are numbered JP1, JP2, and JP3 and are described under numbers 20, 21, and 22 in paragraph<br />
2.3.<br />
These jumpers can be set to:<br />
• HIGH: In this case the voltage range accepted by the terminals used for the signals coming from the<br />
dishwasher is between 150 and 265 Vac.<br />
• LOW: In this case the voltage range accepted by the terminals used for the signals coming from the<br />
dishwasher is between 20 and 265 Vac.<br />
4 PRIMING AND DE-LIMING MODE<br />
4.1 PRIMING<br />
• When the RIN PRIME button on the front panel is pushed, the rinse aid pump runs at top speed. To prime<br />
the pump the system must be fed.<br />
• When the DET PRIME button on the front panel is pushed, the detergent pump runs at top speed. To prime<br />
the pump the system must be fed.<br />
• When the SAN PRIME button on the front panel is pushed (only LLL and DLL versions), the sanitizer pump<br />
runs at top speed. To prime the pump the system must be fed.<br />
4.2 DE-LIMING (DE-ENCRUSTING OF DISHWASHERS)<br />
The system can include a special stand-by status that allows the dishwashing machine to be cleaned without<br />
having to switch it off.<br />
To enter DELIME mode, push DETERGENT PRIME and RINSE PRIME simultaneously.<br />
In DELIME mode, TWINDOSE <strong>35</strong> does not recognise any input signal, thereby disabling any type of dosing, even<br />
when the dishwasher is running.<br />
When in DELIME mode, the DET LED flashes, the RIN LED flashes, the SAN LED flashes, and the ALARM<br />
LED flashes. The buzzer cannot sound, the alarm relay is deactivated, and the pumps are stopped.<br />
To exit DELIME mode simply return to operating mode by pushing any key.<br />
TWINDOSE <strong>35</strong> code 0000136655 rev. 1.0 19
TWINDOSE <strong>35</strong> – System for dishwashers<br />
5 SETTING AND OPERATION<br />
5.1 DETERGENT DOSING<br />
5.1.1 Dosing the detergent in conductometric mode (PROBE)<br />
To set the machine to conductometric sensor (PROBE) detergent dosing mode, switch the DIP-switch 2 to the<br />
“ON” (PROBE) position. The pump doses at top speed until the set point is reached.<br />
CAL. OFF<br />
CAL. ON<br />
When TWINDOSE <strong>35</strong> receives a signal from the dishwasher’s washing pump on its IN WASH terminal, the<br />
conductometric sensor detects the concentration in the tank. When the concentration drops below the set point,<br />
set using potentiometer POT3, the control circuit automatically activates the detergent pump and stops when the<br />
conductivity in the tank rises more than 10% higher than the set point.<br />
The detergent pump’s speed depends on how much the concentration in the tank differs from the set point:<br />
• When the concentration in the tank is below 80% of the set point, the pump doses at top speed.<br />
• When the concentration in the tank is between 80% and 90% of the set point, the pump doses at 50% of its<br />
top speed.<br />
• When the concentration in the tank is above 90% of the set point, the pump doses at 25% of its top speed.<br />
If TWINDOSE <strong>35</strong> does not receive a signal on its IN WASH terminal, the control circuit will not activate detergent<br />
dosage, even if the concentration of detergent in the tank is below the set point.<br />
If the correct concentration of detergent is not reached within the two OFA time intervals set, the “OFA2” alarm<br />
is activated automatically and detergent dosage stops.<br />
In this alarm state, the LED configuration is as follows.<br />
• DET LED: flashing<br />
• ALARM LED: lit permanently<br />
• The buzzer sounds continuously.<br />
• The alarm relay output is activated.<br />
To reset the alarm status, eliminate the cause and restart the system.<br />
TWINDOSE <strong>35</strong> code 0000136655 rev. 1.0 20
TWINDOSE <strong>35</strong> – System for dishwashers<br />
5.1.2 Setting the concentration of detergent (SET POINT)<br />
Only when using a conductometric sensor<br />
The setting and maintenance of the correct concentration of detergent is extremely important for obtaining<br />
acceptable results while keeping costs down.<br />
The dosage unit’s conductometric sensor measures the electrical conductivity of the water and detergent solution.<br />
This conductivity depends on the alkalinity (strength of detergent), water temperature (at higher temperatures the<br />
conductivity is higher) and hardness of the water.<br />
The conditions that affect the dosage of detergent are constantly changing. Some of the factors that are changing<br />
continually include temperature, hardness of the water, degree of dilution, the different chemical effects caused by<br />
different food residues, external contamination (introducing the incorrect product), etc.<br />
It is highly unlikely that these conditions will be exactly the same two days running.<br />
For this reason it is not possible to relate the concentration of the detergent to the conductivity scale on the<br />
TWINDOSE <strong>35</strong>.<br />
The method most commonly used involves regulating the concentration on the basis of previous experience in<br />
relation to the type of detergent, water conditions and the type of dishwashing machine.<br />
The method explained below is more scientific, and is recommended when previous experience in the field does<br />
not make it easy to determine the set point for the concentration in the tank:<br />
Set the DIP-switch as shown below.<br />
CAL. OFF<br />
CAL. ON<br />
• It is not necessary to remove the suction hose from the detergent jerry can, since the system uses the buzzer to<br />
indicate when the set point, based on the concentration of the solution in the tank, has been stored in the<br />
memory, without starting the pumps.<br />
• Go to calibration mode by switching DIP-switch 5 to the ON (CAL ON) position.<br />
• Turn potentiometer POT 3 anticlockwise until it stops turning.<br />
• Shut off the dishwasher’s drain, fill the tank with water and add the amount of detergent calculated in order to<br />
obtain the correct concentration or titration value.<br />
• Start the dishwasher and wait for the water to reach operating temperature.<br />
• Check titration and adjust the concentration as required.<br />
• With the dishwasher running, slowly adjust the concentration (slowly turn POT3 clockwise) until the buzzer<br />
sounds.<br />
• Switch the dishwasher off.<br />
• Switch the DIP-switch to the OFF (CAL OFF) position to return to operating mode.<br />
TWINDOSE <strong>35</strong> code 0000136655 rev. 1.0 21
TWINDOSE <strong>35</strong> – System for dishwashers<br />
5.1.3 Dosing the detergent in timer mode<br />
To select the timer mode for the detergent pump, DIP-switch 2 must be switched to the OFF (PROBELESS)<br />
position. The pump will run at top speed for the time set using potentiometer POT3.<br />
CAL. OFF<br />
CAL. ON<br />
In this configuration, POT4 regulates the detergent dosing time during the rinsing phase, while detergent dosing<br />
during the 1 st charging phase is controlled by potentiometer POT5 that sets the dosing time when a signal is<br />
received on the CHARGE SIGNAL terminal.<br />
5.2 RINSE AID DOSING<br />
When the TWINDOSE <strong>35</strong> unit receives a signal on the RINSE SIGNAL terminal, the rinse aid pump doses in terms<br />
of a volumetric (speed) setting or timer setting, depending on the selection made using DIP-switch 4 (RINSE<br />
SPEED / RINSE TIME).<br />
5.2.1 Dosing the rinse aid in by setting the volume (RINSE SPEED)<br />
CAL. OFF<br />
CAL. ON<br />
If the volumetric (RINSE SPEED) dosing mode is selected:<br />
• Set DIP-switch 4 (RINSE SPEED / RINSE TIME) to RINSE SPEED (OFF position).<br />
• Set the rinse aid pump flow rate to between 0% and 100% of the top speed (using potentiometer POT1).<br />
To change the pump speed, simply turn potentiometer POT1 clockwise to increase speed and anticlockwise to<br />
reduce speed.<br />
5.2.2 Dosing rinse aid by setting the timer (RINSE TIME)<br />
CAL. OFF<br />
CAL. ON<br />
If the timer dosing mode is selected:<br />
• Set DIP-switch 4 (RINSE SPEED / RINSE TIME) to RINSE TIME (ON position).<br />
• Set the dosing time for the rinse aid pump to between 1 and 255 seconds (using potentiometer POT1).<br />
To change the pump dosing time, simply turn potentiometer POT1 clockwise to increase and anticlockwise to<br />
reduce.<br />
TWINDOSE <strong>35</strong> code 0000136655 rev. 1.0 22
TWINDOSE <strong>35</strong> – System for dishwashers<br />
5.3 SANITIZER DOSING (only 3-pump versions)<br />
CAL. OFF CAL. ON CAL. OFF CAL. ON<br />
“ON” Position<br />
“OFF” Position<br />
The sanitizer pump can be set to dose at the same time as the detergent or the rinse aid pump. This setting is<br />
done using DIP-switch 6 (SANI W/DET-SANI W/RINSE):<br />
• In the “ON” position (SANI W/RINSE) the sanitizer pump is activated at the same time as the rinse aid pump.<br />
• In the “OFF” position (SANI W/DET) the sanitizer pump is activated at the same time as the detergent pump.<br />
<strong>Inst</strong>all the sanitizer injection fitting to suit the mode chosen.<br />
Dosage of the sanitizer takes place as per the volumetric flow rate setting.<br />
Potentiometer POT2 (SANIT SPEED) can be used to set the motor speed between 5 and 100% of the top speed.<br />
TWINDOSE <strong>35</strong> code 0000136655 rev. 1.0 23
TWINDOSE <strong>35</strong> – System for dishwashers<br />
6 OPERATING MODE<br />
This system can be set for installation on single-tank type (DOOR) dishwashers or conveyor (CONVEYOR) type<br />
dishwashers. In both cases it can be set to work in conductometric mode (with a probe).<br />
The type of dishwasher is selected using DIP-switch 1:<br />
CAL. OFF<br />
CAL. ON<br />
The choice of dosing the detergent in conductometric (PROBE) or timer (PROBELESS) mode is made using DIPswitch<br />
2.<br />
CAL. OFF<br />
CAL. ON<br />
6.1 PRIORITY OF INPUT SIGNALS<br />
• The system can handle a maximum of 3 signals coming from the dishwasher.<br />
• 1 st charge (CHARGE SIGNAL)<br />
• RINSE SIGNAL<br />
• WASH SIGNAL<br />
The CHARGE SIGNAL enjoys priority over the others.<br />
The RINSE SIGNAL and WASH SIGNAL enjoy equal priority. This means that activation of one does not<br />
exclude activation of the other (which means that they can be active at the same time).<br />
TWINDOSE <strong>35</strong> code 0000136655 rev. 1.0 24
TWINDOSE <strong>35</strong> – System for dishwashers<br />
6.2 SINGLE-TANK WASHING MACHINES (DOOR) – PROBE DOSING MODE<br />
This mode is set using the DIP-switches in this layout:<br />
CAL. OFF<br />
CAL. ON<br />
<br />
CHARGE SIGNAL<br />
DETERGENT PUMP<br />
When the signal from the solenoid valve, which controls the 1° charge signal, is activated, the detergent pump<br />
doses for a set time (between 0 and 255 seconds) using the potentiometer POT5 (DETER INIT CHRG)<br />
DETER<br />
INIT CHRG<br />
The set dosing time will be completed even if the charge signal is de-activated during the dosing.<br />
RINSE AID PUMP<br />
In this phase, the rinse aid pump is not activated.<br />
0 sec. 255 sec.<br />
SANITIZER PUMP (ONLY 3-PUMP VERSIONS)<br />
The sanitizer pump (optional) is activated simultaneously with the detergent pump only if previously set with the<br />
DIP-switch 6 in the “OFF” position (SANI W/DET)<br />
CAL. OFF<br />
CAL. ON<br />
If DIP-switch 6 is set in the “ON” position (SANI W/RINSE), the sanitizer pump will not be activated.<br />
TWINDOSE <strong>35</strong> code 0000136655 rev. 1.0 25
TWINDOSE <strong>35</strong> – System for dishwashers<br />
<br />
RINSE SIGNAL<br />
DETERGENT PUMP<br />
The detergent pump is not controlled in this mode.<br />
RINSE AID PUMP<br />
When the signal from the solenoid valve, which controls the rinsing, is activated the rinse aid pump is activated in<br />
the time mode or in the speed mode, depending on how the DIP-switch 4 was set.<br />
• If it is set in the RINSE SPEED mode, the rinse aid pump will dose at the set speed using the potentiometer<br />
POT1 for the whole duration of the rinsing signal.<br />
• If it is set in the RINSE TIME mode, the rinse aid pump will dose at the maximum speed for the time set using<br />
the potentiometer POT1.<br />
In both cases, if the RINSE LIM ON mode is set using the DIP-switch 7, the rinse aid pump will stop dosing after 15<br />
seconds independently from the set time or from the duration of the RINSE SIGNAL. In order to de-activate this<br />
function, move the DIP-switch 7 to the left (RINSE LIM OFF)<br />
CAL. OFF<br />
CAL. ON<br />
.<br />
WARNING<br />
If the RINSE LIM ON mode is activated and the rinse aid pump is set in time for a duration of less than 15 seconds,<br />
the pump will dose for the set time using the POT1.<br />
SANITIZER PUMP (ONLY 3-PUMP VERSIONS)<br />
The sanitizer pump (optional) is activated simultaneously with the rinse aid pump only if the DIP-switch 6 is set in<br />
the “ON” position (SANI W/RINSE)<br />
CAL. OFF<br />
CAL. ON<br />
If DIP-switch 6 is set in the “OFF” position (SANI W/DET), the sanitizer pump will not be activated.<br />
TWINDOSE <strong>35</strong> code 0000136655 rev. 1.0 26
TWINDOSE <strong>35</strong> – System for dishwashers<br />
<br />
WASH SIGNAL<br />
DETERGENT PUMP<br />
When this signal is activated, the detergent pump is activated only if the conductometric sensor detects a<br />
concentration of detergent inferior to the set point in the tank.<br />
When the concentration value detected in the tank falls below the set point, the control circuit automatically<br />
activates the detergent pump and stops when the concentration in the tank rises more than 10% above the set<br />
value.<br />
If TWINDOSE <strong>35</strong> does not receive any signal from the WASH SIGNAL terminal, the control circuit does not<br />
activate dosage of the detergent, not even if the conductometric sensor detects that the detergent concentration is<br />
below the set point.<br />
If the desired concentration of detergent (set point) is not reached within the time set by the OFA using the POT4<br />
(OFA TIME):<br />
• the buzzer alarm sounds intermittently<br />
• the alarm LED flashes OFA1 ALARM<br />
• the relay output is activated<br />
• the pumps continue running.<br />
If the correct concentration of detergent is not reached within two OFA time intervals<br />
• the buzzer alarm emits a continuous sound<br />
• the LED alarm stays on OFA2 ALARM<br />
• the relay output is activated<br />
• the pumps stop running.<br />
To reset the alarm status, eliminate the cause and restart the system.<br />
RINSE AID PUMP<br />
The rinse aid pump is not controlled by the WASH SIGNAL.<br />
SANITIZER PUMP (ONLY 3-PUMP VERSIONS)<br />
The sanitizer pump (optional) is activated simultaneously with the detergent pump only if previously set with the<br />
DIP-switch 6 in the “OFF” position (SANI W/DET)<br />
CAL. OFF<br />
CAL. ON<br />
If DIP-switch 6 is set in the “ON” position (SANI W/RINSE), the sanitizer pump will not be activated.<br />
WARNING<br />
The RINSE SIGNAL and the WASH SIGNAL have equal priority, this means that the system can control them<br />
simultaneously and therefore activate the detergent pump (controlled by the WASH SIGNAL) and the rinse aid<br />
pump (controlled by the RINSE SIGNAL).<br />
Obviously, the sanitizer pump is activated according to whatever is set using the DIP-switch 6.<br />
TWINDOSE <strong>35</strong> code 0000136655 rev. 1.0 27
TWINDOSE <strong>35</strong> – System for dishwashers<br />
6.3 SINGLE-TANK DISHWASHING MACHINES (DOOR)- PROBELESS DOSING<br />
This mode is set using the DIP-switches in this configuration:<br />
CAL. OFF<br />
CAL. ON<br />
<br />
CHARGE SIGNAL<br />
DETERGENT PUMP<br />
When the signal from the solenoid valve that controls the 1 st charge signal is activated, the detergent pump doses<br />
for a time (between 0 and 255 seconds) set using potentiometer POT5 (DETER INIT CHRG).<br />
DETER<br />
INIT CHRG<br />
The dosing time set will be completed even if the charge signal is de-activated during dosing.<br />
RINSE AID PUMP<br />
In this phase, the rinse aid pump is not activated.<br />
0 sec. 255 sec.<br />
SANITIZER PUMP (only 3-pump versions)<br />
The sanitizer pump (optional) is activated simultaneously with the detergent pump only if previously set by putting<br />
DIP-switch 6 in the “OFF” position (SANI W/DET)<br />
CAL. OFF<br />
CAL. ON<br />
If DIP-switch 6 is set in the “ON” position (SANI W/RINSE), the sanitizer pump will not be activated.<br />
TWINDOSE <strong>35</strong> code 0000136655 rev. 1.0 28
TWINDOSE <strong>35</strong> – System for dishwashers<br />
<br />
RINSE SIGNAL<br />
DETERGENT PUMP<br />
When the signal from the solenoid valve, which controls the RINSE SIGNAL, is activated, the detergent pump<br />
doses for a time (between 0 and 30 seconds) set using potentiometer POT3 (DETER RECHARGE).<br />
DETER<br />
RECHARGE<br />
SET POINT<br />
0 sec 30 sec<br />
The dosing time set will be completed even if the dosing signal is de-activated during dosing.<br />
RINSE AID PUMP<br />
When the signal from the solenoid valve that controls rinsing is activated, the rinse aid pump is activated in time<br />
mode (RINSE TIME) or in speed mode (RINSE SPEED), depending on how DIP-switch 4 was set.<br />
• If it is set for RINSE SPEED mode, the rinse aid pump will dose at the speed set using potentiometer POT1<br />
for the whole duration of the rinsing signal.<br />
• If it is set for RINSE TIME mode, the rinse aid pump will dose at top speed for the time set using<br />
potentiometer POT1.<br />
In both cases, if the RINSE LIM ON mode is set using the DIP-switch 7, the rinse aid pump will stop dosing<br />
after 15 seconds independently of the time set or the duration of the RINSE SIGNAL.<br />
In order not to set this rinse aid dosing limit, move DIP-switch 7 (RINSE LIM OFF) to the left.<br />
CAL. OFF<br />
CAL. ON<br />
WARNING<br />
If RINSE LIM ON mode is activated and the rinse aid pump is set to time (RINSE TIME option) for a dosing time of<br />
less than 15 seconds, the pump will dose for the time set using POT1, ignoring the LIMIT OFF/LIMIT ON option.<br />
SANITIZER PUMP (only 3-pump versions)<br />
The sanitizer pump is activated simultaneously with the detergent pump only if previously set by moving DIP-switch<br />
6 to the “OFF” position (SANI W/DET). Alternatively, it is activated simultaneously with the rinse aid pump if DIPswitch<br />
6 is set to the “ON” position (SANI W/RINSE)<br />
TWINDOSE <strong>35</strong> code 0000136655 rev. 1.0 29
TWINDOSE <strong>35</strong> – System for dishwashers<br />
<br />
WASH SIGNAL<br />
In this configuration, the WASH SIGNAL is not managed, since in single-tank probeless (DOOR-PROBELESS)<br />
mode, the detergent concentration control takes place without a conductometric sensor, using the timed dosing<br />
mode (PROBELESS).<br />
6.4 CONVEYOR DISHWASHING MACHINES (CONVEYOR) – PROBE DOSING<br />
This mode is set by setting the DIP-switches in this configuration:<br />
CAL. OFF<br />
CAL. ON<br />
<br />
CHARGE SIGNAL<br />
DETERGENT PUMP<br />
When the signal from the solenoid valve that controls the 1 st charge signal is activated, the detergent pump doses<br />
for a time (between 0 and 255 seconds) set using potentiometer POT5 (DETER INIT CHRG).<br />
DETER<br />
INIT CHRG<br />
0 sec 255 sec<br />
The dosing time set will be completed even if the charge signal is de-activated during dosing.<br />
RINSE AID PUMP<br />
The rinse aid pump is not activated.<br />
SANITIZER PUMP (OPTIONAL)<br />
The sanitizer pump (optional) is activated simultaneously with the detergent pump only if previously set by moving<br />
DIP-switch 6 to the “OFF” position (SANI W/DET).<br />
CAL. OFF<br />
CAL. ON<br />
If DIP-switch 6 is set in the “ON” position (SANI W/RINSE), the sanitizer pump will not be activated.<br />
TWINDOSE <strong>35</strong> code 0000136655 rev. 1.0 30
TWINDOSE <strong>35</strong> – System for dishwashers<br />
<br />
RINSE SIGNAL<br />
DETERGENT PUMP<br />
The detergent pump is not controlled.<br />
RINSE AID PUMP<br />
When the rinse signal is activated, the rinse aid pump doses at the speed set using potentiometer POT1:<br />
RINSE<br />
SPEED<br />
TIME<br />
0% 100%<br />
If the RINSE LIM ON mode is set using DIP-switch 7, the rinse aid pump will stop dosing after 15 seconds<br />
independently of the time set or the duration of the RINSE SIGNAL. In order not to set this rinse aid dosing<br />
limit, turn DIP-switch 7 (RINSE LIM OFF) to the left.<br />
CAL. OFF<br />
CAL. ON<br />
SANITIZER PUMP (OPTIONAL)<br />
The sanitizer pump (optional) is activated simultaneously with the rinse aid pump only if DIP-switch 6 is set in the<br />
“ON” position (SANI W/RINSE)<br />
CAL. OFF<br />
CAL. ON<br />
If DIP-switch 6 is set in the “OFF” position (SANI W/DET), the sanitizer pump will not be activated.<br />
TWINDOSE <strong>35</strong> code 0000136655 rev. 1.0 31
TWINDOSE <strong>35</strong> – System for dishwashers<br />
TWINDOSE <strong>35</strong> code 0000136655 rev. 1.0 32
TWINDOSE <strong>35</strong> – System for dishwashers<br />
<br />
WASH SIGNAL<br />
DETERGENT PUMP<br />
When this signal is activated, the detergent pump is activated only if the conductometric sensor detects a<br />
concentration of detergent in the tank, below the set point.<br />
When the concentration value detected in the tank falls below the set point, the control circuit automatically<br />
activates the detergent pump and stops when the concentration in the tank rises more than 10% above the set<br />
value.<br />
If TWINDOSE <strong>35</strong> does not receive any signal from the WASH SIGNAL terminal, the control circuit does not<br />
activate dosage of the detergent, even if the conductometric sensor detects that the detergent concentration is<br />
below the set point.<br />
If the required concentration of detergent (set point) is not reached within the time set by the OFA using POT4<br />
(OFA TIME):<br />
• The buzzer alarm sounds intermittently.<br />
• The alarm LED flashes OFA 1 ALARM<br />
• The relay output is activated<br />
• The pumps continue dosing.<br />
If the correct concentration of detergent is not reached within two OFA time intervals<br />
• The buzzer alarm sounds continuously.<br />
• The LED alarm stays on OFA 2 ALARM<br />
• The relay output is activated<br />
• The pumps stop dosing.<br />
To reset the alarm status, eliminate the cause and restart the system.<br />
TWINDOSE <strong>35</strong> code 0000136655 rev. 1.0 33
TWINDOSE <strong>35</strong> – System for dishwashers<br />
6.5 CONVEYOR DISHWASHING MACHINES – PROBELESS DOSING<br />
This mode is set using the DIP-switches in this configuration:<br />
CAL. OFF<br />
CAL. ON<br />
DETERGENT PUMP<br />
When the signal from the solenoid valve that controls the 1st charge signal is activated, the detergent pump doses<br />
for a time (between 0 and 255 seconds) set using potentiometer POT5 (DETER INIT CHRG).<br />
DETER<br />
INIT CHRG<br />
0 sec 255 sec<br />
The dosing time set will be completed even if the charge signal is de-activated during dosing.<br />
RINSE AID PUMP<br />
In this configuration, the rinse aid pump is not activated.<br />
SANITIZER PUMP (OPTIONAL)<br />
The sanitizer pump (optional) is activated simultaneously with the detergent pump only if previously set by moving<br />
DIP-switch 6 to the “OFF” position (SANI W/DET)<br />
CAL. OFF<br />
CAL. ON<br />
If DIP-switch 6 is set in the “ON” position (SANI W/RINSE), the sanitizer pump will not be activated.<br />
TWINDOSE <strong>35</strong> code 0000136655 rev. 1.0 34
TWINDOSE <strong>35</strong> – System for dishwashers<br />
<br />
RINSE SIGNAL<br />
DETERGENT PUMP<br />
When the RINSE SIGNAL is activated, the detergent pump runs in ON-OFF mode for a time set using<br />
potentiometer POT3 (between 0 and 30 seconds) and switches off for 15 seconds.<br />
The pump continues to switch on and off in this mode, for the entire duration of the RINSE SIGNAL.<br />
DETER<br />
RECHARGE<br />
SETPOINT<br />
0 sec 30 sec<br />
PUMP START TIME<br />
(TIME ON)<br />
RINSE AID PUMP<br />
When the rinse signal is activated, the rinse aid pump doses at the set speed for the entire duration of the RINSE<br />
SIGNAL.<br />
The speed at which the pump doses depends on the setting on potentiometer POT1:<br />
RINSE<br />
SPEED<br />
TIME<br />
0% 100%<br />
If RINSE LIM ON mode is set using DIP-switch 7, the rinse aid pump will stop dosing after 15 seconds even if the<br />
RINSE SIGNAL continues longer.<br />
In order to allow the pump to run for the entire duration of the RINSE SIGNAL, set “RINSE LIMIT OFF” mode<br />
using DIP-switch 7.<br />
SANITIZER PUMP (OPTIONAL)<br />
The sanitizer pump is activated simultaneously with the detergent pump only if previously set with DIP-switch 6 in<br />
the “OFF” position. Alternatively, it is activated simultaneously with the rinse aid pump if DIP-switch 6 is set in the<br />
“ON” position.<br />
<br />
WASH SIGNAL<br />
In Conveyor-Probeless mode the WASH SIGNAL is not controlled.<br />
TWINDOSE <strong>35</strong> code 0000136655 rev. 1.0 <strong>35</strong>
TWINDOSE <strong>35</strong> – System for dishwashers<br />
7 LED DISPLAY<br />
A whole series of messages are indicated both during operation and in case of malfunction or alarm status, using<br />
the LEDs on the front panel of the TWINDOSE <strong>35</strong>.<br />
7.1 LED DISPLAY DURING OPERATION<br />
C D E*<br />
7.1.1 Stand-by display<br />
A<br />
B<br />
The green LED A (power) stays on, this LED shows that the TWINDOSE <strong>35</strong> is switched on.<br />
The buzzer and the relay output are de-activated.<br />
7.1.2 Display during priming<br />
The green LED A (power) stays on, this LED shows that the TWINDOSE <strong>35</strong> is switched on.<br />
The buzzer and the relay output are de-activated.<br />
• DETERGENT PUMP PRIMING: The green LED C (detergent) stays on<br />
• RINSE AID PUMP PRIMING The green LED D (rinse aid) stays on<br />
• SANITIZER PUMP PRIMING: The green LED E (sanitizer) stays on<br />
7.1.3 Display during dosing<br />
The green LED A (power) stays on, this LED shows that the TWINDOSE <strong>35</strong> is switched on.<br />
The buzzer and the relay output are de-activated.<br />
• DETERGENT PUMP DOSING The green LED C (detergent) stays on<br />
• RINSE AID PUMP DOSING The green LED D (rinse aid) stays on<br />
• SANITIZER PUMP DOSING The green LED E (sanitizer) stays on<br />
7.1.4 Display in DELIME mode<br />
The green LED A (power) stays on, this LED shows that the TWINDOSE <strong>35</strong> is switched on.<br />
The buzzer and the relay output are de-activated.<br />
• The red LED B (alarm) flashes<br />
• The green LED C (detergent) flashes<br />
• The green LED D (rinse aid) flashes<br />
• The green LED E (sanitizer) flashes<br />
*Only in the 3 pump systems<br />
TWINDOSE <strong>35</strong> code 0000136655 rev. 1.0 36
TWINDOSE <strong>35</strong> – System for dishwashers<br />
7.2 ALARM LED DISPLAY<br />
7.2.1 Motor fault alarm (contact your local dealer)<br />
The green LED A (power) stays on, this LED shows that the TWINDOSE <strong>35</strong> is switched on.<br />
The buzzer sounds for 1 second every 10 seconds.<br />
• The red LED B (alarm) flashes<br />
• The green LED C (detergent) flashes<br />
• The green LED D (rinse aid) flashes<br />
• The green LED E (sanitizer) flashes<br />
7.2.2 Over feed alarm OFA1: abnormal detergent dosage without pumps cutting out<br />
This alarm goes off if during dosing with a conductometric sensor, the detergent concentration in the tank is not<br />
reached within an OFA time set by potentiometer POT 4 (OFA TIME).<br />
The green LED A (power) stays on, this LED shows that the TWINDOSE <strong>35</strong> is switched on.<br />
• The buzzer sounds intermittently.<br />
• The relay output is enabled.<br />
• The red LED B (alarm) flashes.<br />
• The green LED C (detergent) stays on.<br />
7.2.3 Over feed alarm OFA2: abnormal detergent dosage with pumps cutting out<br />
This alarm goes off if during dosing with a conductometric sensor, the detergent concentration in the tank is not<br />
reached within 2 OFA times.<br />
The green LED A (power) stays on, this LED shows that the TWINDOSE <strong>35</strong> is switched on.<br />
• The buzzer sounds continuously<br />
• The relay output is enabled<br />
• The red LED B (alarm) stays on<br />
• The green LED C (detergent) flashes<br />
*Only in the 3 pump systems<br />
TWINDOSE <strong>35</strong> code 0000136655 rev. 1.0 37
TWINDOSE <strong>35</strong> – System for dishwashers<br />
7.2.4 Detergent level alarm without pumps cutting out<br />
The green LED A (power) stays on, this LED shows that the TWINDOSE <strong>35</strong> is switched on.<br />
• The buzzer sounds intermittently<br />
• The relay output is enabled<br />
• The detergent pump is ready to dose<br />
• The red LED B (alarm) stays on<br />
• The green LED C (detergent) flashes<br />
7.2.5 Rinse aid level alarm without pumps cutting out<br />
The green LED A (power) stays on, this LED shows that the TWINDOSE <strong>35</strong> is switched on.<br />
• The buzzer sounds intermittently<br />
• The relay output is turned on<br />
• The rinse aid pump is ready to dose<br />
• The red LED B (alarm) stays on<br />
• The green LED D (rinse aid) flashes<br />
7.2.6 *Sanitizer level alarm without pumps cutting out<br />
The green LED A (power) stays on, this LED shows that the TWINDOSE <strong>35</strong> is switched on.<br />
• The buzzer sounds intermittently<br />
• The relay output is enabled<br />
• The sanitizer pump* is ready to dose<br />
• The red LED B (alarm) stays on<br />
• The green LED E* (sanitizer) flashes<br />
7.2.7 Detergent level alarm with pumps cutting out**<br />
This function can be excluded by selecting LEV STOP OFF on DIP-switch 8<br />
The green LED A (power) stays on, this LED shows that the TWINDOSE <strong>35</strong> is switched on.<br />
• The buzzer sounds continuously<br />
• The relay output is turned on<br />
• The red LED B (alarm) stays on<br />
• The green LED C (detergent) flashes<br />
• The pumps cut out<br />
7.2.8 Rinse aid level alarm with pumps cutting out**<br />
This function can be excluded by selecting LEV STOP OFF on DIP-switch 8<br />
The green LED A (power) stays on, this LED shows that the TWINDOSE <strong>35</strong> is switched on.<br />
• The buzzer sounds continuously<br />
• The relay output is turned on<br />
• The red LED B (alarm) stays on<br />
• The green LED D (rinse aid) flashes<br />
• The pumps cut out<br />
7.2.9 Sanitizer level alarm with pumps cutting out**<br />
This function can be excluded by selecting LEV STOP OFF on DIP-switch 8<br />
The green LED A (power) stays on, this LED shows that the TWINDOSE <strong>35</strong> is switched on.<br />
• The buzzer sounds continuously<br />
• The relay output is turned on<br />
• The red LED B (alarm) stays on<br />
• The green LED D (sanitizer) flashes<br />
• The pumps cut out<br />
*Only in the 3 pump systems<br />
TWINDOSE <strong>35</strong> code 0000136655 rev. 1.0 38
TWINDOSE <strong>35</strong> – System for dishwashers<br />
8 MAINTENANCE & ACCESSORIES<br />
8.1 MAINTENANCE<br />
Routine maintenance of the TWINDOSE <strong>35</strong> involves taking out any encrustations that may have formed on the<br />
probe’s electrodes.<br />
It will also be necessary to change the peristaltic tubes for the detergent, rinse aid and sanitizer dosing pumps<br />
whenever they are found to have deteriorated.<br />
Thanks to SEKO technology, maintenance time is reduced to a minimum. Maintenance can be carried out on site,<br />
without having to remove the product.<br />
8.1.1 Routine Inspection<br />
• Titrate the solution in the washing tank to check that the equipment is maintaining the correct concentration.<br />
• Clean the conductometric or inductive sensor.<br />
• Clean the TWINDOSE <strong>35</strong> casing using only a damp cloth.<br />
• Check the plumbing efficiency of the suction and discharge hoses.<br />
IT IS ADVISABLE TO DESCALE THE DISHWASHING MACHINE REGULARLY IN ORDER TO AVOID<br />
COMPROMISING CORRECT FUNCTIONING OF THE CONDUCTIVITY SENSORS.<br />
8.1.2 Replacing the peristaltic hoses on the dosing pump<br />
Replace the pump hoses at regular intervals. Hoses should be replaced long before they become weak and burst.<br />
Should a hose burst, remove all the chemical product left in the pump, using a damp cloth.<br />
• Switch off the power supply before doing any maintenance work on the equipment.<br />
• Take the transparent lid off of the pump, removing the front cover screws if necessary<br />
• Before removing the old hose, position the roller arm in such a way that the rollers are in a vertical position.<br />
• Remove the old tube, starting from the left<br />
• Lift the tube and simultaneously rotate the roller arm clockwise.<br />
• Before inserting the new hose, put the roller arm in a horizontal position.<br />
• Insert the new tube with the connections placed in such a way that the flat sides are towards the front.<br />
• Insert the new tube starting from the left and simultaneously rotate the roller arm clockwise.<br />
• Make sure that the peristaltic tube is correctly positioned inside the pump.<br />
• Insert the front transparent cover all the way, putting the screws back in if necessary.<br />
8.2 ACCESSORIES<br />
• Two-pole cable: 2x0.75 - H-05 RNF<br />
• T connector in PP for injection in the sanitizer pump<br />
• Intake nozzles with or without level probe.<br />
• Low-bulk tank side-connector, made of in PP, for injecting detergent.<br />
TWINDOSE <strong>35</strong> code 0000136655 rev. 1.0 39
TWINDOSE <strong>35</strong> – System for dishwashers<br />
9 TROUBLESHOOTING<br />
9.1 THE POWER LED (POWER) DOES NOT SWITCH ON<br />
• Check the fuses in the circuits.<br />
• Check that the voltage at the circuit’s power terminals is correct. For details on the data plate and the<br />
connections diagram, refer to this manual.<br />
9.2 ONE OR MORE PUMPS ARE NOT RUNNING<br />
• Check the terminals on the circuit for the pump motor for any loose screws or disconnected wires.<br />
• Check that the voltage on the signal terminals is correct. For details on the data plate, refer to this manual.<br />
9.3 EXCESS DETERGENT<br />
• Check the voltage on the power supply to the system.<br />
• Check that the concentration set point was set correctly.<br />
• Make sure that there are no encrustation or foreign objects on the conductometric sensor that would<br />
compromise the correct reading of the concentration in the tank.<br />
• Make sure that the dosing time for the detergent pump has not been set at excessively high values.<br />
9.4 TOO LITTLE DETERGENT<br />
• Check the voltage on the power supply to the system.<br />
• Check that the concentration set point was set correctly.<br />
• Check the efficiency of the conductometric sensor.<br />
• Make sure that the dosing time for the detergent pump has not been set at excessively low values.<br />
• Check for possible chemical product leaks on the delivery line.<br />
9.5 EXCESS RINSE AID OR SANITIZER<br />
• Make sure that the dosing time or speed for the pump have not been set at excessively high values.<br />
9.6 TOO LITTLE RINSE AID OR SANITIZER<br />
• Make sure that the dosing time or speed for the pump have not been set at excessively low values.<br />
• Check for possible chemical product leaks on the delivery line.<br />
9.7 THE PUMP RUNS TOO SLOWLY<br />
• Check that the roller block has not seized.<br />
• Check lubrication of the flexible hose.<br />
9.8 LOSS OF PRIMING ON THE DOSING PUMP<br />
• Check the suction line for holes.<br />
• Check that the pump’s peristaltic hoses are not cracked or punctured.<br />
• Check that the peristaltic hoses are not worn.<br />
9.9 ERROR MESSAGES VIA THE LEDS ON THE FRONT PANEL<br />
Refer to paragraph 7.2 of this manual and if necessary contact your local dealer.<br />
TWINDOSE <strong>35</strong> code 0000136655 rev. 1.0 40
TWINDOSE <strong>35</strong> – System for dishwashers<br />
10 ENCLOSURE<br />
ENCLOSURE A<br />
10.1 “FIXED POWER SUPPLY AND DISHWASHERS WITH 2 SOLENOID VALVES”<br />
WITH CONDUCTIVITY PROBE<br />
SONDA CONDUCTIVITY CONDUCIBILITA' PROBE<br />
CONDUTTIVA<br />
CHARGE ELETTROVALVOLA<br />
SOLENOID<br />
VALVE<br />
DI CARICO<br />
RINSE ELETTROVALVOLA<br />
SOLENOID<br />
VALVE<br />
DI RISCIACQUO<br />
WASHING CONTATTORE MOTOR<br />
CONTACTOR<br />
MOTORE DI LAVAGGIO<br />
SONDE LEVEL PROBES DI LIVELLO<br />
L N<br />
1 2 3 4 5<br />
AC MAINS AC MAINS<br />
DETERGENT RINSE<br />
CHARGE<br />
SIGNAL<br />
6 7 8 9 10<br />
RINSE<br />
SIGNAL<br />
WASH<br />
SIGNAL<br />
AC<br />
OUT<br />
DET<br />
AC<br />
OUT<br />
RINSE<br />
AC<br />
OUT<br />
SANI<br />
11 12<br />
ALARM<br />
OUT<br />
13 14 15 16 17 18 19 20 21 22 23 24<br />
DETER RINSE SANIT TEMP COND PROBE<br />
INPUT SIGNAL PROBE<br />
LOW-HIGH HIGH-LOW<br />
LOW-HIGH HIGH-LOW<br />
LOW-HIGH<br />
HIGH-LOW<br />
DC OUT DET<br />
DC OUT RINSE<br />
DC OUT SANI<br />
BLUE<br />
MARRONE<br />
BROWN<br />
YELLOW-GREEN<br />
GIALLO/VERDE<br />
DOOR<br />
PROBELESS<br />
COND PROBE<br />
RINSE SPEED<br />
CONVEYOR<br />
PROBE<br />
IND PROBE<br />
RINSE TIME<br />
RINSE<br />
SPEED<br />
TIME<br />
SANIT<br />
SPEDD<br />
DETER<br />
RECHARGE<br />
SETPOINT<br />
HIGH<br />
AUDIO<br />
LOW<br />
OFA DETER<br />
TIME INIT CHRG<br />
SANI W/DET<br />
RINSE LIM OFF<br />
LEV STOP OFF<br />
SANI W/RINSE<br />
RINSE LIM ON<br />
LEV STOP ON<br />
POT 1<br />
POT 2<br />
POT 3<br />
POT 4<br />
POT 5<br />
TWINDOSE <strong>35</strong> code 0000136655 rev. 1.0 41
TWINDOSE <strong>35</strong> – System for dishwashers<br />
ENCLOSURE B<br />
10.2 FIXED POWER SUPPLY AND DISHWASHERS WITH 1 SOLENOID VALVE<br />
WITH CONDUCTIVITYPROBE<br />
RINSE SOLENOID<br />
ELETTROVALVOLA<br />
VALVE<br />
DI RISCIACQUO<br />
WASHING MOTOR<br />
CONTATTORE<br />
CONTACTOR<br />
MOTORE DI LAVAGGIO<br />
SONDA CONDUCIBILITA'<br />
CONDUCTIVITY PROBE<br />
CONDUTTIVA<br />
SONDE LEVEL DI PROBES LIVELLO<br />
L N<br />
1<br />
2<br />
AC MAINS<br />
DETERGENT<br />
3 4<br />
AC MAINS<br />
RINSE<br />
5 6<br />
CHARGE<br />
SIGNAL<br />
7 8<br />
RINSE<br />
SIGNAL<br />
WASH<br />
9 10<br />
SIGNAL<br />
AC<br />
OUT<br />
DET<br />
AC<br />
OUT<br />
RINSE<br />
AC<br />
OUT<br />
SANI<br />
13 14 15 16 17 18 19 20 21 22 23 24<br />
DETER RINSE SANIT TEMP COND PROBE<br />
11<br />
INPUT SIGNAL<br />
ALARM<br />
12 PROBE<br />
OUT<br />
HIGH-LOW<br />
LOW-HIGH<br />
HIGH-LOW<br />
LOW-HIGH<br />
HIGH-LOW<br />
LOW-HIGH<br />
DC OUT DET<br />
DC OUT RINSE<br />
DC OUT SANI<br />
BLUE<br />
MARRONE BROWN<br />
YELLOW-GREEN<br />
GIALLO/VERDE<br />
DOOR<br />
PROBELESS<br />
COND PROBE<br />
RINSE SPEED<br />
CONVEYOR<br />
PROBE<br />
IND PROBE<br />
RINSE TIME<br />
RINSE<br />
SPEED<br />
TIME<br />
SANIT<br />
SPEDD<br />
DETER<br />
RECHARGE<br />
SETPOINT<br />
HIGH<br />
AUDIO<br />
LOW<br />
OFA DETER<br />
TIME INIT CHRG<br />
SANI W/DET<br />
RINSE LIM OFF<br />
LEV STOP OFF<br />
SANI W/RINSE<br />
RINSE LIM ON<br />
LEV STOP ON<br />
POT 1<br />
POT 2<br />
POT 3<br />
POT 4<br />
POT 5<br />
TWINDOSE <strong>35</strong> code 0000136655 rev. 1.0 42
TWINDOSE <strong>35</strong> – System for dishwashers<br />
ENCLOSURE C<br />
10.3 POWER SUPPLY FROM THE LOAD AND RINSE SIGNALS<br />
WITH CONDUCTIVITY PROBE<br />
CHARGE SOLENOID<br />
VALVE ELETTROVALVOLA<br />
DI CARICO<br />
RINSE SOLENOID<br />
VALVE ELETTROVALVOLA<br />
DI RISCIACQUO<br />
WASHING MOTOR<br />
CONTACTOR<br />
SONDA CONDUCTIVITY CONDUCIBILITA' PROBE<br />
CONDUTTIVA<br />
SONDE<br />
LEVEL<br />
DI<br />
PROBES<br />
LIVELLO<br />
AC<br />
OUT<br />
DET<br />
1<br />
2 3 4 5 6<br />
CHARGE<br />
SIGNAL<br />
AC MAINS<br />
DETERGENT<br />
AC MAINS<br />
RINSE<br />
7 8<br />
RINSE<br />
SIGNAL<br />
9 10<br />
WASH<br />
SIGNAL<br />
11 12<br />
ALARM<br />
OUT<br />
13 14 15 16 17 18 19 20 21 22 23 24<br />
DETER RINSE SANIT TEMP COND PROBE<br />
INPUT SIGNAL PROBE<br />
HIGH-LOW<br />
LOW-HIGH<br />
HIGH-LOW<br />
LOW-HIGH<br />
HIGH-LOW<br />
LOW-HIGH<br />
DC OUT DET<br />
DC OUT RINSE<br />
DC OUT SANI<br />
AC<br />
OUT<br />
RINSE<br />
AC<br />
OUT<br />
SANI<br />
BLUE<br />
MARRONE BROWN<br />
GIALLO/VERDE<br />
YELLOW-GREEN<br />
DOOR<br />
PROBELESS<br />
COND PROBE<br />
RINSE SPEED<br />
SANI W/DET<br />
RINSE LIM OFF<br />
LEV STOP OFF<br />
CONVEYOR<br />
PROBE<br />
IND PROBE<br />
RINSE TIME<br />
SANI W/RINSE<br />
RINSE LIM ON<br />
LEV STOP ON<br />
POT 1<br />
RINSE<br />
SPEED<br />
TIME<br />
SANIT<br />
POT 2 SPEDD<br />
HIGH<br />
AUDIO<br />
LOW<br />
DETER<br />
RECHARGE OFA DETER<br />
SETPOINT TIME INIT CHRG<br />
POT 3<br />
POT 4<br />
POT 5<br />
TWINDOSE <strong>35</strong> code 0000136655 rev. 1.0 43
TWINDOSE <strong>35</strong> – System for dishwashers<br />
10.4 ALARM SUMMARY<br />
ENCLOSURE D<br />
LED DET LED RIN LED SAN LED ALARM BUZZER RELA<br />
Y<br />
MOTOR<br />
S<br />
DELIME<br />
PRIMIN<br />
G DET<br />
PRIMIN<br />
G RIN<br />
PRIMIN<br />
G SAN<br />
MOT<br />
DET ON<br />
MOT RIN<br />
ON<br />
MOT<br />
SAN ON<br />
MOTOR<br />
FAULT<br />
ALARM<br />
OFA1<br />
OFA2<br />
DET LEV<br />
DOES<br />
NOT<br />
CUT<br />
OUT<br />
RIN LEV<br />
DOES<br />
NOT<br />
CUT<br />
OUT<br />
SAN LEV<br />
DOES<br />
NOT<br />
CUT<br />
OUT<br />
DET LEV<br />
CUTS<br />
OUT<br />
RIN LEV<br />
CUTS<br />
OUT<br />
SAN LEV<br />
CUTS<br />
ON<br />
(FLASHING)<br />
ON<br />
PERMANENTL<br />
Y<br />
OFF<br />
ON<br />
(FLASHING)<br />
ON<br />
(FLASHING)<br />
ON<br />
(FLASHING)<br />
OFF OFF OFF<br />
OFF OFF OFF OFF OFF DET ON<br />
MAX<br />
SPEED<br />
ON<br />
OFF OFF OFF OFF RIN ON<br />
PERMANENTL<br />
MAX<br />
Y<br />
SPEED<br />
OFF OFF ON<br />
PERMANENTL<br />
Y<br />
OFF OFF OFF SAN ON<br />
MAX<br />
SPEED<br />
OFF OFF OFF OFF OFF OFF DET ON<br />
ON<br />
PERMANENTL<br />
Y<br />
ON<br />
PERMANENTL<br />
Y<br />
OFF OFF ON<br />
PERMANENTL<br />
Y<br />
ON<br />
(FLASHING)<br />
ON<br />
PERMANENTL<br />
Y<br />
ON<br />
(FLASHING)<br />
ON<br />
(FLASHING)<br />
OFF<br />
ON<br />
(FLASHING)<br />
OFF OFF OFF OFF RIN ON<br />
ON<br />
(FLASHING)<br />
OFF OFF OFF SAN ON<br />
ON<br />
(FLASHING)<br />
- - ON<br />
(FLASHING)<br />
- - ON<br />
PERMANENTL<br />
Y<br />
OFF OFF ON<br />
PERMANENTL<br />
Y<br />
ON<br />
(FLASHING)<br />
OFF<br />
OFF OFF ON<br />
(FLASHING)<br />
ON<br />
(FLASHING)<br />
OFF<br />
ON<br />
PERMANENTL<br />
Y<br />
ON<br />
PERMANENTL<br />
Y<br />
OFF OFF ON<br />
PERMANENTL<br />
Y<br />
ON<br />
(FLASHING)<br />
OFF<br />
OFF OFF ON<br />
(FLASHING)<br />
ON<br />
PERMANENTL<br />
Y<br />
ON<br />
PERMANENTL<br />
ON<br />
PERMANENTLY<br />
ON<br />
(INTERMITTENT<br />
ON<br />
PERMANENTLY<br />
ON<br />
(INTERMITTENT<br />
ON<br />
(INTERMITTENT<br />
ON<br />
(INTERMITTENT<br />
)<br />
ON<br />
ON<br />
ON<br />
ON<br />
ON<br />
ON<br />
OFF<br />
ON<br />
OFF<br />
ON<br />
ON<br />
ON<br />
ON ON OFF<br />
ON ON OFF<br />
ON ON OFF<br />
TWINDOSE <strong>35</strong> code 0000136655 rev. 1.0 44
TWINDOSE <strong>35</strong> – System for dishwashers<br />
OUT<br />
Y ON<br />
TWINDOSE <strong>35</strong> code 0000136655 rev. 1.0 45
TWINDOSE <strong>35</strong> – System for dishwashers<br />
11 HOW TO CONTACT SEKO<br />
<strong>Seko</strong><br />
Website: www.seko.com<br />
SEKO Asia Pacific<br />
SEKO Brazil<br />
SEKO China<br />
SEKO Deutschland<br />
SEKO France<br />
SEKO Iberica<br />
SEKO Italia<br />
SEKO Russia<br />
SEKO Southern Africa<br />
SEKO <strong>UK</strong><br />
SEKO USA<br />
TWINDOSE <strong>35</strong> code 0000136655 rev. 1.0 46