
 Copy Link
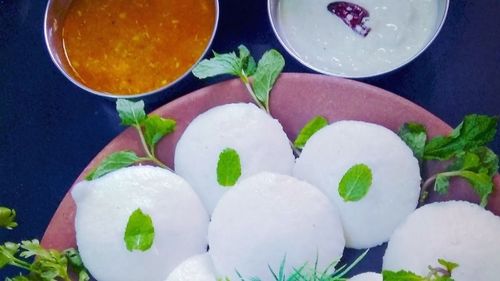
Authentic idly Recipe
Authentic idly Recipe
Tadi Rita
These idlis are very spongy and so porous that they absorb oil when you put an idli in it. And this texture is achieved ... Read More
Cooking Time
25
Meal Type
Main Course
Recipe region
Andhra Pradesh
Ingredients For Authentic idly Recipe
1 cup whole urad (peeled)
2 1/2 cup idli rice (the short ones)
1 tsp methi (fenugreek)seeds
1/2 cup preboiled rice (replaced with poha in emergency)
Salt as required
How to make Authentic idly Recipe?
- Wash and soak separately the idli rice and the udad Dal for about 20 hours. Methi can be soaked together with udad Dal.
- Cook the par boiled rice as normal and keep them ready before grinding the batter.
- Grind udad Dal and methi to very smooth batter. Add only a little water at a time as needed for grinding. If your grinder is making abnormal noises (like it's hard for it to ruor gives jerks, understand that the batter is too thick to be grinded and hence you need to add a little bit water. But if you add more water than required, it won't grind smooth enough.
- When the batter feels smooth enough, take it out in a big container that has a tight lid.
- Grind the idli rice and the cooked rice together till very smooth batter by adding only a little water at a time as needed for grinding. This batter in particular does not feel as smooth as the Dal batter. Still try to get it as smooth as possible. The grainy texture should be only 5-10 %.
- Mix the rice and the udad Dal batter along with salt. Beat it well using your hands for about 5-10 min. Keep it for fermentation in a warm place. It may take between 12-24 hours for the batter to rise, depending on the climate. (Once it took 48 hours to rise! The idlee texture & smell were usual, but idlee tasted a bit souYou may wrap the vassel with a blanket and place it in a warm oven to speed up fermentation. The batter gets light and frothy (pic 2 and when fermented well.
- The batter can be refrigerated for 4-5 days. As the batter gets used up and stays longer, it looses the air bubbles and hence gets harden a bit. Such batter is not ideal for idlee, but you can use it to make dhosa. If you freeze the batter, it can stay upto 2-4 weeks. Whether refrigerated or frozen, it has to be brought down to room temperature before use.
- If you have made etra batter for later use, it is advisable to take out required quantity without disturbing the air bubbles in the rest of the batter. Handle and move the remaining batter very gently so as to keep the air bubbles intact.
- This batter is so perfect (when fresthat there is no need to add soda or eno while cooking idli, not even a pinch. Yet the idlis will be soft and smooth like a sponge. However, if the batter is not airy enough, you may want to add eno.
- Try to control the fermentation period right from the beginning. Find out what leads to faster fermentation - putting in the oven or wrapping in the blanket. Prolonged period of fermentation makes idlee/dhosa sour.
- Add salt and water in the batter, a little water at a time as needed(I have given the exact measurement of water, yet it largely depends on how much water you used while grinding the batter.). Combine very gently without disturbing the air bubbles in the batter. The batter should be thick, but at pouring consistency. Very thick batter will make hard idli and thinner batter will make flat idli.
- Prepare the steaming pot by putting some water in it to heat up. Meanwhile, brush some oil in each section of the idli tray. Pour idli batter in each section. Do not fill it till the very top as it spreads as the idli puffs.
- If the water in the steaming pot is boiling or if the steaming pot is full of steam, it's ready ! Place the idli tray in it and cover it quickly so the steam does not escape. Cook for 7-10 minutes on medium high flame. Meanwhile prepare another tray of idli for steaming.
- Take the tray out of the steaming pot and rest for 3-5 minutes. Then remove the idlis gently using a sharp knife or a sharp spoon. You need to run the sharp object all around to help idli release the tray and then lift it up gently.
- If the idli breaks while lifting or if the edges of the idlis are not neat enough, understand that it is still too hot to work with. See pic 2 Vs pic 3 below. Flat and hard, it suggests that the batter did not ferment well. Or the batter is too thin. If the idlis are sour, understand that the fermentation time of the batter was extended.
- Avoid putting 2 trays of idlis on the top of each other. The steam water that gets collected on the top most tray falls on the second tray and that's how the idlis in the second tray get soggy. For the same reason, avoid covering the steaming pot with a flat surface. Doom shaped cover is preferred because the shape helps the steam water to roll down easily, rather than falling on the idlis.
- Serve with chutney and sambar.